Rusty's not very quiet cuda progress

Parts Authority shows the Standard part in their Bronx DC. Any local store should be able to transfer it in.
I think that's the route I'd go. I'm not familiar with Parts Authority or other regional parts stores, but if one can get it locally it'd save the shipping. Then again, if it's going to cost $12 in fuel and a bunch of time, well...

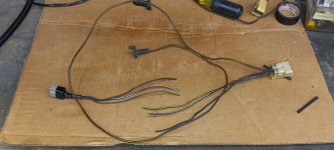
Are those the same basic connector that is used all over these cars?
Pretty much, yes. The bulkhead disconnect is full of 'em, as are the harnesses in a lot of cases. For example, the radio connector is a 2-pin, comprised of two of 'em (obviously with the corresponding female side on its mate). I keep both sides around because although I haven't broken the terminal itself, it's not uncommon for the wire to corrode off at the crimp.

It was originally known as a Packard Type 56 connector, then a Delphi 56, and now an Aptiv 56 since Delphi's been sold and rearranged a number of times. "Aptiv" is the idiotic name they chose for the connector division. Apparently nobody in the renaming department realized it sounds like a George W. Bush mispronunciation/invented word. :LOL:
 
I ordered the summit ones, I'll let you know how it goes, I think they are the smaller gauge ones, see how getting 2wires in goes, I can always put a dab of solder on?
 
I ordered the summit ones, I'll let you know how it goes, I think they are the smaller gauge ones, see how getting 2wires in goes, I can always put a dab of solder on?
With those open crimps you can basically put as much wire in as you can get the prongs around and like you said, add solder if necessary but eventually you'll have trouble getting it to snap into the insulator.
 
It's done, starts from the key again, but I have to tell the saga of how I finally got there, should be good for a few chuckles!
Sooooooooo, first I tried to put the "spare" on without jacking up the car, twisted & turned, contorted & cursed & just could not get it to push on.
So up went the front of the car, still couldn't get in far enough, so up went the back of the car.
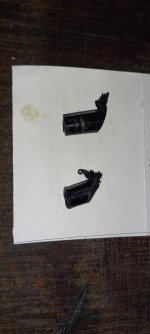
OK I can see, but when I get in that far I can only move one arm at a time, So now I remove the tranny linkage rod, then I managed to get it lined up but would not stay on, even tried a flat punch to tape it in, darn thing will not stay on just touch it & it falls off.
So I get the bottom section of the 2 piece unit & compare, look exactly the same, but the "spare" is hard as a rock & the other is nice flexible rubber!
OK, so I put the 2 piece lower section in, tranny rod back on & figure I'll have to splice in the plug for that into the better firewall connector!
Rock hard piece 20240707_155902.jpg
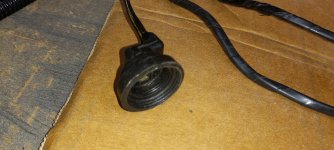
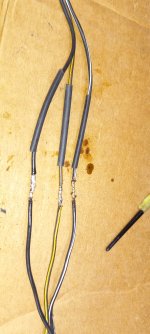
Un-taped & ready for surgery20240707_155851.jpgSoldered up & ready for shrink wrap20240707_161455.jpgJust plugged in every thing up top for the test & my lord it cranked from the key!
I think I would have lost it at that point if it didn't!!!!!!!!
Now I have to reroute all the wires up top. 20240707_163515.jpgSo it looks like I wasted my money buying those clips, not enough left to repair. 20240707_163030.jpgSo after about 2 hours of kicking & screaming I had to do a feel good SOMETHING, anything, so I stuck on the rear plate, one step closer to hitting the streets! 20240707_163412.jpgAnd how was your day!
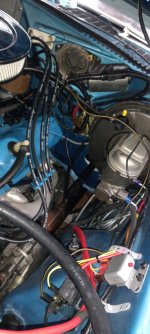
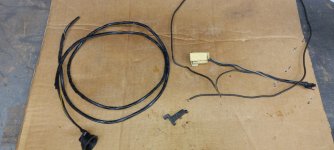
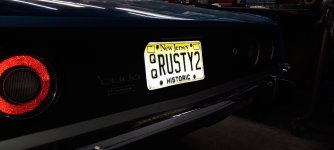
 
This weather is too hot, wondering what august will bring 110*.
All I did today was reroute the NSS harness, got it tucked away pretty good.
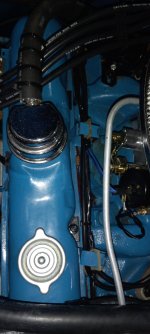
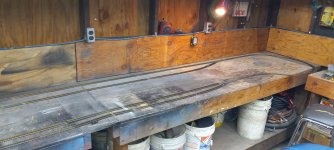
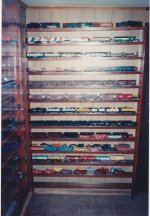
20240708_145417.jpg& finished strapping the passenger side to get those off the motor.20240708_145434.jpgRunning out of things to do in there, started playing with trains again! 20240708_145328.jpg20240708_145344.jpg
first plopping of track to see what I can do in that limited space?
 
Oh yea, gotta keep the excitement up for the grand kids!

This is all junk I bought an old collection at a yard sale.
All the good stuff from Dad's collection & what I added over the last few years is stored in the attic, the train "room" became Moms room for a few years, waiting for my son to move out, his room is a little bigger, then the good stuff can have a home.
Some of what's in the attic! 002.jpg001.jpg
 
This car from hell continues to vex me, even Rube Goldberg is at the end of his rope!

So all I wanted to do was put in the LAST piece of the dash that Jass was good enough to send me (thanks man)
As usual between the haunted car & my lack of knowledge it became a major project.
First there's only one screw in from the front, I found only one I could get to in the back, with the seat in I couldn't even try to see where the others were.
Sooooooooooooo out came the seat & the A/C duct.
Get in there, can start the one screw on the column end, top outer screw quite a bit off from the hole in the metal.
Could not get all 3 studs near the ash tray in all at once, I think the piece has warped a little over the years.2 top in bottom about 1/2" off, same with 2 bottom in, then there's a stud behind the radio butting up against the radio trim screw that goes in from the front?

Surgery time, mann do I hate cutting up factory pieces!
bottom of three off, one butting the radio screw Off! 20240709_161916.jpg
Well it's kinda in, but only with those 2 screws at least they were on opposite ends, seems pretty snug?
Had to squash the padding quite a bit to get the top screw in20240709_155834.jpgYou can see the warpage pretty good in this one20240709_155813.jpgPut the A/c duct back in, even put some semi gloss black on my Rube wire, make it blend a touch better?
Left the seat loose, gotta see if I can get the tach wired up before I put it back.
 
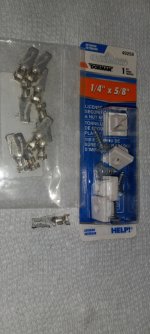
So summit order came I got the clips that I no longer need & I ordered the wrong plate screw set, I just wanted 2 silver screws for the front plate, I didn't look at the add good enough, it has security screws, don't want those. Soooooooooooooo black screws will stay up front!
20240709_162259.jpg
If anyone wants that plate screw set let me know FREE!
& if you need a few clips I can send some too, I will keep a couple just in case!

Looks like 2 wires is gonna be a stretch? 20240709_162237.jpg
 
You can see the warpage pretty good in this one
20240709_155813-jpg.28044

That's not what it looked like when it left here. That trim is being pulled into a warp because it wasn't installed properly. Not even close.

When it left here, it looked like this:

100_6170-1-jpg.27997


100_6167-jpg.27995


Dr.Jass said in Post 4624 said:
Being 100% honest, you'd be hard-pressed to find a nicer one. All the screw posts are intact, there are no cracks or blemishes, and it's not warped.
I didn't take pictures of one moulding, then send you another. The only other ones I have are the one for an 8-track two others that are still bolted into my other cars. There was nothing wrong with that moulding. It literally came out of my '74. Don't blame the part or the car.

Had you asked rather than hacking away blindly, I could have told you that piece gets installed before the radio. It's how the factory assembled it, and why it has the cutouts for the radio mounting bolts--those have to go in after that piece. You need(ed) to remove the radio to install it, not destroy the part. That should've been obvious when radio hardware was in your way: "If that wasn't there, I'd have clearance for this screw." The visible screw up at the dash pad is the last one installed.

If it's hitting the steering column, then the column isn't right. The column is easily adjusted, the trim is not adjustable a'tall.

There is a particular order to assembling these cars; one can't just install any part at any point. If something's not going together easily, usually it means there's something else that needs to be disassembled or adjusted before you can proceed.
 
There is a particular order to assembling these cars; one can't just install any part at any point. If something's not going together easily, usually it means there's something else that needs to be disassembled or adjusted before you can proceed.
Review my Duster thread for confirmation of that. I've spent much more time taking things back apart than I did assembling them in the first place.
 
OK all well & good, I sat in the corner with the dunce cap on moping for an hour.
But & it's a big but, how in the world would an amateur "restorer" know any of this.
I'd swear on the other car all the lower trim went on last & I do not remember all those screws going in from the back.
Got the A/C blasting will go out in a while & see if I can even remove the radio, I soldered & shrunk wrapped almost all the connections???
 
Don't remember exactly, I know one plug was suspect so I shrunk wrapped over it, the adventure starts in a little while, if I don't check in tonight send the paramedics, or maybe the coroner!
 
OK the saga begins, removed the bezel & the A/C duct, crawled under & looked over the wiring, looks like I taped that questionable plug but I have everything way up high & zip tied in place it will be a major job to get the radio out, so I started looking things over & pulled the inner radio bezel, with that off I could get to one more screw & it sat in perfectly.
20240710_145146.jpg
So now I try & get the inner bezel back in, no friggen way, so off comes the outer. so I'm looking for the screw hole, well as if struck by lightning it finally dawns on me, there's only one hole over there, the radio inner bezel is just sandwiched in there, I had it screwed in from the front!!!!!!!!!!! & that was pushing that part out to make it look warped.
Now I already cut off the post for the right side screw, so I stuck that screw in & proceed to kick & curse to get the 2 screws in on the column side, then the outside one, no way to get to the posts by the ashtray but she seems pretty well secured. My dash is hanging a bit on the column side, poop.20240710_150704.jpg

So while I was in there hunting for a dropped screw these 2 nuts also came out, now I'm wondering what will fall out next! 20240710_151325.jpg
 
Last edited:

SiteLock

SiteLock
Back
Top