You are using an out of date browser. It may not display this or other websites correctly.
You should upgrade or use an alternative browser.
You should upgrade or use an alternative browser.
Rusty's not very quiet cuda progress
- Thread starter mopar_man
- Start date
RUSTY Cuda
In over my head!
So the rust converter finally came, it was pretty cool out so I read the can, don't put on metal under 50 degrees, well it was 54 out there so I'm sure the metal was colder.
Also have to wait 48 hours before topcoat, looks like prime is yet a few more days out!
Which also depends on the weather!
So I went after a job I've been putting off as long as possible, scraping 2 layers of tint off the rear window, I started this years ago when the car was together, contorting my poor old body in directions it did not want to go, said to myself what the heck are you doing, this may well be laying on a work bench some day, well I decided not to take it out, but it was much easier standing in the upright shell & scraping away.
My hands will wake me up for days, but I got it done in about 3 hours!
down to my last razor blade, but I endeavored to persevere!
So I got out the leaf blower & covered the town in tint!
This was in the inside of the quarter panel!
Also have to wait 48 hours before topcoat, looks like prime is yet a few more days out!
Which also depends on the weather!
So I went after a job I've been putting off as long as possible, scraping 2 layers of tint off the rear window, I started this years ago when the car was together, contorting my poor old body in directions it did not want to go, said to myself what the heck are you doing, this may well be laying on a work bench some day, well I decided not to take it out, but it was much easier standing in the upright shell & scraping away.
My hands will wake me up for days, but I got it done in about 3 hours!

down to my last razor blade, but I endeavored to persevere!

So I got out the leaf blower & covered the town in tint!

This was in the inside of the quarter panel!

RUSTY Cuda
In over my head!
todays project was to put on the rust converter, the drip rail, window channel & the sides where the doors mount, first coat on, but only a small part of the work turned black, started working on the rear window channel cleanup while that dried. put a second coat on & even less turned black, most of the pitted areas did? I'm not sure if this is how it is supposed to work?
taped off the glass to try & save it.
At first glance I though I was rust free, the other car the whole bottom corner was GONE!
with a little more cleaning I did find one pin hole, still not too bad.
Drip rail ready for the converter
This is how most of the areas look?
Ended up with a razor knife to try & get that window gunk off, trying to get enough clean to get some paint in there, not sure how much shows behind the molding?
taped off the glass to try & save it.

At first glance I though I was rust free, the other car the whole bottom corner was GONE!

with a little more cleaning I did find one pin hole, still not too bad.

Drip rail ready for the converter

This is how most of the areas look?

Ended up with a razor knife to try & get that window gunk off, trying to get enough clean to get some paint in there, not sure how much shows behind the molding?

RUSTY Cuda
In over my head!
Got a few more holding up the paint things out of the way today, did the other side if the rear window, worked on cleaning up the bottom of the drip rail area & roughed up some spots around the doors that I don't think I have to strip to bare metal.
My whole world is upside down!

Most of the rust was in the deep channel on the outside edge. For whatever it's worth I spread the rust converter on these areas?
There wasn't that many seams you could get to from the bottom, but I hit what I could with seam sealer.
My whole world is upside down!


Most of the rust was in the deep channel on the outside edge. For whatever it's worth I spread the rust converter on these areas?

There wasn't that many seams you could get to from the bottom, but I hit what I could with seam sealer.

RUSTY Cuda
In over my head!
RUSTY Cuda
In over my head!
So I got off all but one window clip, that was a screw in & the screw backed into the glass so I left that one on, wire wheeled around all the pins, JB welded the 2 pin holes & cleaned the glass a little more, got a few small stains & scratches but works for me!
After I sand down the JB I'll run a couple of coats of the rust converter in there & then start taping off the glass & the front end, everything else will get the seal coat!
After I sand down the JB I'll run a couple of coats of the rust converter in there & then start taping off the glass & the front end, everything else will get the seal coat!
RUSTY Cuda
In over my head!
So on the more bad news front, I called the guy who was going to rebuild my engine, now he's up there in years & said he got covid, over now but no energy he'll call when ready, I hope this doesn't make him retire???
Some of the older mopar guys my know him, from the Max wedge days, Jerry Stein out of jersey
Some of the older mopar guys my know him, from the Max wedge days, Jerry Stein out of jersey
restoman
The paint fumes have cleared so I'm
Yup.you really aught to just get that back window outta there
There's far too much rust around it for my liking...
RUSTY Cuda
In over my head!
It's a test on the eastwood rust converter, after sanding the JB I put the first coat in there today, I Had major patches in that lower drivers corner on the other car, all the way down that seam into the trunk lip area.
Also checked it from underneath all solid in there, it's mostly on that back lip.
Also checked it from underneath all solid in there, it's mostly on that back lip.
RUSTY Cuda
In over my head!
74DartSport
has asparagus pee
Teacher’s Pet. Local to me, sold him parts at the parts store years ago.Jerry Stein out of jersey
Last I saw him his granddaughter went to the same dance studio my kids did. Always pleasure to talk to him.
RUSTY Cuda
In over my head!
You still get out to the track once in a while, I don't think I've been since the day with you & the 340 bros, just talked to Donnie the other day.
RUSTY Cuda
In over my head!
Pushing to be ready for a major primer shoot, looks like mon. & tues. are going to be nice, found a few more spots to seam seal & started sanding & taping off the car, of course after I packed up I noticed a few more areas that need seam sealer , quarter skin to door jamb & the seams on the sill.
Need to sand/rough up the bottom of the passenger rocker too, should get that stuff done tomorrow & then a day off for Mothers day!
Seam sealer I hit today
Don't think there was any here but figured it couldn't hurt?

Window all taped off
front end roughed up what I will paint again , the rest of the front I can use a drop cloth.
So the hope for Mon. & Tues. is to get everything seal coated, bottom, interior & interior of the trunk & around the windows & the roof & then 3 or 4 coats of high build on the roof, I will start with the gal of black I got for free & then use the gray on top of that on the roof, will let me know pretty quick when I start sanding how bad it is!
Need to sand/rough up the bottom of the passenger rocker too, should get that stuff done tomorrow & then a day off for Mothers day!

Seam sealer I hit today

Don't think there was any here but figured it couldn't hurt?

Window all taped off

front end roughed up what I will paint again , the rest of the front I can use a drop cloth.

So the hope for Mon. & Tues. is to get everything seal coated, bottom, interior & interior of the trunk & around the windows & the roof & then 3 or 4 coats of high build on the roof, I will start with the gal of black I got for free & then use the gray on top of that on the roof, will let me know pretty quick when I start sanding how bad it is!
RUSTY Cuda
In over my head!
K I think I'm ready for the marathon primer shoot, went around touching up a few spots I noticed as I was cleaning everything.
A spot on the rocker where it met the new quarter skin had a big gap, so I JB welded that & sanded it a little smoother.
where it met the new quarter skin was a big gap, so I hit that with some JB weld & sanded it out a little smoother. Have been using the leaf blower a bunch of times to try & blow out the last of the blasting media & mouse houses, today I turned the compressor up to 140lbs & used the air gun, got out quite a bit more, here's some of the nastiness!


Most of that is out of the rear frame rails
This is the bottom of the patches in the back of the trunk floor, I did that work on the jack stands & guess I didn't look at the bottom too close, with it upside down I saw a very rough mess, so I ground it down a bit
A little smoother now, it's not going to show, but it was nasty! Now a little less nasty! If all goes well the shoot starts tomorrow.
A spot on the rocker where it met the new quarter skin had a big gap, so I JB welded that & sanded it a little smoother.

where it met the new quarter skin was a big gap, so I hit that with some JB weld & sanded it out a little smoother. Have been using the leaf blower a bunch of times to try & blow out the last of the blasting media & mouse houses, today I turned the compressor up to 140lbs & used the air gun, got out quite a bit more, here's some of the nastiness!


Most of that is out of the rear frame rails
This is the bottom of the patches in the back of the trunk floor, I did that work on the jack stands & guess I didn't look at the bottom too close, with it upside down I saw a very rough mess, so I ground it down a bit

A little smoother now, it's not going to show, but it was nasty! Now a little less nasty!
 If all goes well the shoot starts tomorrow.
Last edited:
RUSTY Cuda
In over my head!
I was completely rotating the car & using the leaf blower till today, more volume but probably less pressure, but I could never get it all out of the car, just kept moving under something else.
today I used the wand, & rolled it a few times, I can still hear some mouse nuts in the frame rails but when I got the stuff to a low spot I vacuumed it out before the next roll, pretty sure most (you never get it all ) is out, just hope it stays put while I paint after that I don't much have to worry bout it!
Last thing I did was leaf blow my fake grass to get as much of the sanding dust out of the area.
I'll blast the car once more before I shoot.
RUSTY Cuda
In over my head!
What a marathon, I'm too old for this, 6 hours of mix & shoot mix & shoot etc etc.
Started with the almost 1/2 gal of black my friend gave me, shot the whole bottom then realized it wouldn't be enough for the seal coat on everything, so I shot the roof next & then went into the cabin till I ran out.
Switched to gray & finished the seal coat.
nice two tone interior!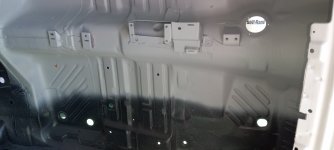
ooopsy a couple of spots I missed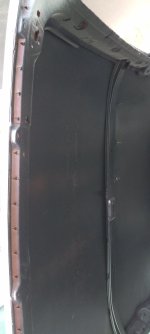
Now I started flipping the car for each coat, should have shot one when it was all black, looked pretty good, gray is anywhere I saw the red primer after the flip.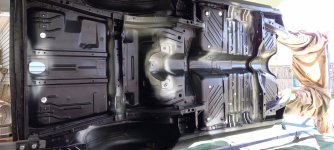
Looks like I did ok with the big gun getting all the nooks & crannies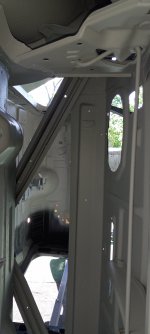
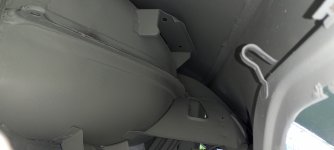
Now the high build on the roof was going good , got 4 coats on, but by the last coat (4th gun load) my 6" back for a 6" spray turned into 3" & 3".
Cleaning the gun was nasty, I had shot 5 guns worth of the sealer with no problem then cleaned the gun, guess that little thicker mix won't last the hour it takes for 4 coats? Hope the gun is ok, took a long time to clean, then I took it out & shot 1/4 cup of thinner, the spray on that looked ok?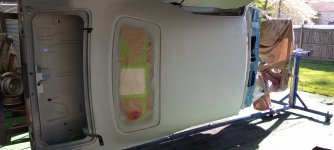
was too tired to even shoot the guide coat, I'll shoot that in the AM & then start the first round of blocking.
Started with the almost 1/2 gal of black my friend gave me, shot the whole bottom then realized it wouldn't be enough for the seal coat on everything, so I shot the roof next & then went into the cabin till I ran out.
Switched to gray & finished the seal coat.
nice two tone interior!

ooopsy a couple of spots I missed

Now I started flipping the car for each coat, should have shot one when it was all black, looked pretty good, gray is anywhere I saw the red primer after the flip.

Looks like I did ok with the big gun getting all the nooks & crannies


Now the high build on the roof was going good , got 4 coats on, but by the last coat (4th gun load) my 6" back for a 6" spray turned into 3" & 3".
Cleaning the gun was nasty, I had shot 5 guns worth of the sealer with no problem then cleaned the gun, guess that little thicker mix won't last the hour it takes for 4 coats? Hope the gun is ok, took a long time to clean, then I took it out & shot 1/4 cup of thinner, the spray on that looked ok?

was too tired to even shoot the guide coat, I'll shoot that in the AM & then start the first round of blocking.
69.5CUDA
Blah Blah Blah
yeah pot time on sealer will typically start getting a lil gummy/firm neer the end, while "spray-able" not happily
strip the gun and soak it for about an hour in acetone, it will get the hardest of hard stuff out even epoxy primer...i keep a small bread loaf tin specifically for this, i also have a lil muffin tray for "quick soak" where i dont fully strip the gun, its enough of bowl/tray to just get the entire tip of the gun without the pot and tip on it..ie to basicly soak just the fluid flow space...its useualy how i clean my gun as i can pull the 3 parts put it in the tray fill just past where i need to with acetone and walk away..come back in an hour or 2 wipe it down and its good to go
just be sure you dont have any plastic or rubber bits in the acetone..."some" nylon parts can be ok but may swell then shrink back up..i dont recommend it
RUSTY Cuda
In over my head!
Spent about 3 hours sanding away, till my arms begged for mercy, working in 180 for the first round it's looking decent, got most of the black out on one side, with still some sanding to go, only broke through on a couple of edges so far & I'm not seeing any drastic lows or highs!
Borrowed a super block for this!
Hoping tomorrows session will get this round done & ready for the next coat
Considering what I started with I think it will be OK.
Borrowed a super block for this!

Hoping tomorrows session will get this round done & ready for the next coat

Considering what I started with I think it will be OK.


