You are using an out of date browser. It may not display this or other websites correctly.
You should upgrade or use an alternative browser.
You should upgrade or use an alternative browser.
Rusty's not very quiet cuda progress
- Thread starter mopar_man
- Start date
RUSTY Cuda
In over my head!
RUSTY Cuda
In over my head!
So this is the rubber insulation I tried

I put in 4 pcs about 3" long , it did help there was one spot just behind the brace that didn't take much pressure to oil can, that stopped, there a couple more spots on the roof that do but I have to press pretty hard, more pressure than say waxing a car?
hard to see but there in there.


I put in 4 pcs about 3" long , it did help there was one spot just behind the brace that didn't take much pressure to oil can, that stopped, there a couple more spots on the roof that do but I have to press pretty hard, more pressure than say waxing a car?
hard to see but there in there.

RUSTY Cuda
In over my head!
Not in there very tight, went in pretty easy, the gap on mine I think is wider from being bent once then normal. I guess time will tell?
restoman
The paint fumes have cleared so I'm
As far as I know, no one ever glued hoods and decklids... at least not any one back before the era of very-modern assembly line practices of adhesives and rivets.i want to say the original pads were 1/8th inch? maybe thinner...mind you they wouldnt compress much if any
a few things you need to be sure of...that it wont hold moister, and that it wont make noise, and wont decompose due to the heat/cooling going on
the ones on my lloyd were nothing but oil soaked felt, similarly the same thing was found in my 58 ford tho what was in the ford was much more "ridged" and or compressed
im curious tho, why is it "ok" to have the hoods and trunks glued but not the roof, only thing i can think of is that the trunks and hoods have esscentialy a full double layer with small holes where a roof is just a halo with some slapper bars
restoman
The paint fumes have cleared so I'm
It might work, but it's fairly dense stuff, like 69.5 said...So this is the rubber insulation I triedView attachment 23732View attachment 23733
I put in 4 pcs about 3" long , it did help there was one spot just behind the brace that didn't take much pressure to oil can, that stopped, there a couple more spots on the roof that do but I have to press pretty hard, more pressure than say waxing a car?
hard to see but there in there. View attachment 23734
Here is the reason I strongly suggested a new roof skin: anything that needs to be squeezed in between the roof panel and the brace is going to exert pressure on the panel, and push it out of it's "natural" shape. Add in some heat from outdoor summer temperatures and some cold from winter temperatures, and now you will most likely have a distorted roof panel. Throw in the natural vibrations of simply driving the car, and it could get worse.
Even though the foam is fairly soft, it still exerts pressure, and even though the roof is steel, pressure under the above circumstances will affect it over time.
How much time? It could be as short a time as the first hot day, or it could be two years down the road. But, it will happen.
Large expanses of sheet metal need to float free in the areas where expansion and contraction can do their thing without distorting the steel.
The factory put the stuff (whatever they used) in there to keep the rattling and/drumming to a minimum, nothing else.
I don't know how else to say this, other than to say I've been doing this a long time, and have either made all the same mistakes myself, or seen them done and had to fix them. Trust me, I know what I'm talking about.
RUSTY Cuda
In over my head!
Understand & appreciate all the help & hints you have given over the years.
With that said , this ain't a million dollar car, I will thin out the rubber & see how it feels, I'm a stubborn old coot & will save that roof if it kills me!
Now doesn't anybody sell the goop or a replacement for what was in there from the factory?
If I knew what to call it I could probably search it out.
RUSTY Cuda
In over my head!
Pulled out the rubber, cut them in half width-wise & put the in the center of the beam where it drops down, not even sure if there putting any tension, if I'm lucky maybe enough to stop any vibration?
restoman
The paint fumes have cleared so I'm
Yup, sorry Rusty, didn't mean to sound like Richard Cranium...Pulled out the rubber, cut them in half width-wise & put the in the center of the beam where it drops down, not even sure if there putting any tension, if I'm lucky maybe enough to stop any vibration?
If it exerts minimal pressure on the skin, you should be good.
69.5CUDA
Blah Blah Blah
is you go it into the drop down of the U in the brace your probably perfect
the biggest thing to remember is the roof skin will move long before the brace will thus the possible issues
oh and resto my 67s never had glue, but ALL of my 69 hoods and trucks do, it resembles seam sealer, and the hood and trunk lid that i cut them down to just the outter skeleton showed vast amounts of it on every crossmember
restoman
The paint fumes have cleared so I'm
I've never seen it... I've seen the factory soft-cell stuff, but it's there for rattles & drumming, not for adhesion purposes.is you go it into the drop down of the U in the brace your probably perfect
the biggest thing to remember is the roof skin will move long before the brace will thusothi the possible issues
oh and resto my 67s never had glue, but ALL of my 69 hoods and trucks do, it resembles seam sealer, and the hood and trunk lid that i cut them down to just the outter skeleton showed vast amounts of it on every crossmember
RUSTY Cuda
In over my head!
So I'm itching to get the seal coat of primer on this car & every time I look around I find a few more little things to do first, still waiting on the eastwood rust converter to hit the drip rails & anywhere else I ground out rust.
yesterday I tried spinning the car alone & had no problem , it only got hard when I was close to the end (full up or full flat.
Of course that showed me even more things to do, today I tackled a few.
Remember these..........
this is the one that overlapped the hole, so I ground off some metal till I could pound it into place!

Got it welded up & used weld to fill the low spots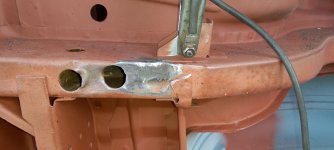
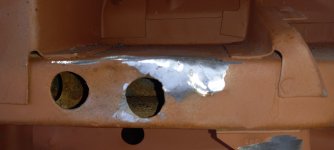
Rail is still dented to hell but at least it's no longer ripped wide open!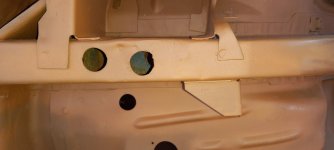
yesterday I tried spinning the car alone & had no problem , it only got hard when I was close to the end (full up or full flat.
Of course that showed me even more things to do, today I tackled a few.
Remember these..........
this is the one that overlapped the hole, so I ground off some metal till I could pound it into place!

Got it welded up & used weld to fill the low spots


Rail is still dented to hell but at least it's no longer ripped wide open!

RUSTY Cuda
In over my head!
RUSTY Cuda
In over my head!
That's an elongated drain hole!
RUSTY Cuda
In over my head!
I'm thinking that drain was packed with texas mud, that's probably why I have extra holes to repair!
RUSTY Cuda
In over my head!
Just for 69! thanks for the reminder.
on this I banged down the edges after I cleaned it up a bit so the patch would lay flush & hopefully give me some metal to weld to.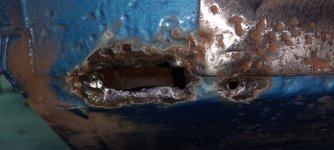
Patch fit pretty good dang I think my welding is finally improving a bit, close on the first round
 finished off the welding, now if I could get the pit spots clean, still waiting on the rust converter.
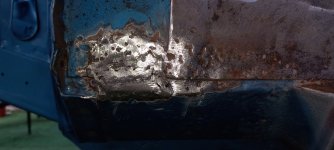
on this I banged down the edges after I cleaned it up a bit so the patch would lay flush & hopefully give me some metal to weld to.

Patch fit pretty good
 dang I think my welding is finally improving a bit, close on the first round
 finished off the welding, now if I could get the pit spots clean, still waiting on the rust converter.

