72 Challenger R/T/A

Could be a ground issue if you are bolting stuff to freshly painted surfaces. Have someone turn the key while you look things over, Ive seen wiring actually move when things get wierd. Feel for a warm spot where your connections are to find resistance. And remember, just because its new doesnt mean its worth a shit these days.:hmmm:
 
Nodda,
The headers fit the box just fine.:D I've been working on other stuff and haven't had time to try to put them on yet. The idler arm looks like it's going to be close so I'm going to wait till I get it running before I try to put them on.

Da-Ho,
I repainted some of the firewall under the VR and ECU but I sanded down to bare metal under all the mounting bolt locations. I haven't been able to get a ride out into town again to get to the parts store yet. We'll probably do that tomorrow it looks like.

Back to the main attraction...
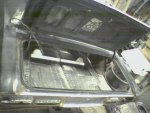
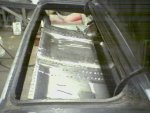
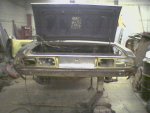
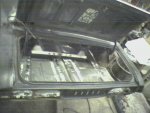
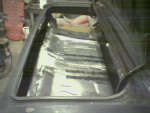
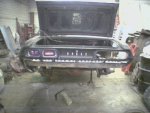
The trunk floor and filler piece between the floor and tail panel are now completely welded in. I also have about 80% of the welds ground down so the floor is looking really good. The trunk latch also needs to be welded back in but it's already prepped so it should only be a 5-10 minute job.

The wheel housings still need the most attention. One is already moved inward 1.5" and mostly welded in but we haven't even touched the other one yet. I'm hoping to get those both finished before I leave Tuesday. If there's time the trunk drop offs will get attached after we get everything else lined up. Mark say's he can tackle the quarter panels by himself after I leave.

I'm still going to try to get the engine to fire before I go. I plan on picking up some more stuff for that purpose while I'm at the auto parts store. I'm getting anything I think could be holding it up. There's not much left to get at this point. :liar:

Last but not least, here's the pics I promised earlier as well as some new ones.:bravo:
 

Attachments

  • Trunk mostly welded in.jpg
    Trunk mostly welded in.jpg
    67.6 KB · Views: 38
  • Trunk mostly welded - side.jpg
    Trunk mostly welded - side.jpg
    67 KB · Views: 40
  • Tail panel sanded.jpg
    Tail panel sanded.jpg
    62 KB · Views: 39
  • Trunk welding done.jpg
    Trunk welding done.jpg
    64.5 KB · Views: 34
  • Trunk welded - filler reattached.jpg
    Trunk welded - filler reattached.jpg
    63 KB · Views: 39
Church day today. And since Mark's the pastor... well, you get the picture.:shifty:

I was able to get out to the auto parts store and get the starter relay and a bunch of other basic tune up stuff (oil & filter, tranny fluid & filter, fan belts, vacuum and fuel lines, points and condenser).

When I got back to the shop I wired in the new starter relay and sanded the rust off the mounting point before mounting it. No change. It still just went "click" one time when I turned the key. Next I removed the starter, or tried to anyway. I knew it was problem area when I had to use a floor jack and a block of wood to pry it out. I actuall lifted the car about 2" off the the jack stands before the old starter finally popped loose. After that it just pulled right out. First thing I did with the Dakota mini starter was to remove that stupid black plastic block on the wire terminals. Then I hooked up the wires to give the best clearance for the exhaust and bolted it in. After reattaching the battery I turned the key. *whir whir whir whir whir*:clap: Now were getting somewhere!

Next I moved onto the carb. The carb rebuild kit would have taken three days to get here so I didn't bother to order it since I'll be leaving in two days. I figured I'd just have to take my chances with the JY carby. Well after cleaning it as best I could I saw bubbles coming from the middle body gasket when I applied compressed air to it. I stuck it on there anyway since the original one was even worse (seized solid). I tried pouring some gas down the throat and cranking it but still wasn't getting it to catch. I don't know squat about points dizzys so I moved on to something else.

I took the large original hacked up air cleaner and chopped the excess off to make a medium sized base plate to fit the filter that came with the car (8"-10"?). Then I sanded it and smoothed the rough edges on the baseplate and gave it a coat of gloss black. At this point the tempurature started dropping and the gloss paint wasn't drying right with the temp change.

I was getting cold and hungry so I called it quits about 9pm. Mark said we'll be able to put a full day in on the Chally tomorrow so hopefully I'll have a lot more progress to report tomorrow.:helpme:
 
Last edited:
gomopar440 said:
I don't know squat about points dizzys so I moved on to something else.

Simplest thing there is....take the cap off, have someone turn the starter and watch the points....if they don't open and spark....re-adjust them to .017 clearance. If they don't close...yep....adjust. If they spark at the points....you flooded it. :naughty:
 
If the breaker plate and bushings are worn its best to leave the vaccum line off to keep from getting dwell variation. Just bump the initial up to where it starts without kicking back and run it there after gapping your points as close as you can and still run. The tighter they are the better they work on old stuff, I like around 10 thousands.:toot:
 
Huston we have lift off!!!:giggedy: :dance: :banana:

Mark changed out and set the points and condenser first thing this morning. We stuck the fuel line into a gas can, tossed some gas down the carb throat and turned the key: *whir whir pop cough whir whir*
2nd try: *whir pop vroom sputter cough*
3rd try: *whir pop vrooom sputter cough cough*
We checked the fuel line and it was dry, so bad fuel pump. After trying a spare pump lying around (bad) and an electric fuel pump (bad) we went to the store and got a new pump and some new gas. I swapped in the new pump and stuck the fuel line into the new gas.
Prime the carb and turn the key again:
*whir cough pop vroooom cough pop*
Trying to catch so I give it another go: *whir vrooooom cough vroooooooom*
Almost there this ought to do it: *whir VROOOOOOOOOOOOOOOOOOOOOM! VROOOOOOOOOOOOOOOOOOOOM!! VROOOOOOOOOOOOM!!!*
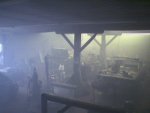
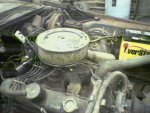
SWEEEEEET!!! IT'S ALIVE!!!:giggedy: :giggedy: :giggedy: It made a hell of a smoke show to burning off the oil in the in the cylinders. I've attached a pic of the fogged out shop after it cleared out a bit. You couldn't even see the car from where I was standing 5 minuites before I took that pic. I can start the engine at any time now since the new parts were installed and it sounds really healthy. The open exhaust manifolds make it sound real NIIIICE too! After our success with the engine we cracked open a few celebratory birch beers and had a toast .

Now we moved back onto the the back of the car.

The trunk latch brace went in very easily and took about 10 minutes to weld back in place.

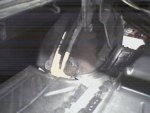
For the next step we started getting driver side drop off fitted. After some trimming and adjusting it finally got to where it looked like it would work.

Next we slid the the outer wheel house in place and clamped it in. Well, wrangled would probably be a better word. Now onto the fun part...

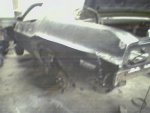
The two of us held up the quarter side panel in place and checked the fit. After trimming the top, front and back ends we clamped it up. Mark started aligning the three pieces together using the parts car for reference measurements. He'll be taking over from here as far getting everthing stuck in place permently.

I finished painting the driver side tail light panel. For the next step I polished the lenses and reattached them to the panel. I mocked it up for the next photo op. What do ya think?

I needed to find a place to put the battery so we worked over the mounting area on the inner fender. I already had a new battery tray so everything's in there solid for a while although both the inner fenders may get replaced later on.
 

Attachments

  • Sweet smell of success.jpg
    Sweet smell of success.jpg
    35.6 KB · Views: 44
  • Driver inside trunk.jpg
    Driver inside trunk.jpg
    59 KB · Views: 41
  • Driver quarter mocked up.jpg
    Driver quarter mocked up.jpg
    54.1 KB · Views: 45
  • Tail panel painted.jpg
    Tail panel painted.jpg
    64.5 KB · Views: 49
  • Engine compartment driver side.jpg
    Engine compartment driver side.jpg
    75.7 KB · Views: 47
Last edited:
It sure helps your attitude on the project as a whole when you finally hear them run doesnt it? Startin to look like a real car in places dude.:2thumbs:
 
Tune in next month for the next episode of the R/T/A build. May 23-30 to be exact. I've already gotten my leave approved and purchased the plane tickets.:giggedy:

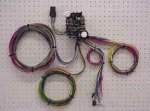
I've been looking at the EZ Wiring EZ 21 kit and will probably be using that one to update the wiring in the Chally. The $165 price tag is looking MUCH better that Painless's $400+ price for their new Mopar kit.

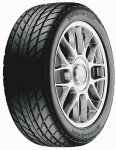
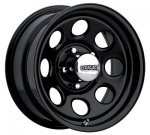
I picked out some tires and wheels to suit the attitude of the car. Up front I'm going to use BFG G-Force TA KDW, Y speed rated, 245/40ZR17 tires on Cragar Black Soft 8, 17" X 8" wheels. Out back I plan on using BFG G-Force TA KDW, Y speed rated, 275/40ZR17 tires on Cragar Black Soft 8, 17" X 9" wheels.


BTW, If you don't like my choice of rim diameter... BITE ME!:finger: :D
 

Attachments

  • EZ21 kit.jpg
    EZ21 kit.jpg
    10.1 KB · Views: 25
  • BFG G-Force TA KDW.jpg
    BFG G-Force TA KDW.jpg
    26.8 KB · Views: 20
  • Cragar Black Soft 8.jpg
    Cragar Black Soft 8.jpg
    27.3 KB · Views: 20
Last edited:
Outta be a SWEET ride when done bro!! Can't wait for the next installment of pics and info!!!:dance:
 
If I was going back to original that would work fine. The thing is I've got so much non-oem stuff going in the car, half of the harness is going to end up "hacked" together anyway. I appreciate the link and have bookmarked it for future use.
 
Last edited:
After much research, I finally got the parts for the suspension. They should be shipping them out to Mark tomorrow.:giggedy:

From Mancini Racing:
Mancini Aluminum front strut kit
Mancini E-body Super front end rebuild kit
MP Extra Heavy Duty Leaf spring set (left & right)
MP 3" spring relocation kit
Mancini Front spring eye bolt set 5/8"
MP 1.000" E-body Torsion Bars
Energy Susp Polyurethane Torsion Bar dust boot
MP Torsion Bar clips
Mancini E-body Frame Connector package
Lower Control Arm stiffening plates
Triangle shaped suspension bumpers
bullet nose shaped suspension bumpers
KYB E-body front gas shocks (x2)
KYB E-body rear gas shocks (x2)
Mancini 7" leaf spring U-bolt set
E-body front suspension pro tool kit.

I still need to order the heavy duty front and rear torque boxes from Auto Rust Technicians but I have to let the debit card cool off first.:eek: I'll get them after next payday and have them shipped to Mark. Hopefully they'll get there before I do (23 May) so we can weld them on when I'm over there this month. I doubt I'll have time to mess with the wiring so I plan to wait on getting the wiring kit till later.
 
Last edited:
Advice? DO NOT buy anything from auto rust techs....you can build better WAAAAAAAY cheaper.
the frame caps I bought once looked like a grade ten welding flunky built them as part of his birdhouse project....HORRIBLE!!!
 
Does anyone have any other sources for them then? My materials and resources are limited to what I can buy and ship over there.
 
Ok, I talked to Mancini again today about the shipping for my suspension parts order. That stuff is gonna cost $140 to ship it to PA. [smilie=2:

Kinda sucks being out here on an island cause I can't just run to a parts store to pick up anything for the car. It seems like everything's gotta be special order, special shpping, special bend me over pricing to get it there. :doubt:
 
XLR8R said:
Advice? DO NOT buy anything from auto rust techs....you can build better WAAAAAAAY cheaper.
the frame caps I bought once looked like a grade ten welding flunky built them as part of his birdhouse project....HORRIBLE!!!

Really?

- 'cuz the Abody front rail cap I bought from them for the Dart Sport looked awesome. - Never did try to install it tho...
 
Well, with out any additional input on the subject, I went ahead and got the Auto Rust Tech torque boxes. They told me that Harm's makes some exact reproduction ones but those are 16 guage metal. The ones from Auto Rust Tech are not exact repops, but they are 13 guage for better stregnth.:giggedy: Some fine tuning will be needed but after installing the floors and trunk that should be a snap.

Another thing I liked about dealing with ART, I am going to use a 3"spring relocation kit so I don't need the bolt access square opening in the rear torque boxes. I'm having them make them without cutting the square opening out of them. They should be even stronger that way.

BTW: They're giving me a 10% military discount too.:bravo:
 

Attachments

  • k2_2627.JPG
    k2_2627.JPG
    10.9 KB · Views: 29

SiteLock

SiteLock
Back
Top