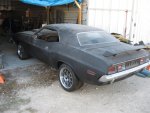
72 Challenger R/T/A

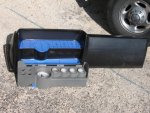
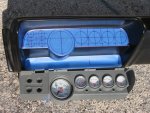
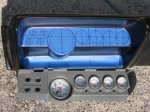
More fiberglass on the way for the Chally weight reduction program. I decided to go ahead and get the fiberglass dash from VFN after seeing how heavy the stock dash was when I removed it. The FG dash weighs only 4 lbs. They are made to order so it will take about 6 weeks for them to make it and then ship it out. Mounting it will require a little creativity, but I have a plan for that as well.:toot:

I got a voicemail message from VFN today. My dash is finished and ready to ship out.:giggedy: I'll be calling them up tomorrow to get the info on when it should arrive.

It took 8 weeks, rather than the 5-6 weeks they estimated, for them to finish it. I wasn't held up waiting for them to get it done, but it's still something to I need to keep in mind when dealing with made-to-order parts.
 
I talked with the lady at VFN and the dash shipped out Friday. I should get it sometime this week as long as the recent tornados don't hold it up somehow.:helpme::rolleyes: I'm hoping to have the Autometer guages installed in the new dash by this weekend.

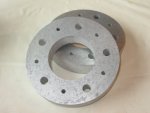
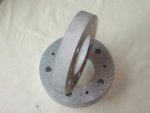
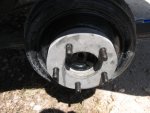
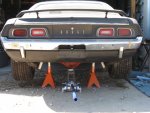
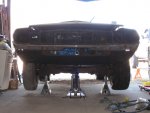
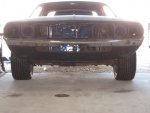
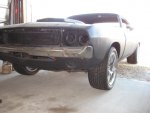
Today was kinda slow at work so I was able to waterjet out the 1" thick spacers for the front wheels. I'll still need the longer wheel studs before I can finally mount the new tires and wheels though. I added some extra holes in the spacer so I can bolt it to the hub so it can't wiggle around. I still need to countersink the small holes and drill and tap the hubs so I can bolt it up. Here's some pics of the front spacers.;)
 

Attachments

  • Wheel spacers - 1 inch (1).jpg
    Wheel spacers - 1 inch (1).jpg
    186.4 KB · Views: 20
  • Wheel spacers - 1 inch (2).jpg
    Wheel spacers - 1 inch (2).jpg
    178.6 KB · Views: 19
id be a lil worried about having no hub centric ..but FINE work thats for sure

sooooo can you make other small waterjetted stuff?
 
The machine itself is capable of cutting up to 8" thick material. However, in the configuration we have, the tank is setup to cut no more than about 2.5" thick material. Pretty much anything that can be drawn out in 2D can be cut on it. We aren't allowed to use regular carbon steel on it due to the corrosion issues with the ferrous particulate matter that comes off from the cutting process. It eats up the machine quickly and makes stuff wear out a lot quicker. We don't even have any carbon steel here in the building. It's all mostly aluminum, stainless and other exotic materials like monel, K-monel, inconel, stellite, nylon, teflon etc...

I thought about the hub-centric issue. It's already a very close fit as it is and the five 1/4"-20 bolts will keep the spacer from walking around at all. If needed, I can machine the center hole out slightly larger to accept an alignment tube. That will tie the disk center to the wheel center and keep everything trued up. The front spindle dust cap is kinda tricky to work around as it protrudes into the wheel center hole slightly.
 
WoooHooo!!!:giggedy:

The dash came in today! I'll be busy mounting the guages and switches and stuff to it this weekend.

I'll post pics when I have something new to show. :shifty:
 
Glad you are still getting it done on your ride Paul. Keep up the good work :bravo: Now that you are closer we need to get together on the tailpanel. I still have that 70 panel for you here at the house.
 
Last edited:
Well, with the site SNAFU'd for the weekend, I got a lot to catch up on.

[thick spanish accent]"Let me explain. ...no, that would take too much time. Let me summarize."[/thick spanish accent]

Aw heck, just look at the pics already... ;)
 

Attachments

  • Long wheel studs - rear with spacer.jpg
    Long wheel studs - rear with spacer.jpg
    227.6 KB · Views: 24
  • wheels and tires on - driver side rear view.jpg
    wheels and tires on - driver side rear view.jpg
    234.5 KB · Views: 24
  • wheels and tires on - both sides rear view.jpg
    wheels and tires on - both sides rear view.jpg
    242 KB · Views: 26
  • wheels and tires on - driver side front view.jpg
    wheels and tires on - driver side front view.jpg
    202.1 KB · Views: 24
  • wheels and tires on - both sides front view.jpg
    wheels and tires on - both sides front view.jpg
    211.5 KB · Views: 27
  • wheels and tires on - all on front quarter view.jpg
    wheels and tires on - all on front quarter view.jpg
    197 KB · Views: 34
  • wheels and tires on - driver front and rear quarter view.jpg
    wheels and tires on - driver front and rear quarter view.jpg
    242.6 KB · Views: 33
A few more pics from today...
 

Attachments

  • dash - gauge layout.jpg
    dash - gauge layout.jpg
    237.8 KB · Views: 19
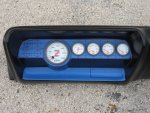
  • dash - gauge layout close up.jpg
    dash - gauge layout close up.jpg
    232.2 KB · Views: 23
  • dash - speedo installed.jpg
    dash - speedo installed.jpg
    202.2 KB · Views: 21
the wheels look great..but the car a little tall?

the guage cluster is a sexy setup!!!

imo you need to take that wing cut it in half and widen it soo the slants meet up with the sides of the body as if the body line continued up the wing
 
imo you need to take that wing cut it in half and widen it soo the slants meet up with the sides of the body as if the body line continued up the wing

GET OUTTA MY HEAD!!!


:bwuhaha::bwuhaha::bwuhaha:

I can't cut it in half though as that'll mess up the spacing for the mounting posts. I'm going to cut each end off just outside of the posts. Then I'll insert a foam core for the shape and wrap it with fiberglass. When it's done the tips will be out at the edges like you described. Only problem is, I'm not that good with fiberglass. ...Yet. Don't worry though, with all the work my boat needs, I'll have plenty to practice on before I get around to tackling that wing.:shifty:

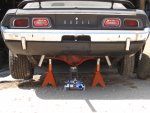
After I get the 3" spring relo kit installed I'll be able to tuck the rear wheels in a little further by using a thinner spacer. Once I have the needed wheel lip clearance I'm going to lower the rear of the car about 2.5". When I get around to installing the front end rebuild kit and 1" T-bars, I'll lower the front to get the car to sit level at the rocker panel. :cool:
 
Ya know, looking at the new dash, I think I might add a little stagger to the switches to the left of the speedometer. Slide the top two about 1/2" right and the bottom two 1/4" left. That wat I'll be able to take advantage of the different slope onthat inside corner. The original dash is square up in that corner so the switches look there. The angle on this one would probably make that headlight switch hard to get to. Moving it away from the corner would solve that. I'll have to cut the metal switch mounting frame and shift it accordingly, but that just comes with the territory. Custom ain't about taking the easy way if the hard way is the only way to get the results you want. Right 69.5?:bravo:
 

Attachments

  • dash - gauge layout with shifted switches.jpg
    dash - gauge layout with shifted switches.jpg
    50.5 KB · Views: 21
only the lazy take the easy way out!!!!

yes staggering the switches will give a MUCH cleaner look as well as a slightly easyer use of them imo as your not reaching thru a switch..know what i mean?

im still running VERY loose ruff drafts of my dash in my head and they change daily tho i think the console draft is about done LOL
 
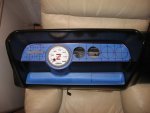
I got the other gauge holes dremeled out and then sanded them to size. The gauge brackets are going to be handmade since I had to cut the original ones down to mount them to the plastic panel. I never modified the speedometer bracket though so that one works fine as is.
 

Attachments

  • dash - speedo and gauges installed.jpg
    dash - speedo and gauges installed.jpg
    238.7 KB · Views: 45
It's a 2&5/8" Autometer silver faced Pro-Comp. They don't make a 2&5/8" tach in the Phantom series so this was as close as I could get. It came with a cup and a stand for column or top of dash mounting. I hacked up the cup and turned it into a hold down for through dash mounting on my factory gauge panel.

Before I got this tach, I always used the Suntune Super Tach II's and just mounted it in the last gauge slot to the right. That way it just took up the empty/clock slot. The lettering on that tach matches the factory gauges pretty close. It has a black face, white numbers and lines and orange pointer like the oem gauges.

EDIT: Come to think of it, I saw a white face version of the Super Tach II recently. That would have been nice to have known about before I got the silver face tach.:doh:
 
Last edited:
i only ask cause i LOVE the small tach's..ive got a few VERY old "hawk" tachs...they dont mach anything else but there small, good looking, and very acturate
 

SiteLock

SiteLock
Back
Top