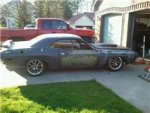
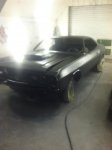
72 Challenger R/T/A

well hey guys im new to the whole mopar thing i traded the camaro to Paul I've started working on the 72 challenger and the stroker motor picked up alot of new parts for the car to:
full magnaflow 3'' x-pipe exhaust
mini starter
4 core aluminum radiator
radiator hoses
140 amp alternator
twin electric fans
high performance fuel pump
1/2 inch fuel pick up and sender
seat belts
rebuilt high performance tf 727 manual valve body
high performance torque converter (3100 stall) anti balloon plates steal sprag
new bigger slip yoke
fuel tank pad
100sq feet fat mat sound deadner
billet spacers
billet valve cover breathers
carb mounted throttle return springs
I know there are more parts im missing but i cant remember right now pretty good start though dont you think!!
here are some pics
challenger rear spring 002.jpgchallenger rear spring and axel location 012.jpgchallenger rear spring and axel location 013.jpgchallenger rear spring and axel location 018.jpgchallenger rear spring and axel location 020.jpgchallenger rear spring 009.jpgchallenger rear spring and axel location 032.jpg
 
the 512ci stroker needed to be talkin apart there was a bunch of little rocks and dirt in the valley plus i had to change the color to my liking also the rockers were hanging up on the heads and they were shaving aluminum files into the heads so i had to shave the spacers so there was enough tolerance for them to move freely with out hanging up i still need to measure the push rods and get them cut to length or buy the right length whichever is cheaper here are some pics of the changes
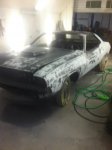
512ci challenger motor take apart 001.jpg512ci challenger motor take apart 006.jpg512ci challenger motor take apart 034.jpg512ci challenger motor take apart 014.jpg512ci challenger motor take apart 030.jpg512ci challenger motor take apart 044.jpg512ci challenger motor paint and put together 003.jpg512ci challenger motor paint and put together 019.jpg512ci challenger motor paint and put together 021.jpg512ci challenger motor paint and put together 015.jpg
 
Hey Rummy, thanks for joining and keeping us in the loop for the build! :dance:
Thank you i really look forward to getting her on the road this summer ill try to keep you guys informed on the build
 
does anyone know if there is a sway bar that can be used with the 3inch spring relocation kit?
 
loving the red and youd id it justice by doing the highlight work on the recessed and raised areas which i ALWAYS like to see..its that touch of detail that so many overlook
 
Glad to see you made it onboard! There should be an adjustable pushrod in with those that came with the engine parts. They still need to be measured and the new ones cut to the proper legnth. The rockers were an issue I mentioned that would need to be addressed before running the engine. I was going to slightly trim (mill thinner) the rocker pedastal widths for the clearance. That way I could keep the roller tips centered over the valve stems using the rocker spacers for dialing in the exact positioning.

For the 3" sway bar, I don't remember if I had found a source for one. I'll poke around my old links and see if I can come up with some info.

Glad to see you've been making progress. It's really looking good!
 
loving the red and youd id it justice by doing the highlight work on the recessed and raised areas which i ALWAYS like to see..its that touch of detail that so many overlook
Thanks it took some time but i like it alot to,
it always pays off in the end
 
Glad to see you made it onboard! There should be an adjustable pushrod in with those that came with the engine parts. They still need to be measured and the new ones cut to the proper legnth. The rockers were an issue I mentioned that would need to be addressed before running the engine. I was going to slightly trim (mill thinner) the rocker pedastal widths for the clearance. That way I could keep the roller tips centered over the valve stems using the rocker spacers for dialing in the exact positioning.

For the 3" sway bar, I don't remember if I had found a source for one. I'll poke around my old links and see if I can come up with some info.

Glad to see you've been making progress. It's really looking good!
yea i finally got some time to jump on board, i found the adjustable push rod just need to get off my butt and do it ha ha yea for the heads sanded them down and made them work they still ride in the center of the valve stems. been working on fabing up the rest of the torq boxes and subframe connectors and started some long boarding on the doors to straighten them out and replace the rusted out lower parts still haven't found the vin # tag did you happen to find it?
 
No tag yet. I did find that R/T/A emblem I water jetted for it in the RV. PM me your address and I'll get that in the mail to you. The storage unit is still a mess though so I may find it after I get some more stuff moved out of there. I'll keep looking for the tag, but I don't have too many other places to look.
 
Hey guys haven't had much time to work on the car got a new job on the oil rigs in north dakota so i got the money to finish it but not the time lol i did get a chance to sand down the car a little bit and weld in some patch panels for the holes in the floor and fixed parts of the front sub frame that were rusted to sh#t under the slash shields. Also bought some new tubular upper and lower control arms and rear end weld on brace pulled out the torsion bars and i love the looks of it slamed what do you think it will be a little higher than the pic though :D
 

Attachments

  • challenger slamed.jpeg
    challenger slamed.jpeg
    8.7 KB · Views: 62
Looks great!!! Really glad it went to someone that's going to finish the project! Good luck and keep the pics coming!
 
DSC02437.JPG
DSC02462.JPG

I love what you are doing with this 72. I would like convert my 72 to a 70 but I am still very fond of the way my 72 looks.
 

Attachments

  • DSC02462.JPG
    DSC02462.JPG
    217.6 KB · Views: 43
I prefer the look of the 70-74 over the '09 up :D


I'm really torn on the Challengers, I had a '73 and would love to have another, but the '70 is a great looking car. I'll take any year.
 
Well look what came back to life!!!

Hey guys long time sense I've posted anything life has been busy but a lot of it has been spent on the challenger you won't recognize her she has jumped forward leaps and bounds since you've seen her this is the oldest pic I have back when she was getting straightened out and sanded down I will post more pics when I can get to a computer here are a couple new ones too its just starting to get to the exciting part of the build!!
 

Attachments

  • IMG950314.jpg
    IMG950314.jpg
    266 KB · Views: 24
  • IMG950317.jpg
    IMG950317.jpg
    230.3 KB · Views: 23
  • IMG_20150824_183311304.jpg
    IMG_20150824_183311304.jpg
    1.8 MB · Views: 23
  • IMG_20150113_182658983.jpg
    IMG_20150113_182658983.jpg
    2.5 MB · Views: 24
  • IMG_20141105_102742726.jpg
    IMG_20141105_102742726.jpg
    2.6 MB · Views: 24
More pics

It's been a lot of work getting here and I'm finally seeing the light at the end of the tunnel the last pic is a test fit I am going to bolt the torque converter/transmission on the motor be for setting it in for good the tc seems to be a real tight fit against the crank(where the hub on the tc fits into the dished part) the any suggestions for mounting
 

Attachments

  • IMG_20141117_130559292.jpg
    IMG_20141117_130559292.jpg
    3.6 MB · Views: 23
  • IMG_20141121_104607257.jpg
    IMG_20141121_104607257.jpg
    3.1 MB · Views: 23
  • IMG_20141121_132629557.jpg
    IMG_20141121_132629557.jpg
    3 MB · Views: 23
  • IMG_20141212_134628868.jpg
    IMG_20141212_134628868.jpg
    2.1 MB · Views: 24
  • IMG_20150106_155945256.jpg
    IMG_20150106_155945256.jpg
    2.4 MB · Views: 24
  • IMG_20150106_155851742.jpg
    IMG_20150106_155851742.jpg
    2.5 MB · Views: 22
  • IMG_20150826_183345212.jpg
    IMG_20150826_183345212.jpg
    2.6 MB · Views: 23

SiteLock

SiteLock
Back
Top