72 Challenger R/T/A

I'm shooting for either Friday or Saturday at Carlisle. It will depend on how far I get with whatever needs to be done with the R/T/A and the spare parts to get it all loaded up to hit the road back to TX by Sunday morning. I'd like to bring my spare parts there to sell but I don't want to be stuck in one spot hawking all my junk off when I could be cruising around seeing all the neat stuff there. Oh well, screw the parts for now, I'm gonna check out the show!
 
Haven't heard back from greg yet, I'm hearing rain for fri, but if greg can get off work & I can get him to co pilot pretty sure I'll make it sat. Guess we'll wait & see :huh: Rich.
 
Haven't heard back from greg yet, I'm hearing rain for fri, but if greg can get off work & I can get him to co pilot pretty sure I'll make it sat. Guess we'll wait & see :huh: Rich.

That's cool. Keep me posted and we'll try to meet up if you go.

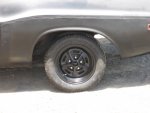
Today I pulled the bad tires off the front and replaced them with the new ones. The ones on the back got moved up to the front and the new tires went out back. That way there should be less chance of having problems on the return trip with the new tires rolling on the road.

Next I went back to work on the front valance. I painted it flat black as well as the modified center brackets. The brackets are now ready to be bonded to the new valance.

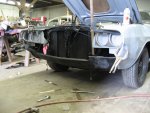
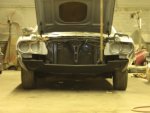
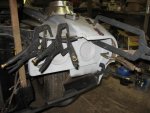
I set the 1970/71 style fiberglass headlight backing brackets in place to see what they needed to get them ready to bond to the fenders. It took some work with a sander to get the edges thinned out so they would line up ok.

The air sander's disk (spinning @ 30K rpm) decided it was done holding on and split in half just as I was finishing the first assembly. Half of it shot out into the field about a football fields legnth away. The other half flew straight into my leg, which was only 6" away, and then bounced back into the shop. Yea, that one's gonna leave a mark... Check my other post about my paintball bruise for an idea, and then double the size of the bruise. :eek: OWWIEEE!!!

To make sure the headlight brackets get lined up ok I used the headlight bezels to confirm the positioning. Or at least I tried to. The outer leading edges were a bit too wavy and dented to allow them to sit flush so I had to use a hammer and a block of wood to tap them back into shape. They arent very pretty now but they will work. That's more important at this point. If I don't have a reference to go by before I bond these pieces together I won't ever be able to line up the headlights properly.

This afternoon I took some time to go target shooting with my friend from PR. After that we got some pizza and caught the Transformers movie. It was pretty cool!:clap:

BTW: I shoulda knocked on wood when I said my back was feeling better. It was pretty sore by the time the movie was over. I'm going to have to call it an early night so I can get enough rest to be able to work on the Chally tomorrow.
 

Attachments

  • 195-60-14 tire installed.jpg
    195-60-14 tire installed.jpg
    182.6 KB · Views: 17
  • headlight buckets mocked up.jpg
    headlight buckets mocked up.jpg
    242.4 KB · Views: 15
  • headlight buckets mocked up front view.jpg
    headlight buckets mocked up front view.jpg
    193.7 KB · Views: 17
Last edited:
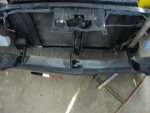
Today I bonded the front valance to the brackets. I had to fabricate some more tabs for the center mount as well as each side of the valance. The valance was cut too short on the ends where they are supposed to bolt up with the lower edge of the fenders. It's on there SOLID now!:cool:

I also fitted the headlight bucket sections and they are now ready to be bonded to the fenders. When that's done, that should be the last of the major fiberglass work.:giggedy:

The new tire on the right rear of the car keeps going flat.:mad: I'm going to take it off, sand the rim, replace the valve stem, check the tire for any punctures and reinstall it.

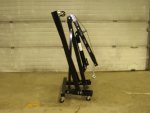
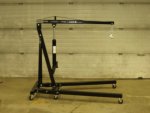
I stopped by onna dem big tent tool sales today and bought a 2 ton folding engine hoist. The folding part will make it a lot easier to load and unload the hoist. I didn't have one in TX and wouldn't have had any way to unload the 512 once I got back there. None of my friends have one either. They always seem to come to me asking to borrow tools.:rolleyes:

As far as Carlisle goes, it's still up in the air. I've still got quite a few things I need to get done to the car before I leave. Then I'll have to load the truck sometime Saturday as I won't have any help to do it here on Sunday. I need to leave PA early on Sunday to keep my schedule and be back to work on time. So... It looks like I may only be able to make it to Carlisle for half a day Friday. I'm not sure it's going to be worth the time, trouble and money to head over there.:(
 

Attachments

  • front valance brackets bonded.jpg
    front valance brackets bonded.jpg
    204.2 KB · Views: 16
  • engine hoist folded.jpg
    engine hoist folded.jpg
    187 KB · Views: 11
  • engine hoist extended.jpg
    engine hoist extended.jpg
    174.7 KB · Views: 10
Last edited:
quote (The new tire on the right rear of the car keeps going flat.:mad: I'm going to take it off, sand the rim, replace the valve stem, check the tire for any punctures and reinstall it.) quote

Run a bead of silcone on the bead of the rim to seal any leaks on the bead of the rim. We do that up here on aluminum rims to prevent leaks in the winter. Have a safe trip Paul. :xl:
 
Thank's for the idea but I think I'll pass on the silicone tip this time. This tire is only on that rim till I get it back to TX. Then both of those two new rear tires are getting swapped onto the Neon.

BTW the rims are a mix of 5" and 6" wide steel Magnum 500's.
 
Last edited:
Hey Paul, if you don't make it to Carlisle have a safe trip back down to Tx, if you do are you going Friday morning or evening? I may have a cable, I'll check and PM you in the beginning of the week.
27 hours is pretty good time, my best was 30, but I had kids with me sooo...
 
It's looking like I'm just gonna skip Carlisle this time. Tomorrow I'll just finish bonding the headlight parts to the fenders and figure out a way to bolt the hood down for the trip (don't have the hood pins yet). Then I'll be spending the rest of the day trying to figure out how I'm gonna pack all the accumulated parts and pieces into the Challenger and the Ram. If all goes well, I'll be passing by Carlisle heading south on I-81 sometime early Saturday morning.
 
First thing I did today was pull the slowly leaking tire and check it out. I didn't find any obvious punctures so I cleaned the rim up, replaced the valve stem with a new one and remounted the tire. So far it's holding fine *knocks on wood*.

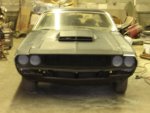
Next we got the headlight buckets bonded in (finally!:giggedy:). They really help to stiffen the front of the fenders up quite a bit.

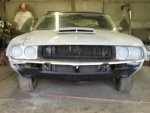
Then I used a hammer and a block to straighten out the '70 grill center. I got it to fit well enough to work for a while as a driver. The headlight bezels required a little persuasion to stay where they are supposed to go. I'll need to rework this whole frontal area sometime in the future. For now it's the best place I could think of to put these parts for the trip back to TX.

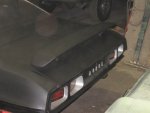
While I was thinking about it, I removed the Go-Wing from the trunk lid. The bolts I used were either already stripped or trying to strip out. I didn't want to loose the wing on the road while hauling it back to TX. It's back inside the trunk for now.

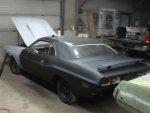
Mark bondo'd the welds around the new quarters and sanded them down close. These will need more detailed sanding before the finish coat of paint is laid down. They look a lot better than they did before though.

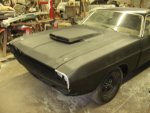
I went out today and got some hood pins to keep the hood down. The T/A hood already had holes for pins from the previous owner. All I had to do was line it all up and drill some holes in the fender for the pins and attach the hood plates. Now that the pins are in it's apparent that the hood will need to be adjusted over towards the passenger side about 1/8". I get on that later as it doesn't really affect anything right now.

While I was out I picked up a trailer light to fix the one that got melted. Apparently I parked it a little too close to the burn barrel. Oops...:doh: It was just a 5 minute fix. I didn't want to let it slide and then get some cop with no sense of humor pulling me over for a faulty trailer light on my trip back.:naughty:

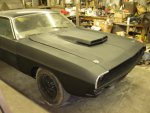
I wiped the bondo dust off the whole car and then put a coat of flat black over the newly sanded quarters. It looks much better now. The rest of the car was another story though. After another trip to the store I was ready to remedy that situation. Now armed with 6 more cans of flat black spray bombs, I started working my way forward. The doors just got a quick touch up since they were already flat black before. Then I did the passenger fender, the hood (top and bottom), the driver fender and the grill area. It took about 2 hours to finish the spray paint job. The results? I'll let you judge for yourself after I post the pics.:cool:

Tomorrow morning we load the engine and transmission in the back of the truck and get the Challenger on the tow dolly. Once those biggest items are taken care of, I'll go ahead and load the rest of the parts in the truck and the car. I'm hoping to hit the road no later than noon.
 

Attachments

  • headlight bucket being bonded.jpg
    headlight bucket being bonded.jpg
    235.4 KB · Views: 15
  • hood pinned and grill in place.jpg
    hood pinned and grill in place.jpg
    203.8 KB · Views: 20
  • Go wing installed.jpg
    Go wing installed.jpg
    216.4 KB · Views: 17
  • quarter panels bondod and repainted.jpg
    quarter panels bondod and repainted.jpg
    184.9 KB · Views: 18
  • car painted front driver view.jpg
    car painted front driver view.jpg
    217.9 KB · Views: 19
  • car painted front view.jpg
    car painted front view.jpg
    192.1 KB · Views: 24
  • car painted front pass view.jpg
    car painted front pass view.jpg
    227.2 KB · Views: 21
Last edited:
Have a safe trip back, looking forward to the latest round of pics.
 
looking forward to the latest round of pics.

Ask and ye shall receive... Go back over the post from this trip. I added all the pertinent pics for youse nuts.

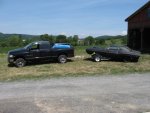
Well the trip went fine. I packed everything up on Saturday morning and was on the road by noon. Here's a pic right before I left Mark's place. Hey Brett, that's your R/T hood on top of the truck bed. ;)

I drove straight through till I hit the Alabama state line and got a hotel room around midnight. The next morning I left just after 7AM and just kept driving till my bladder got full or the fuel tank got low. I made it home around 10PM last night. It took the same overall time (27hrs driving) and distance (1788 mi) to make the trip back.
 

Attachments

  • On the road again....jpg
    On the road again....jpg
    201.9 KB · Views: 65
Well there goes my time off for the rest of the week...:doubt:

I saw a flyer for a car and bike show to be held on base for the Naval Station's 15th birthday celebration this Friday. Of course I just had to call and ask what kind of cars they were looking for. The conversation gravitated towards mostly older cars and whatnot when I mentioned that I had a project car. I told the lady on the phone that it wasn't anywhere near show worthy, but she just about flipped when she found out it was a Challenger. Apparently she had one in her family when she was little blah, blah, blah... So now they're begging me to bring it and I say "Uh, ok.".:shifty:

Now, instead of prepping my storage garage for the car and setting up and organizing my tools and workbenches, I have to button up the outside of the Chally by Thursday. I'll need to mount both bumpers, the rear valance, the wing, the headlights (still have to make the cutouts in the fiberglass for that) and hit the roof and the rear valance with some flat black (if the rain holds off) so it'll match the rest of the car.:doh:

So, today after work I mounted the rear bumper on the Chally. Then I pounded the lower edge of the rear valance somewhat straight with a hammer and a cinderblock. After that I used a high speed grinder with a cutoff wheel to remove all the rusted on bolts that were still attached to the rear valance.

Well, it's a start anyway...:rolleyes:

Oh yea, I almost forgot. I still haven't emptied the car from the trip down from PA. The only room I have in the car is the drivers seat area. The entire rest of the car is still filled with parts.
 
I'll get some pics tonight and post em.

Well I was gonna, until it started to rain here.:rolleyes:

At least I got a few more things done before the rain started falling today.

I was able to get at least 4 bolts holding the rear valance in place. Two in the center bracket and one on each end. Then I squirted it with the usual flat black paint. Next I used a battery powered high speed thingy (like a small router) to cut out the holes for the headlights in the headlight buckets. More flat black paint, this time aimed at the headlight area of the fenders. While I was up front I drilled some holes in the fenders to attach the center grill piece.

At this time some friends stopped by and of course I had to give the tour of the car as well as fire it up for them. I made one of them jump about a foot off the ground when the open shorty headers, which he was standing right next to, barked to life. [smilie=2:LOL!:bwuhaha:

It was starting to drizzle so I went back to work getting some more things up in place. I drilled the holes to mount the flip-top gas cap and slapped it on where it belonged. This gas cap is only temporary though as I plan on adapting a Cuda style gas tank and rear center filler neck later on.

At this time it really started raining heavy so I had to quickly button up the car and put the cover back on it. Then I had to scramble to get the tools picked up and get out of the rain.

I can't do anything about the weather so the pics will have to wait a little longer.
 
Ask and ye shall receive... Go back over the post from this trip. I added all the pertinent pics for youse nuts.

Well the trip went fine. I packed everything up on Saturday morning and was on the road by noon. Here's a pic right before I left Mark's place. Hey Brett, that's your R/T hood on top of the truck bed. ;)

I drove straight through till I hit the Alabama state line and got a hotel room around midnight. The next morning I left just after 7AM and just kept driving till my bladder got full or the fuel tank got low. I made it home around 10PM last night. It took the same overall time (27hrs driving) and distance (1788 mi) to make the trip back.

Cool to see you have your car where you can work on it. :giggedy: My car is stuck in limbo, the added space to the shop where my car was will not be finished until November. My car is stuck in its first guide coating awaiting blocking. New roof, second set of braces in 2 years (this time my son gets them) have put my pocket kinda empty. Great to see that hood up there, now we just have to meet up one of these days over a couple of :bravo: Your car is looking good btw. I still have your 70 tailpanel sitting in the backyard :)
 
I can hang onto the hood for a while for ya. It's leaning flat up against the wall in my storage unit so it's not taking up much space.

Glad to hear about the tailpanel. The one have now is a lot worse than I remember.

Anyway, I've been building a loft in my storage unit to get all the crap out of the way so I can get the Challenger inside. The loft is done so now I have to finish loading everything up onto it that isn't either tools, parts or bikes.

In case you're wondering why I'm not working on the car itself, I've shifted my priorities. I've been getting non-stop heavy rains down here and the R/T/A isn't exactly watertight. I found about 1.5" of water in the trunk and cab when I took all the parts from the trip out of the car. I dried it all out and then put the car cover and a blue tarp on it to keep it dry. The next day (after more heavy rains) I checked the car and the trunk was dry but the center had another inch of water in it again. Soooo, before I end up having to replace the floors again :doh:, I'm trying to get the car inside out of the wet weather.
 
The loft is finally stacked with most of the junk I had on the floor. Yay! :giggedy:

I hauled the car over to the storage unit using the front wheel dolly. I got the stuff moved around and now the Challenger is inside and out of the weather. Just in time too. We're under a flash flood warning for this area and it will continue for at least the next few days.:wtf:

Today I mounted up the front bumper. The driver side corner is tweaked down a bit. It's ok though as I'm going to replace both bumpers with fiberglass ones so It'll be easier to paint them body color.

After that I took the H4 conversion lights and the light mounting buckets out and checked them over. I seem to have two sets of right side headlight buckets. I may be able to make them work ok on the left side also with a little creativity. The conversion lights dont exactly match the buckets light alignment slots. The hi-beam has the nubs to align it but they aren't lining up exactly. On the hi/lo-beam bulbs don't have any of the alingment nubs so I'm going to have to create some for them (with epoxy maybe?). There were also two protrusions on the top and bottom of the back side of the bulb keeping it from sitting in the bucket at all. I took a grinder to the protrusions and made them flush. The hi/lo bulb is now able to sit solidly in the bucket. Lastly, the new headlights are slightly larger in diameter so the retaining trim rings won't fit. I took the grinder to one of them and was able to split the ring at the factory joint. After wrapping it around the new bulbs it will need a piece of thin stainless welded in to fix the 3/8"-1/2" gap that is now there. I'll have to keep working on this whole mess till I get it all together.:shifty:
 
Last edited:

SiteLock

SiteLock
Back
Top