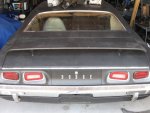
72 Challenger R/T/A

Well the shows over (for me anyway). Last week the car show had been rescheduled to this Friday because of the weather. It looks like it's going to be even worse weather tomorrow. So the event organizers have now rescheduled it to August 17th. That would have been fine with me (more time to work on the car) except that I'll be in San Diego for some military training at that time. At least it gave me a reason to get off my butt and at least do SOMETHING with the car rather than just let it sit.

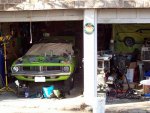
BTW: The storage unit is still a tight fit with the car inside. Now I wish I had gotten one of the 12'X45' units instead of the 12'X32" I have now. It's a moot point though since the loft is up now and won't be coming down any time soon.
 
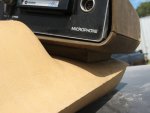
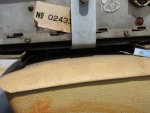
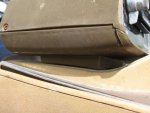
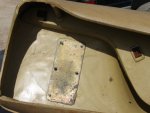
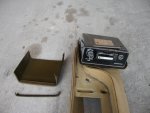
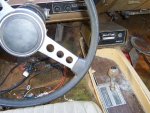
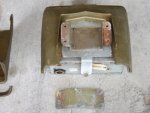
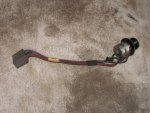
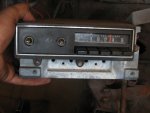
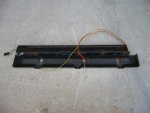
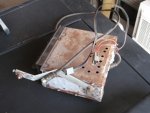
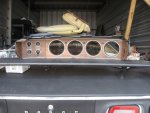
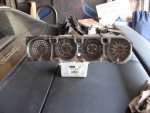
I pulled the Chally outside to get at the bikes today. While everything was finally out of the way I grabbed the console and got to work removing the cassete deck from it. Someone on Cuda-Challenger was asking about them so this was the best time for me to finally get some pics of it. Knowing how you all like pics so much here, and seeing as how it IS R/T/A related (sorta) I figured I'd post 'em up here in case anyone wanted a closed look at one of these things.

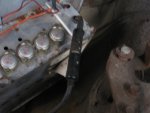
It was a royal PITA to get that thing off the console. I had to grind the 6 screws down on the plate under the console in pic #4 and then punch them up through the top to finally be able to remove it.

BTW: That cassete thing and the radio that goes with it is for sale if anyone wants it. I'm not sure if it works or not as I pulled the interior out first without even trying it out. PM me fo more details. If nobody speaks up within a week I'm gonna go ahead and just put it on Ebay.
 

Attachments

  • Tape Deck 1.jpg
    Tape Deck 1.jpg
    209.1 KB · Views: 18
  • Tape Deck 2.jpg
    Tape Deck 2.jpg
    191.5 KB · Views: 14
  • Tape Deck 3.jpg
    Tape Deck 3.jpg
    192.9 KB · Views: 14
  • Tape Deck 4.jpg
    Tape Deck 4.jpg
    222 KB · Views: 13
  • Tape Deck 5.jpg
    Tape Deck 5.jpg
    231.3 KB · Views: 17
  • console and tape deck.jpg
    console and tape deck.jpg
    68.3 KB · Views: 18
  • Tape Deck 6.jpg
    Tape Deck 6.jpg
    202 KB · Views: 16
I hope this gets to be a habit. If the weather keeps cooperating, I'll eventually make some decent progress on this thing. :giggedy:

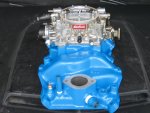
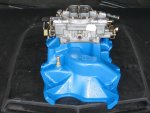
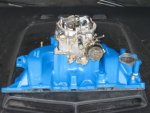
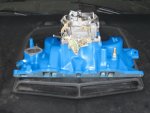
I went over after work and messed around with the sand blaster and got it working well enough so I could finish cleaning up the Weiand intake. I pulled all the fittings off and sand blasted them too. Then I masked the intake off and squirted it, and the fittings, with my favorite engine color. After they dried I wrapped all the threads on the fittings with teflon tape and reinstalled them.

Next I cleaned up the Eddy carb I got from my brother. I had to straighten out the throttle bracket as someone had tweaked it so it would force the choke door open early rather that actually trying to tune it. The part of the bracket with the idle stop screw was bent out of alignment and the screw wouldn't hit the step where it was supposed to.

Once all that was finally straight, I put the Chrysler throttle adapter piece on the carb. I bought it a while ago and just tossed in in the carb box knowing I'd eventually need it. One of the holes that the Chrysler adapter plate bolts to on the carb throttle plate was drilled oversized. So, I have to get a larger 1/4"-20 nut and bolt to go in that hole rather than the smaller one that should have gone there. No biggy.

I didn't have any carb gaskets but I did have some gasket material. I used the steel squarebore adapter plate as a template and cut two carb gaskets with an exacto knife and a hollow hole punch set (picked 'em up on my last trip to PA). I placed the gasket, adapter, gasket and carb on the intake and bolted it down.

And this is what I ended up with...
 

Attachments

  • Weiand and Eddy front.jpg
    Weiand and Eddy front.jpg
    229.1 KB · Views: 16
  • Weiand and Eddy back.jpg
    Weiand and Eddy back.jpg
    223.8 KB · Views: 14
  • Weiand and Eddy left side.jpg
    Weiand and Eddy left side.jpg
    221.8 KB · Views: 14
  • Weiand and Eddy right side.jpg
    Weiand and Eddy right side.jpg
    207.3 KB · Views: 15
I like the sound of this project!! I'm on this site now from Cuda-Challenger, talk to ya soon.

Dont forget Me!!!
 
I removed a bunch of little stuff from inside the car today.

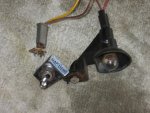
Map light and switch.
Rear speaker switch
Part of the lower dash plastic trim (driver side)
Radio (except for some of the wires:mad:)
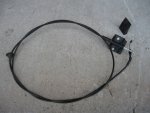
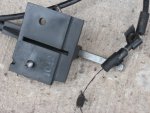
Hood release cable
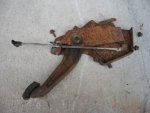
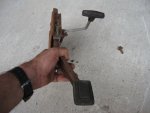
E-brake pedal assembly

Except for the plastic trim, none of this stuff will be going back on the car. It's too heavy and there are better and WAAAY lighter options nowadays.

The E-brake is getting replaced by a Neon hand brake mounted in the console (shhh, don't tell Tam...:toot:). I broke the wire off the E-brake idiot light switch so I taped it off and lableled it.

I don't need the hood release cable because it's missing the handle and I already put an external latch release on the hood anyway. I have a set of locking hood pins I'll be using to make sure everything stays put under the hood.

The plastic trim is going to be my color test panel to see what shade of grey I want to use for the dash.

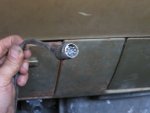
The rear speaker switch only took a minute to get it out. The plug right behind it made it a lot easier to remove as well.

The map light however wasn't as simple. It came off the dash easy enough but then the wires went straight into the harness. So, I just left a few inches of the wire on the harness and cut the wires. Yup, I taped and labeled them too. The switch was seized solid so I squirted a little bit of WD-40 on it to see if that would help. After a while It finally started to move, stiffly. A few more times and it started to finally loosen up and I thought it was going to be savable. However, Rusty must have sent Murphy on vacation to south Texas cause he showed up and decided to lend me a hand. "SNAP!" The backing plate of the switch snapped in half. DOH!!!:doh:

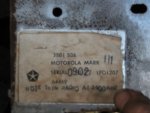
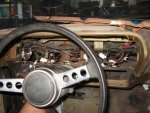
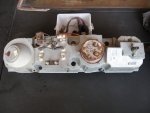
The radio was fairly easy to get loose, however, it is currently being hung up by some wires that travel up and dissappear behind the guage cluster. I'll have to pull the guages out to be able to see where (or if) I can unplug the radio from the main harness. If it goes straight into the harness I'll just have to do the tape and label trick.

All this taping and labeling will make it easier on me when I go to start the rewiring job down the road.

Most of these parts will be sold off to help fund the project so I may as well just get them out of the way now. Some of them I cleaned up using my sandblast cabinet using low air pressure. I was able to clean up the plastic hood release cable bracket without even removing the ink stamped part number on the bottom. The outer collar and locknut for the rear speaker cleaned up real nice as well.

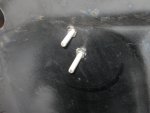
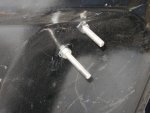
I also had made some corse threaded 5/16" x 3" long stainless steel studs so I could finally mount the Go-Wing to the trunk lid. The threaded mounting holes in the bottom of the pedestals were kinda fookerd up a bit so I drilled em out and tapped them to the next larger size. Hmmm, I didn't get pics of the installed wing dhamik... I have to remember to get them next time I'm at the garage.
 

Attachments

  • rear speaker switch 1.jpg
    rear speaker switch 1.jpg
    199.8 KB · Views: 14
  • rear speaker switch 3.jpg
    rear speaker switch 3.jpg
    198.4 KB · Views: 13
  • map light assy 2.jpg
    map light assy 2.jpg
    213.9 KB · Views: 13
  • radio face.jpg
    radio face.jpg
    206.9 KB · Views: 19
  • radio plug going to cassette deck.jpg
    radio plug going to cassette deck.jpg
    200.2 KB · Views: 16
  • radio label.jpg
    radio label.jpg
    195.6 KB · Views: 15
  • radio plug cassette deck end.jpg
    radio plug cassette deck end.jpg
    188.6 KB · Views: 14
I just got back from the garage with more progress to report. I finished pulling out the gauges today. In order to get them out though, I had to first remove a few things:


- The dash lights (above the guages)
- The light switch panel
- The other lower plastic dash coner piece
- The ashtray :confused:
- Had to lower the steering column
- The rally gauge cover
- And finally, the rally gauges themselves

Once I got all this out of the way, I was able to locate the end of the radio plug and disconnect it.

I'm kinda beat right now so I'll just post the pics and let them do the majority of the talking for me.:shifty:
 

Attachments

  • E-brake pedal assy.jpg
    E-brake pedal assy.jpg
    193.2 KB · Views: 13
  • E-brake handle and pedal.jpg
    E-brake handle and pedal.jpg
    233.3 KB · Views: 14
  • go wing installed.jpg
    go wing installed.jpg
    230 KB · Views: 18
  • hood release cable.jpg
    hood release cable.jpg
    202.9 KB · Views: 15
  • hood release cable numbers.jpg
    hood release cable numbers.jpg
    216.1 KB · Views: 15
  • gauges out and wires tagged.jpg
    gauges out and wires tagged.jpg
    204.9 KB · Views: 17
  • instrument lights.jpg
    instrument lights.jpg
    238.1 KB · Views: 14
more pics...
 

Attachments

  • radio plugs.jpg
    radio plugs.jpg
    200.1 KB · Views: 13
  • rally gauge covers.jpg
    rally gauge covers.jpg
    228.4 KB · Views: 14
  • rally gauges.jpg
    rally gauges.jpg
    204.4 KB · Views: 15
  • rally gauges back.jpg
    rally gauges back.jpg
    228.2 KB · Views: 12
  • go wing bolts left.jpg
    go wing bolts left.jpg
    217.4 KB · Views: 14
  • go wing bolts right.jpg
    go wing bolts right.jpg
    237.4 KB · Views: 11
  • kangaroo.jpg
    kangaroo.jpg
    24.7 KB · Views: 18
attachment.php
SEXY!!!!!
 
digging right in!
I might be able to use that cable, I have to check my handle thats hanging on a piece of cable out in front of the rad to see if they destroyed it.
radio speaker switch too, shoot me some #'s on those & on the rally dash setup, I don't think I can afford the dash,but if there's any way I can swing it I will! Thanks ,Rich.
 
The cable was still workable when I took it off. After I cleaned it up, WD-40'd it and then I filed some burrs off the square metal cable end and now it works a lot better. Let me know how much I'm going to be giving you the cable for. Deal?

I already PM'd ya bout the gauges.

Wally has already claimed the speaker switch, radio, and cassete deck though.
 
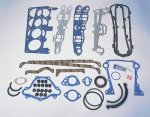
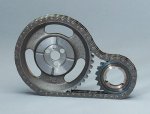
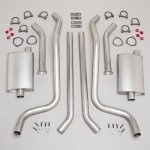
I just ordered these parts today from Summit for the 318:

Fel-Pro Gasket set (FEL-KS2114)
Double Roller Timing Chain and Gear set (SUM-G6603)
Cam and Lifter kit (SUM-K6901)
2.5" Aluminized Exhaust system (SUM-680142)

I'll let you know what I think of the Summit parts when I get them. I didn't want to take a chance with the gaskets so I stuck with Fel-Pro.
 

Attachments

  • fel-ks2109.jpg
    fel-ks2109.jpg
    25.8 KB · Views: 12
  • sum-g6603.jpg
    sum-g6603.jpg
    24.6 KB · Views: 10
  • sum-k6901.jpg
    sum-k6901.jpg
    9.5 KB · Views: 10
  • sum-680100.jpg
    sum-680100.jpg
    24.1 KB · Views: 11
:eek: Im working on getting chizzeled much like that kangaroo, HOT!!!

..... I'll be sure to post some pics [smilie=2:
 
Finally got some time to go through and thoroughly read this thread. I'm sitting here on Oxycodone, while reading I learned that you too are the victim of "Murder-Back" ;except mine is random. I go months with no probs (knock on wood-grain) and then BAM, Hello! it didnt help working 10pm - 6am last night, oh what fun it is to stand there watching guys repair a water main. and with my muderous back pain - Im cranking on 12" water main valves. you're rolling along quite well! wish i had a space like that shop to work in, thats for sure.

We're re-doing my fathers '74 Barracuda right now and this project gives me a few ideas. Trying to get my car more "correct", its nice to work on something where you're not concerned about accuracy. modifications, etc.. I dig it. i just need to get him to dump those loading dock bumpers, and maybe add some aftermarket rims. I really like the black ones in the early pages, what are they?:rolleyes:
 

Attachments

  • CUDA garage1.JPG
    CUDA garage1.JPG
    55.7 KB · Views: 21
Those rims are Cragar Soft 8's if I remember correctly. I want to use them since they:
1) look seriously MEAN
2) are steel (weldable & widenable)
3) are only going on to be used to test out the initial tire & wheel fitment
4) are seriously cheap (about $50 each)

Wally, I can't say that I agree with your accuracy statement as it is worded above. If I wanted to make an accurate restoration then yes, I'm screwing this car up badly. However, since my goal is to build this car to my specs, as long as I achive my goals to my satisfaction then I will have accurately met the requirements I set out to meet. See the difference?
 
Last edited:
actually you're right on. i think the "pills" were affecting my word usage, now that they've worn off and i've had a n hour nap, haha - i agree with you completely. next time i'll pull out the thesauras :bwuhaha:

i was trying to basically explain a difference between 2 different resto/mod outcomes. on one hand, with my car, i am going for more period correct/ stock looking while hiding some tech/ horespower secrets underneath. whereas- my fathers car will be a 74' with an AAR paint scheme, blue engine, most likely aftermarket wheels... EQUALLY BITCHIN' but more noticeabley different as soon as you walk up on it, thats all. :gaga:
 

SiteLock

SiteLock
Back
Top