72 Challenger R/T/A

There's nothing wrong with what you said really. It's more a matter of how you're looking at the big picture differently than I am is all. Your car is headed for a different goal than mine but we're both on the right track for each of us individually.
 
Last edited:
More parts...

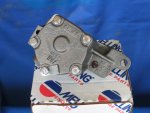
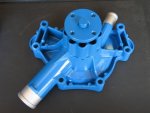
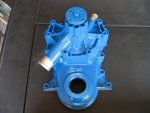
I picked up a Melling HV oil pump yesterday at AutoZone an a new water pump from Oreily's today for the 318. There's nothing wrong with the ones on the engine now that I know of. However, if I have to tear into the engine to get to the cam anyway, why not just go ahead and replace 'em? At least I won't have to worry about them having being worn out or corroded internally anymore.

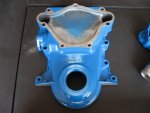
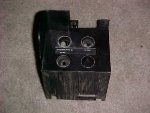
On Thursday I dug out that SB timing cover I got from Jodaddy a while ago and cleaned it up in the sandblaster. Afterwards I took a grinding wheel to the castings rough edges and smoothed it all out. Then I filed the rough edges down and stuck it back in the sand blaster to blend it in. There's no real reason to do this except to make it look better and the fact that I just felt like doing it. It's all painted over now anyway so...:rolleyes:
 

Attachments

  • SB Melling HV oil pump.jpg
    SB Melling HV oil pump.jpg
    232 KB · Views: 10
  • SB timing cover.jpg
    SB timing cover.jpg
    218.2 KB · Views: 11
  • SB water pump.jpg
    SB water pump.jpg
    213.1 KB · Views: 12
  • SB water pump and timing cover.jpg
    SB water pump and timing cover.jpg
    214.1 KB · Views: 11
Great progress on the Chally Paul. If I may ask, why are you going to so much trouble with the 318? I thought you had pretty much everything to strap that bad boy stroker in there?
 
I want to take my time on the 511 and do it right the first time. (again) :toot:

First I have to machine the #5 maincap for oil pan rail and oil seal clearance. It's too tall and interferes with the other parts.

Then I have to mill the shaft mounts on the heads to allow clearance for the rockers to move. They bind when bolted down right now as they are.

The rings gave me some problems when I was rushing to put the engine together (had to rush to fly back to PR) and I screwed them up. I need to pull the rotating assy out and re-hone some of the cylinders and then get some new rings and a proper ring gapping tool.

I still also need to adress the valley cover plate issue. It doesn't seal against the heads solidly so I'll have to find a solution to make that work. I may just use silicone along that edge but I would lkie to fine a better solution if possible.

Once those issues are resolved I can put it all back together. I'd like to have that be the last thing needed to finish on the car. I still need to go throught the 727 completely first as well. I haven't even cracked the pan open on that one yet.

The 318 is meant to propel the car around for about a year or so while I do all the chassis welding, plumbing routing, eletrical wiring and mods, interior reworking, and paint applied. When everything else is ready, I want the stroker to just fall into place. The 318/904 will then most likely sit around waiting for me to find a nice 68 FB fishy to drop it in. The power to weight ratio should be better in that application than in the heavier E-body.

In the mean time while I'm finishing all those projects, I'd still like to be able to ocassionally drive the Chally and enjoy it. THAT's why I'm really working on the 318.
 
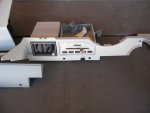
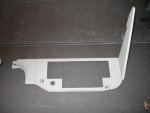
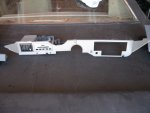
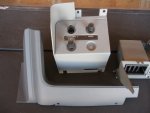
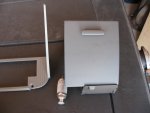
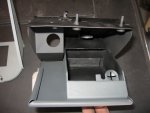
I spent some time on the dash pieces today. I cleaned them an shot some glass beads at them in the blast cabinet. Then I dusted then off and shot them with some vinyl paint. I'm using a light medium color for the controls and guages area and a darker charcoal grey for all the other top, bottom and front parts.

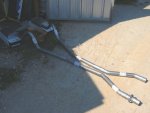
I also pulled the exhaust out of the box to see how it looked. Pretty good so far from what I can see. I'll let you know how well (or bad) it fits when I get it under the car.
 

Attachments

  • grey dash heat and AC panel.jpg
    grey dash heat and AC panel.jpg
    219 KB · Views: 16
  • grey dash radio panel.jpg
    grey dash radio panel.jpg
    195.9 KB · Views: 13
  • grey dash lower both sides.jpg
    grey dash lower both sides.jpg
    218.4 KB · Views: 12
  • grey dash switch panel and left corner.jpg
    grey dash switch panel and left corner.jpg
    218.8 KB · Views: 15
  • grey dash ash tray door.jpg
    grey dash ash tray door.jpg
    207.4 KB · Views: 13
  • grey dash ash tray inside.jpg
    grey dash ash tray inside.jpg
    198.2 KB · Views: 12
  • sb exhaust complete.jpg
    sb exhaust complete.jpg
    227.2 KB · Views: 12
BTW: I'm still looking for some cast aluminum M/T, or MP valve covers for the 318. Anyone got a spare set lying around they want to get rid of cheap?:helpme:

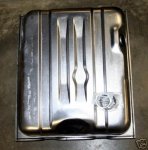
Next on the list of needed parts is a 1/2" fuel pickup. I found one here ---> http://www.quantaproducts.com/prodinfo.asp?number=SUCR8-12SS, but I have to wait till I can sell off some more parts before I can afford to get anymore new parts. I'm also looking for a dash cap like this one on Ebay--->http://cgi.ebay.com/ebaymotors/ws/e...m=180159332822&ssPageName=STRK:MEWA:IT&ih=008 Anyone here used one of these before?
 
Last edited:
Anyway to get out of the shipping on those seats?

Nope, They are expensive to ship in the first place and then they play the usual Egay games by lowering their prices and then making it up on the shipping side. :wtf:
 
Last edited:
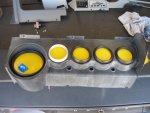
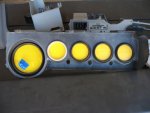
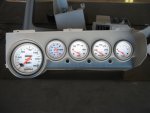
I didn't have a lot of spare time today so I just got one thing done. I masked the gauges off and painted the plastic cover and the gauge bezels with the same medium grey paint used on the other mid panel pieces. I noticed that the switch panel is from a 71-74 car. I'll need to replace it with one from a 70 to make it all match properly. Anyone got one lying around they'd be willing to part with?:helpme:
 

Attachments

  • gauges taped for paint.jpg
    gauges taped for paint.jpg
    234 KB · Views: 14
  • gauges taped for paint front.jpg
    gauges taped for paint front.jpg
    214.3 KB · Views: 14
  • gauge cover and bezels painted front.jpg
    gauge cover and bezels painted front.jpg
    200.9 KB · Views: 18
I didn't have a lot of spare time today so I just got one thing done. I masked the gauges off and painted the plastic cover and the gauge bezels with the same medium grey paint used on the other mid panel pieces. I noticed that the switch panel is from a 71-74 car. I'll need to replace it with one from a 70 to make it all match properly. Anyone got one lying around they'd be willing to part with?:helpme:


I know I have one of those ribbed gauge panels and I might have an extra light switch panel but I will have to look. I have a couple of dash assemblies in the wrecked 70 parts car and I will look the next time I get out to my dads place. Looking good there Paul :bravo:

Brett
 
I got into the project cheap enough. $2200 for the mostly complete black car and the green parts car from someone on Mofarts. The biggest single expense had to be the 511 stroker though. I've got somewhere north of 10K in that engine alone. [smilie=2: I've NEVER put that much into any one engine let alone a whole car before. I expect a lot from it for that very reason.

Before anyone gets any ideas about me, I'm NOT rich. I had to take out a retirement plan bonus to get a big head start on the project a few years ago. When those funds ran out, I throttled back on buying big parts until I am able to save enough $ to get them. I'm now selling off the original parts I don't plan on reusing to help pay for the new parts I need. It helps others out that need those parts and they help me fund my project. Win-win.

I still have a crapload of new parts from that big purchase that I haven't had the time to install yet. While I'm saving money for the next needed part, I just pick another part to install or work on and pass the time that way. It keeps me moving forward with the project that way.

I stopped counting after putting about $25K or so into it. I really don't care what it's going to cost. As long as it drives and handles like I want it to when finished, it's worth whatever the final cost works out to be. My goal for the car was to be on par with a Viper power and handling wise but at about half the cost ($40K?) while still being wrapped in a better looking shell. ;)

God knows I lost so much time to be able to work on it while I was stationed in Puerto Rico. Now that I'm back stateside, I've got a chance to work on the car just about everyday here and I intend to make the most of it. [smilie=::
 
I know I have one of those ribbed gauge panels and I might have an extra light switch panel but I will have to look. I have a couple of dash assemblies in the wrecked 70 parts car and I will look the next time I get out to my dads place. Looking good there Paul :bravo:

Brett

Cool, let me know what you want for it if you have one you can part with.:bravo:
 
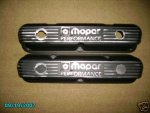
BAM! The gavel just dropped on the auction for a nice set of MP SB cast valve covers.:cool::giggedy:

I also found a 70 switch panel from another Mopar website (I know, I've been straying lately :shifty:) and I should have it some time next week.

I'm planning on gutting the wiring from the R/T/A this weekend and begining the rewiring fo the entire car. I'll have a few questions already I know just from looking under the dash the other day.:confused:
 

Attachments

  • MP Valve Covers.jpg
    MP Valve Covers.jpg
    22.8 KB · Views: 15
  • 70 switch panel.jpg
    70 switch panel.jpg
    178 KB · Views: 16
You should be proud.

Proud? I'd rather be finished and driving it! :bwuhaha:

Thanks for the kind words of encouragement though Jon (and the rest of youse Nuts):bravo:

Someday I'll get there. It just seems like a LOOOOOOONG way off right now.:rolleyes:
 

SiteLock

SiteLock
Back
Top