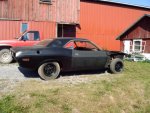
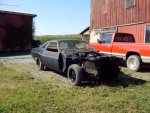
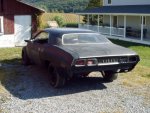
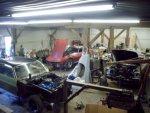
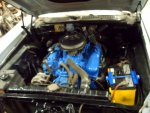
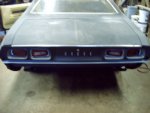
72 Challenger R/T/A

Feeling tired tonight so I'll let the pics do most of the talking...

I got the rest of the front latch pieces off when Mark came over to move the Chally back into the downstairs garage part of the barn. I hunted around till I found enough jackstands to get the Chally completely off the ground again.

I cleaned the and painted the rest of the hood latch parts. Looks much better in person than it did on the pics so just use your imagination. :p

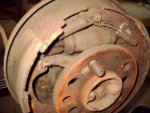
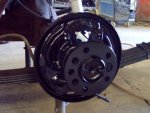
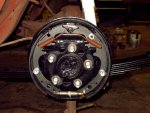
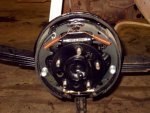
I then started getting the rear brakes apart to clean and rebuild them. Turning out nice so far. The parts for them are supposed to be in tomorrow.

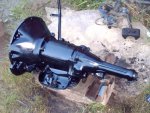
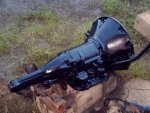
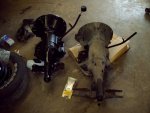
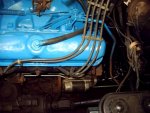
Next I disconnected everything connected to the tranny to get it ready to drop out. I busted a tranny line when the end twisted off while removing it.:doubt: Need to get another one of those tomorrow. The new tranny was clean but had already started to oxidize noticably after just one day. Sooo, I went ahead and sanded the outside fairly smooth and gave it a coat of gloss black.

Tune in tomorrow for the next episode...
 

Attachments

  • Rear brakes old.jpg
    Rear brakes old.jpg
    229.7 KB · Views: 27
  • rear brakes clean.jpg
    rear brakes clean.jpg
    197.5 KB · Views: 30
  • tranny cleaned and painted left side.jpg
    tranny cleaned and painted left side.jpg
    240.3 KB · Views: 32
  • tranny cleaned and painted right side.jpg
    tranny cleaned and painted right side.jpg
    233.4 KB · Views: 29
Not much worthy of posting tonight. I spent most of the day cleaning and painting small brake parts, chasing down more parts from the local auto store, helping Mark unload hay, etc...

It's much easier to get things done since Mark's letting me use a spare car to chase parts and stuff down. I'm still waiting on a tranny mount to come in tomorrow and my rear brake shoes to come in Monday. I already have the rotors and drums turned (as well as they can be anyway...) and the driver side front brake is already back together. I ran out of paint again today so I had to run to get some more to be able to finish the front pass side tomorrow. I have to wait till Monday before I can finish the rear brakes and then bleed the system.

The tranny is now only held in by 3 remaining bolts and is otherwise ready to get swapped out tomorrow. I picked up some new tranny lines this evening and I'll bend and trim them after all the trans stuff is bolted back on.

Sometime this weekend I'll have to get on to rebuilding the carb as well since I have the rebuild kit now and even a new brass float for it "just in case".

I only have a couple of (crappy) pics from todays efforts on the camera so I didn't upload them yet. I'll get more pics tomorrow and edit this post to add any applicable ones here later.

BTW: Thanks for peekin in A12. At least now I know I'm not just talking to myself. :p

EDIT: Best of the worst pics added.
 

Attachments

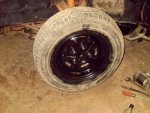
  • painted road wheels.jpg
    painted road wheels.jpg
    215.9 KB · Views: 24
  • hood latch parts new.jpg
    hood latch parts new.jpg
    231.2 KB · Views: 24
Last edited:
Sweet work.

I always thought that valve covers make an engine look awesome. I understand you have competing priorities, but was interested in what kind/model you'd slap on overtop that engine?

Just Curious,

V.

PS: It is coming along very nicely......how long ago did you start? I wish I could learn to do body work. ...............................so cool!
 
Valve covers on that 318? Whatever doesn't interfere with the operation of the rockers and doesn't leak... kinda like what's on there now.:D Really though I've always liked the cast aluminum M/T's or Mopar Performance ones. Preferrably done up in engine color and the tops of the fins and letters sanded back down to bare aluminum and then clear coated.

Mark's doing the welding on the body panels. I'm doing most of the cutting, trimming, drilling, shaping etc of the parts going on. Mechanical stuff is all me. Mark's a bodywork guy and doesn't like to do that stuff if he doesn't have to.

As far as how long I've been at it? I got the car(s) right before Christmas 2004. I didn't get to see the cars in person till Sep 05 and I worked on it for two weeks while I was there. Next trip was Apr 06 and I worked on it for a week then. After that was May 06 and one more week of work on the Chally. This time I got here on the 14th and will be heading back to PR on the 24th. Hopefully if the tranny swap and brake job goes well, I'll be able to drive it around the yard here before I leave.:dance:
 
gomopar440 said:
Hopefully if the tranny swap and brake job goes well, I'll be able to drive it around the yard here before I leave.:dance:

Stop by and give me a ride.;)
 
No insurance, no registration, no inspection... you can always stop by here to go for a spin in the yard if you want. :p
 
Last edited:
The day started out by running into town to pick up the polyurethane tranny mount. I was amazed to find that they had got it in as promised and that it was actually the right part!

I got the other front disk brake on the passenger side finished without any problems. Things can't really be going this well can they?

Today brought lots more bits and pieces that got painted as I came across them. Little by little things are going from rusty red to gloss or flat black. :rolleyes:

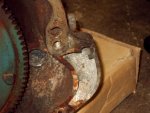
I pulled the old tranny down and immediately tossed out any notion of saving the case to keep it with the original 318. The top bolt hole for the starter was cracked all the way through to the outside and the inside had a big chunk of aluminum missing as well. Good thing I didn't plan on rebuilding it while I was here as I had originally thought of doing.

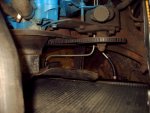
Mark helped me lift and align the new tranny into place. From there I started loosly mocking up everything on the driver side so I could make new tranny lines. I took my time and the lines both came out very nice. They look a lot better and straighter than the original ones that came out.

It's getting closer to being drivable!:vroom:
 

Attachments

  • trannys old and new.jpg
    trannys old and new.jpg
    193.4 KB · Views: 34
  • tranny broken starter mount.jpg
    tranny broken starter mount.jpg
    217.8 KB · Views: 36
  • tranny reinstalled driver side.jpg
    tranny reinstalled driver side.jpg
    212.6 KB · Views: 37
  • tranny new lines.jpg
    tranny new lines.jpg
    212.5 KB · Views: 33
Last edited:
Thank's Brett. I'm kinda supprised it's gotten this far with the (overall) limited amount of time I've had to work on the car over here.

I didn't start on the car till mid afternoon today. I started the day out by going to Church with Mark and then having lunch at his grandmothers place. It was kinda neat seing five generations of Mark's family all at a dinner table for Sunday lunch get together. I didn't mind taking a break from working on the car for a little while either. I can't seem to shake the sore and tired feeling since I've been going basically non-stop on the car since mid day Monday.

I picked up a shorty oil filter, oil, tranny filter/gasket kit and some tranny fluid at the auto parts store on the way back today. Hopefully the shorty oil filter will help when it comes time to run the exhaust pipes past it.

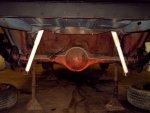
All the parts that were mocked up for making the lines had to come back out so I could get the dust cover on. I could have just bolted that stuff up one time but I had the painted parts still drying and just wanted to keep making progress of some kind. Either way, the tranny is completely bolted in tight now.

I had to take apart the rear (factory original?) U-joint on the driveshaft. I had to put pliers on it to get it to move at all. It's cleaned and greased now and works ok but it will need to be replaced as the damage inside the cups had already been done.

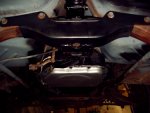
I couldn't take any pics worth a damn under the car. I couldn't hold the camera steady, couldn't focus or a little of both. It is looking lots better under there anyway. Take my word for it.:shifty: :toot: :p

EDIT: I gave it one more try and this pic was the best I could do...
 

Attachments

  • tranny reinstalled under pic.jpg
    tranny reinstalled under pic.jpg
    176.8 KB · Views: 40
Last edited:
I wasn't feeling too well today and had a hard time getting out of bed this morning. The car wasn't going to fix itself though so I made myself get up and get to work on it.

I started out by pulling the tranny pan to drain the remaining oil (not much) and replacing the filter, gasket and fluid with new stuff. I posted a pic of the cleaned up tranny pan on yesterday's post.

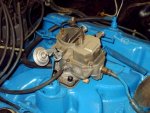
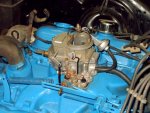
After that I started cleaning and rebuilding the 2bbl Carter carby. Pretty much straight forward here. Some passages were blocked but easily cleared out and rinsed with some carb cleaner spray cans. In case you're wondering, the total so far is about 14.5 emptied cans of carb cleaner on this trip alone.:eek: My hands feel like dry leaves right about now. Once the carb was all back together it was bolted back down and reconnected to everything.

My brake shoes finally arrived late this afternoon and I was able to get to work finishing the rear brakes. Since I had already had the driver side pieces painted and ready, that side got done fairly quickly. I had left the pass side assembled as a reference for reassembly. Now the driver side was my reference and I could tear the pass side down. Clean and paint, clean and paint, clean and paint... :rolleyes: Once everything was dry I got it all back together with only one minor hiccup. The pass side axle brake line fitting snapped off when I was removing the old wheel cylinder. That double flare kit came in handy once again and I was able to fab up a new line within a half an hour.

Well tomorrow may be the first time I get to actually drive the R/T/A under its own power if all goes well...:helpme: Still have to bleed the brakes, start the car, check the carb for leaks, check fluid levels, air up the front tires (again:doubt: ) and then see if it drives!:giggedy:
 

Attachments

  • carb rebuilt choke side.jpg
    carb rebuilt choke side.jpg
    219.5 KB · Views: 28
  • carb rebuilt throttle side.jpg
    carb rebuilt throttle side.jpg
    228.9 KB · Views: 29
  • rear brakes rebuilt driver side.jpg
    rear brakes rebuilt driver side.jpg
    207.8 KB · Views: 28
  • rear brakes rebuilt pass side.jpg
    rear brakes rebuilt pass side.jpg
    208.7 KB · Views: 27
  • rear brake axle lines replaced.jpg
    rear brake axle lines replaced.jpg
    197.5 KB · Views: 32
Sweetness!!! Have Mark take a few pics of you driving it..or atleast behind the wheel!!:giggedy: Making good progress this time around it seems!! :clap:
 
Hmmm... Now how did that get out there?:hmmm: :huh:


:dance: :giggedy: :nanna:

Yup, it's running and driving now! :vroom:

Before I could get to drive it today I had some more brake line problems with the main brake hard line going to the rear axle . It got a pinhole leak right at the first bend after it comes out of the bottom of the distribution block. Once again the double flare kit came to the rescue. A quick line replacement and we were able to finish bleeding the brakes.

There was a kink in the fuel line keeping fuel from getting to the carb. Once it was straightened out it started fine, no leaks and seems to work ok. Tranny fluid level was checked and I had to add about two quarts to get it up to spec. Tires all got set at 35 psi to even things out. Then we had to move some cars around to get the Chally out of the garage.

Before I pulled the car out, I took the opportunity to get this shot of what could have been any mid 70's garage. There's a 73 Vette, a 67 Mustang fastback and of course a 72 Challenger all being worked on. Cool site!:)
 

Attachments

  • short drive.jpg
    short drive.jpg
    232.5 KB · Views: 45
  • short drive 2.jpg
    short drive 2.jpg
    234.8 KB · Views: 40
  • short drive 3.jpg
    short drive 3.jpg
    230.4 KB · Views: 38
  • Muscle car garage trio.jpg
    Muscle car garage trio.jpg
    198.8 KB · Views: 45
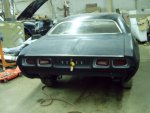
After dinner I went back to work on the Chally. First I fininshed cleaning and painting the pass side tail light assembly and reinstalled it. While I was back there I also adjusted the trunk latch to align and center the trunk lid. Then the trunk lock was reinstalled without any problems and it works smooth again.

Now the fun part begins...:shifty:

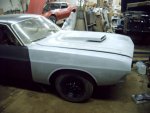
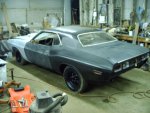
I started putting the fiberglass fenders and hood on. The pass side was first and was a bear to handle while trying to line it up to drill the mounting holes. After a while I was able to clamp it in place with some large c-clamp jaw type vise grips. After the fender was lined up and stablilized I drilled the fender mounting holes and secured the fender to the top of the inner fender.

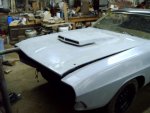
Next I laid the hood over the engine bay to check the alignment. It was very close as is so I got some bolts and mounted it to the hinges.

The driver side fender seems like it's going to need a good body mans finesse to get it to line up right. So, I just mounted it to the inner fender with one bolt for now and I'll get Mark's help line it up tomorrow.

It's really starting to look like a Challenger again.:giggedy: :dance: :clap:
 

Attachments

  • tail lights both finished.jpg
    tail lights both finished.jpg
    181.1 KB · Views: 33
  • front end in place.jpg
    front end in place.jpg
    181.2 KB · Views: 43
  • driver side view.jpg
    driver side view.jpg
    193.4 KB · Views: 37
  • TA hood on.jpg
    TA hood on.jpg
    178 KB · Views: 38
  • Engine compartment with fenders and hood on.jpg
    Engine compartment with fenders and hood on.jpg
    202.3 KB · Views: 42
Last edited:
Congrats!

Wow, look at him go!
Vroom Vroom Vroom.....waaaam....waaammmm.....waaaammmmm.....eeeeeeeeyyoooonnnnnnggg........eeeeeerrrrrrt.
:eek2:

 
SHOgirl said:
Wow, look at him go!
Vroom Vroom Vroom.....waaaam....waaammmm.....waaaammmmm.....eeeeeeeeyyoooonnnnnnggg........eeeeeerrrrrrt.
:eek2:

Naw, I wouldn't drive like that...:toot: [smilie=i: :shifty: :D

Anyways, I don't have much progress to speak of today. My back has been buggin me bad and I've had to up my dose of pain meds lately. Let's just say trying to work on a car while trippin is difficult to say the least. That and the back spasms that yank you right back to a painfull reality at any given moment are really NOT COOL.:( But I refused to just give up working on the car so I just went to work on some light weight projects.

At first I was working on getting the fenders drilled so they can be mounted properly. Unfortunately that's when I started having the back troubles so I didn't get too far on that. I did manage to get the bottom two holes drilled and bolted up on the driver side before moving on. I used some thick rectangular steel plates as body washers to spread the load over a larger area on the fiberglass.

I went upstairs and dug through the misc stuff for the car and I pulled out the Go-Wing spoiler to work on. I disassembled the pedastals and mounts and removed all the rust and old paint. Then they got a coat of grey primer to keep the rust from coming back.

Then from the trunk I pulled the filler panel that goes under the tail lights between the body and bumper. I started sanding it to get it down to bare steel but the thing had been coated with argent and had paint on top of that as well. The 80 grit sandpaper was wearing out faster than the paint and argent combo. My solution was to sacrifice my pocketknife blade and just scrape it all off first and then go back over it with the sandpaper afterwards. Now it was all cleaned up but I need to resharpen my pocketknife. Fair trade given the amount of time I saved doing it that way. It also got a coat of grey primer. When I tried to remount the filler panel most of the holes were wallerd out and the screws wouldn't tighten. My solution was to just redrill new holes right next to the old ones and use the original screws in those holes. Worked like a charm.

I didn't take any new pics today since there wasn't much to look at that was really different from before.:huh:

EDIT: I went back and got a pic of the filler panel.
 

Attachments

  • tail to bumper filler panel.jpg
    tail to bumper filler panel.jpg
    167.4 KB · Views: 26
Last edited:

SiteLock

SiteLock
Back
Top