72 Challenger R/T/A

Last time I was stationed there was 93 to 96. There wasn't much there back then. However I see a lot of new construction in the google satellite photos of the base now. Whether or not there's an auto shop on base...:huh: I have a bunch of tools of my own so as long as I have a garage I'll be fine there.

Keep in mind, I'm a machinist and I'm finally going back to work in a machine shop again. [smilie=i: Oh yes, I WILL be making mucho custom one of a kind parts for the Chally before I leave there!:giggedy: :giggedy: :giggedy:
 
I'm... blind... in Texas!

An El Paso hellhole,
Couldn't get high-er-er!
White lightning moonshine,
Tastes like fie-er-er!
I drank for free,
Til I couldn't see;
I fell on the floor what I said is:

[Chorus]
"I'm blind in Texas!"
The Lone Star is hot tonight.
I'm blind in Texas,
The cowboys have taken my eyes!

Hah!

Oooooh, drank Dallas whisky,
Lost my mi-hi-hi-hind!
And highballs in Houston,
Three for a di-i-i-me, yeah!

Everything starts to spin,
Loaded on gin,
I fell on the floor what I said is:

[Chorus]

San Antonio
And the west Texas town El Paso
Corpus Christi and Waco,
Yellow roses wild!
 
Either you're old enough that all you have is casettes, or you're young enough to think that Nirvana is good music.

One way or the other, never mind.
 
HaHa... saw them open up for Sabbath... cool show, but they weren't that good and Blackie was a 'tard.
 
Dr.Jass said:
Either you're old enough that all you have is casettes, or you're young enough to think that Nirvana is good music.

One way or the other, never mind.

Ummm, BLUE!:xl:
 
Allright, Let's get this train back on track now.

I'm always looking for ways to reduce and lower (CG wise) the overall weight of the Challenger AND get the car balanced out better front to rear. Ebodys have always had a reputation for being nose heavy so the more weight I take off the front of the car the closer I'll be able to get to meet both of those goals.

Obviously the fiberglass hood, fenders and front valance will help but what else can I do? There's already the aluminum heads and intake as well as the tubular headers on the engine which help to offset the weight of the bigger engine to come. The late model mini alternator and starter on the SB now will be kept for use on the BB.

One downside in the weight department is that I want to add a Classic Air A/C kit in the future. At least it uses modern light weight compressor which will get mounted down low, beneath the alternator with a Bouchillon bracket. I also plan on keeping the power steering and power brakes. Since I don't want to ditch those systems, my best bet is to keep looking for ways to reduce the overall system weights using smaller and lighter modern components. I'm thinking of using a 7" or 8" dual diaphram power booster to replace the wider single stage stock one. Weight wise it'll probably be a push there. However, the MC will get the heave-ho in favor of a modern aluminum one. On a side note, I really like this all-in-one distribution block and adjustable proportioning valve even though it is a bit pricey.

That leaves the Power Steering system...

I had originally started out looking at the Magnum Force Tubular K frame setup but after some research, it was deemed it not strong enough for use on a daily driven vehicle. It also retails for about $3500-4000 depending on options. Next I looked at the RMS AlterKation conversion. It was designed to hold up to regular use on the street and also give a major reduction in weight. The cost was much cheaper last year but now it's about the same price as the Magnumforce kit.

I had planned on saving up for one of the AlterKation kits in the future when I came across another much more economical alternative. There is a new rack and pinion kit made by a company called Unisteer. First thing I noticed is that it didn't replace the original K frame and that it was starting at about $1100 with free shipping to boot. It also doesn't replace the torsion bars, shocks, UCA's or LCA's. I can always get tubular UCA's later and I'll have already reinforced the LCA's and upgraded the torsion bars and shocks by the time I can get this kit. The other major plus is there will be less money wasted replacing already replaced new parts in the long run. The kit looked interesting on the website (which needs to be updated badly for this new Mopar specific stuff) so I gave them a call to see what was up. After talking to the Tech department for a while, I got the run down on this new kit. They have yet to publish an actual comparison of thedifference in weights of stock vs the kit parts, but I'd guestimate it will be at least 50% lighter overall than the stock system.

The kit replaces the stock (ie: HEAVY) original pump, hoses, steering gear box, steering shaft coupler, center link, pittman, idler arm, tie rods and ends. All that stuff comes out. In it's place, the first step is to attach the mount for the rack which uses existing bolt holes from the idler arm and steering gear box. The rack then gets bolted into the bracket and sinched down. Next the new smaller and lighter aluminum power steering pump and mounting bracket replaces the old parts. A fluid resiovior gets mounted remotely to the fenderwell. Then attach the u-joint to the steering shaft and connect it to the rack's input shaft. Next you connect the three braided stainless hoses to the pump, rack and resiovior. Lastly you need to reattach the fan belt, fill the resiorvior and bleed the system. Now you can center everything up as close as you can, tighten all the mounting bolts and get it to an alignment shop to dial it in properly.

BTW: They're going to have a customer's Cuda on display over at the Mopar Nats in Ohio this year so I'm hoping to get a good look at a kit actually installed on an E body in person while I'm there.
Check out the links above and let me know what you guys think about it.:bravo:
 
Last edited:
I got a brochure coming in the mail from them. I'll let you know how it looks in print. Maybe I can scan something if you want a look at it. I'm planning on taking LOTS of pictures at the Nats while I'm there too.:bravo:


No, NOT with the camera phone either.:doubt:
 
Last edited:
Well, here's a pic of the Nova kit to at least give you an idea of the basic kit contents. The Mopar specific brackets will be the biggest difference from the sound of it. The guy on the tech line said the bottom of the rack would be around or above the lower edge of the K frame so there should be no ground clearance isues with the new stuff.
 

Attachments

  • rack and pinion conversion kit.JPG
    rack and pinion conversion kit.JPG
    23.8 KB · Views: 23
I asked and they are reluctant to do non-power units for Mopars. They are afraid of the liability related to someone using one in a racing environment and causing damage due to repeated wheelstanding and the resultant slam when the nose comes back down. I told them they should just put a warning that they would not be held liable for failure of any component used for any kind of racing. Most aftermarket companies do that anyway. He said he would mention it to his boss so maybe it could happen in the future.

BTW: They already have some Chebby kits that are manual however. I guess they don't think Chebby's can get it up...:bwuhaha:
 
Next up is Round 4 of the long distance R/T/A Marathon Project. I'm flying out to NJ to meet up with the 340 Bros on the 9th. Then we're leaving early on the 10th to head for the Mopar Nats in Ohio. Not sure what time we'll arrive but I'm sure it'll be late. Saturday the 12th is the Nuts Nats over at Jon's place then back to the Nats on Sunday the 13th. Monday the 14th we head back east from Ohio and I'll get dropped off over at Mark's place. I'll be staying there till the 24th when I fly back to PR. Any Moparnuts that want to stop by are welcome between 15-23 Aug. PM me for directions If you want to stop by.

While I'm there, I'm going to try to:
1. get the tranny swapped out
2. rebuild the entire brake system
3. install the spring relocation kit, subframe connectors and torque boxes
4. hang the fenders and hood
5. finish the exterior bodywork and shoot it with some primer/sealer
6. double check and/or fix the wiring
7. re-dye the interior panels medium to light grey
8. install the carpet, seats and the rest of the interior

I may not get to everything, but I'll be working down the list in this order anyway.
 
Short Update:

After being on the road for over 1200 miles (not including the flight) since Thursday I'm understandably tired. The Mopar Nats was cool (the Nuts Nats even more so:Fresh Meds: ) but I'm glad it's over now. I'm keeping this post short so I can get to sleep before we head off early tomorrow on another 5-6 hr road trip to Mark's place in PA. I was able to get a few parts from the Mopar Nats Friday and Sunday.

Used swap meet stuff:
lower plastic ribbed (1970) dash pieces on both sides of the steering column. $40
A/C/heat switch control panel to fit the 70 panel $10
E-body aluminum sill covers (driver quality) $10/pr

New stuff from the vendor midway:
2 bolt disk brake master cylinder adapter $35 (Doctor Diff)
2 bolt aluminum disk brake master cylinder $50 (Doctor Diff)
adjustable brake push rod $33 (Mancini)

I still need a tranny and converter but I plan to look around at the JY near Mark's place so I won't have to pay to get one shipped$$$.

BTW: The R/P steering kit guys weren't at the Nats as far as I can tell. I'm not sure why not since they told me they'd be there.
 
You're lucky you got some parts for a good price at the swap meet. The year I was there, I didn't find anything that wasn't overpriced, junk or both.
 
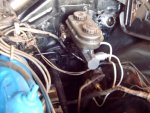
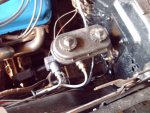
We got to Mark's place arount 3pm today and I went right to work. Don and Greg took off to get back to NJ and Mark headed out to the field to bale some hay. I went ahead and got to work on the brakes. I started by disconnecting the brake lines and vacuum hose. Next was the master cylinder itself. Pretty simle job there with just the four bolts holding it in place. The brake booster was a bit more difficult to remove though. All the bolts were only accessible from the inside and they were all rusted solid. :( I had to remove the front seat in order to get access to all the bolts. It was a royal pain to get it all out but everything finally got done. Next I had to figure out how to mount the new MC adapter plate since the hole in the firewall for the brake booster was a lot bigger than the adapter plate. My solution was to make a sheet metal plate to cover the hole and then mount the adapter to that. I found some scrap metal lying around and cut, drilled and hole sawed it till it wasjust right. I next had to find some nuts, bolts and washers to geteverything mounted. Mark's got tons of spare stuff like that around but it's a chore digging through all the mixed assortment of coffee cans full of misc stuff. After a while I had enough hardware to mount everything up. The rest of the installation was fairly simple. After the cover plate, adapter and MC were installed I removed the lines to the splitter block. I'll get some replacement lines for those tomorrow when we head out to look for a tranny at the JY. I'll ger pics of the MC tomorrow and edit the post to add them. For now I'm beat and am gonna turn in now.

Nite nite everyone!

EDIT: Pics added
 

Attachments

  • Brake master cylinder and lines new.jpg
    Brake master cylinder and lines new.jpg
    209.7 KB · Views: 33
  • Brake master cylinder new.jpg
    Brake master cylinder new.jpg
    216.2 KB · Views: 31
Last edited:
I spent almost the whole day pulling a 904 from a Chrysler M body at the JY today. Let's just say it was a messy PITA of an ordeal, but I finally got it out.

Lesson learned: If you ever have to pull a JY trans, make sure all the fluids are drained first...:doubt:

After I got back I started cleaning up the tranny till I ran out of carb cleaner and daylight. I still need to get new brake lines to the replace the ones from the MC to the distribution block. After a much needed shower and dinner (breakfast?) I headed out to get some supplies for tomorrow. I picked up the brake lines and fittings to connect the MC, brake fluid, 8 cans of carb cleaner and some spray paint.

For the most part I was too filthy to even think of handling a camera so no pics today either. I'll add pics later.:rolleyes:
 
I started tackling lots of little details today.

First I finished cleaning the top outside of the 904. Still need to clean the bottom of it off after I remove the M body crossmember and exhaust mount.

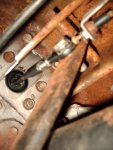
After that I tried to bolt in the new adjustable brake push rod. Let's just say there was nowhere near enough adjustability and the threads on it sucked big time. I ended up running a tap and die over the existing threads till they wouldn't bind. That was ok till I tried to bolt it up. Still too long so I pulled it back out and rethreaded it as far as I could and then cut about 3/4" off the end of the threads to shorten it up. Now I had the legnth right but the pivot bolt wouldn't go through the pushrod. Soooo out it comes again and I had to drill the pushrod out to 5/8" so the bolt would finally pass through it. The last bit was I had to shim the bolt to center the pushrod in front of the brake switch. More digging through coffee cans and I was able to piece together something workable. Finally I was able to get it bolted in, adjusted and centered.

Now that the brake pedal was connected to the MC I could bench bleed it. First I cleaned and bent the old lines to make them dump back into the MC. With Mark working the pedal and me watching for bubbles we had it bled within a minute. Then I bent the new lines to connect the MC to the distribution block. The 12" lines I got were not long enough to make loops in them like the old lines. These will work for now and will be made correctly soon. For now I just wanted to close the brake system back up.

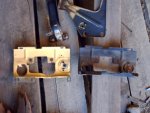
I started to take the front latch plate and support apart to put the new ones on but I got pulled away for something else to help Mark and hadn't got back to it. I'll probably finish it up tomorrow. I'll need some vise grips to straighten it out a bit so I can get to some of the bolts.

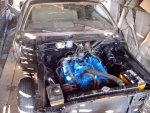
While I was working in the engine compartment I decided to clean it up a bit. I still had some paint left over from the 512 so after a bit of wire brushing, scraping and a carb cleaner washdown I gave the 318 a quick rattle can resto. The firewall behind the MC was a lot more accessable now that the power booster is gone so I hit that as well. I had taken the carb off to get a rebuild kit for it so I picked up some new vaccum hoses, a 90' PCV valve and a chrome breather for it while I was out. The vaccum nipple for the brake booster was replaced with a plain plug to get rid of some more clutter on top of the engine.

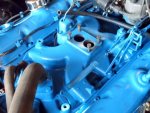
After I sprayed the color down I noticed something weird about the intake. It appears to be a flat single plane intake. I've never seen a 2bbl intake like that before. Anyone ever had one of these intakes? How do they run on a mostly stock 318?

Lastly I mad a new brake line on the rear axle from the T-block to the driver side wheel cylinder. It went a lot better than the front MC lines since I got a double flaring tool kit when I went to the parts store and just bot a line that was longer than what I needed since they never seem to have the exact size I need.

I couldnt get pics of the rear brake line since the camera batteries went dead on me after only a few pics. I went to wally world and got some rechargables with a charger so I'll be ready for tomorrow.
 

Attachments

  • adjustable brake push rod.jpg
    adjustable brake push rod.jpg
    237.4 KB · Views: 34
  • hood latch parts comparison.jpg
    hood latch parts comparison.jpg
    196.7 KB · Views: 34
  • Hood latch support bent.jpg
    Hood latch support bent.jpg
    200.3 KB · Views: 35
  • Engine compartment cleaned up.jpg
    Engine compartment cleaned up.jpg
    234.4 KB · Views: 45
  • single plane 2bbl intake.jpg
    single plane 2bbl intake.jpg
    213.1 KB · Views: 36
Last edited:

SiteLock

SiteLock
Back
Top