What are you working on?

I also see a few of the pictures are huge! I didn't do anything different than the rest.

Most of the pics you post are huge. Just short of 4MB.

There are a few that were down in the couple of hundred KB range - the pics of the frame on the trailer for example.

No biggy. They're pretty cool pics.

For those viewing the thread, it will take some time to load those big pics depending on the speed of your Internet connection.
But, we;come to the Internet... Right?
 
I guess I'll need to make some adjustments then. I had no idea they were so big.

I have been working on the Oakland on and off for the last few weeks but nothing picture worthy. I've been stripping paint off of small parts, I got them ready for paint and hung them last night. I hope I can get the garage warm enough to paint tomorrow (Friday) night after work. It's been cold as hell here the last few nights. I had -25 (no wind chill in that figure) this morning. The cold doesn't look to be letting up any time soon either so time will tell.
 
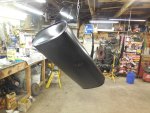
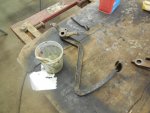
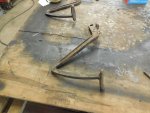
I got the garage warm enough to do some priming and painting Friday night. I painted the fuel tank, spring leaves and shackle bars. I also reassembled the springs and painted the assembles. I took the springs apart before I painted them because I wanted to be sure they had rust protection and I wanted to be sure I had total black coverage. I reassembled them between coats of paint, hung them and sprayed them again.

DSCN1279 resize.JPGDSCN1281resize.JPG
 
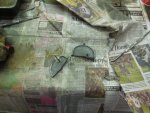
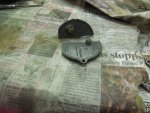
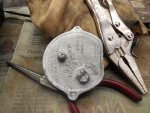
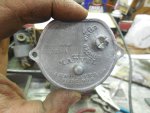
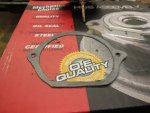
Saturday I spent some time on the carburetor. The float bowl cover was broken. You cant go buy parts for these cars so I had one cast. I had to drill the hole for the metering rod and the holes for the mounting screws. After I had that done I put the metering rod in. I needed a float bowl gasket and once again I had to make what I can't get. I grabbed some gasket material, a sharpie, and a razor blade. After that was done I assembled the carburetor and put it in a ziploc bag until I'm ready for it.

DSCN1292 resize.JPGDSCN1293 resize.JPGDSCN1294 resize.JPGDSCN1297 resize.JPGDSCN1299 resize.JPGDSCN1300 resize.JPGDSCN1301 resize.JPG
 
i would be VERY hard pressed to not media blast that replacement bowl cover and then age match it in some hot oil bath or something..just to try and make it look all the more original...its just toooooo shiny
 
i would be VERY hard pressed to not media blast that replacement bowl cover and then age match it in some hot oil bath or something..just to try and make it look all the more original...its just toooooo shiny

That's a good idea. I just might do that.
 
I bead blasted the rest of the carb. I'm thinking blasting the new cover in my glass bead cabinet would pretty much be all it would take.

Damn you! I thought I was done with the carb. :D
 
well eventual you woulda saw it sticking out like a sore thumb and done it anyway...atleast your doing it before youve got it on the engine
 
The guys name is Rand. He can be contacted a. [TABLE="class: ajC"]
[TR="class: ajv"]
[TD="class: gG, colspan: 2"]
[/TD]
[TD="class: gL, colspan: 2"]broadstreetltd@msn.com[/TD]
[/TR]
[/TABLE]

He is a man of very few words. :D

Total cost for that carb cover was $60.00 including shipping.
 
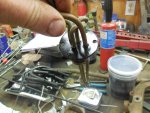
I cleaned up and painted a few more parts this week. I cleaned the tie rod & tie rod hardware, the brake rods & clevis assemblies & the gas tank straps, the U-bolts & the gas tank fuel sending unit . I also got the rear diff cover painted up. Now I need to get the frame back in the garage and start assembling the chassis.

I also started stripping the paint off of the brake and clutch peddles.

The car was listed as having the restoration 70% done. All the guy did was take it apart and paint over the rust, dirt & grease. You can see that in the pictures of the peddles. The nice thing is, paint stripper cuts through whatever he used in about 30 seconds flat. After I get the rest of the paint off of the peddles I'll clean them up in my blast cabinet.

DSCN1302 resize.JPGDSCN1305 resize.JPGDSCN1306 resize.JPGDSCN1308 resize.JPGDSCN1311 resize.JPGDSCN1310 resize.JPG
 
It's been a long winter... and it's still going on.
Haven't set foot in the garage in a month - too cold in there to do anything anyway, but I do like to visit my tools once in a while. :(

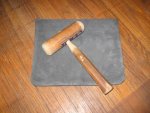
My bossing mallet and shot bag ended up in someone else's possession a few years ago so it was time for a some new.
The old mallet was plastic and didn't have much weight behind it. It worked but...
Chopped up an old baseball bat, roughed it out with my mini grinder, balanced it and bored the handle hole. The original handle to my cross pein hammer was still in the drawer (at $14 apiece, you don't throw them away unless they're toast), so I whittled it to fit and wedged it in. Nicely balanced and with some weight, it should work pretty good.
Got another one with a smaller diameter waiting for it's handle to be fitted.

The shot bag I sewed up with some heavy leather. A little bigger than my old one it should be easier to keep the steel in place.
 

Attachments

  • mallet and bag.jpg
    mallet and bag.jpg
    99.2 KB · Views: 25
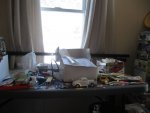
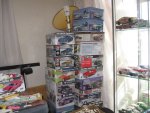
My inside work space... and what I do when there's nothing to do.

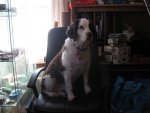
And of course, every work space needs a Lola Helper. :)
 

Attachments

  • model bench.jpg
    model bench.jpg
    60.3 KB · Views: 24
  • model stack.jpg
    model stack.jpg
    99.6 KB · Views: 24
  • lola helper.jpg
    lola helper.jpg
    59.3 KB · Views: 23
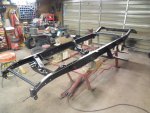
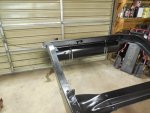
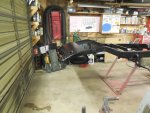
After work tonight I plowed the 3 or so inches of snow we got yesterday and then A buddy stopped by and helped me carry the frame from the enclosed car trailer I've had it stored in while I was cleaning and painting parts and set it back on the hoist. It's time to start assembling the chassis. I'm getting excited.

DSCN1315 frame 1 resize.JPGDSCN1317 frame 2 resize.JPG
 
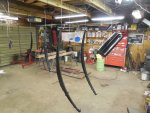
Got this hay rake tucked into the shop to modify the crappy engineers design to make a better stronger rake wheel.
I took the 3/16 plate and power tapped all the holes to bolt the teeth to the hub. Took 15 min per plate to tap all the holes. and i had to do 8 plates with 26 holes.
We bought the rake for the hydraulic fold and hydraulic up and down. Needed to weld on a better hitch and jack. (crappy engineering)
The wheels were breaking a lot of teeth and the old design was a b*#$ to change a tooth. Made new rings as well.
When a tooth breaks it gets lost in the field and either the baler or the forage harvester comes along and knives do not like hitting blunt objects.


This is a bigger one in action
sitrex-magnum-rake-2.jpg


Dartie has been kicked out of the shop for the winter months, since i am waiting for engine to return
 
It's been a long winter... and it's still going on.
Haven't set foot in the garage in a month - too cold in there to do anything anyway, but I do like to visit my tools once in a while. :(

My bossing mallet and shot bag ended up in someone else's possession a few years ago so it was time for a some new.
The old mallet was plastic and didn't have much weight behind it. It worked but...
Chopped up an old baseball bat, roughed it out with my mini grinder, balanced it and bored the handle hole. The original handle to my cross pein hammer was still in the drawer (at $14 apiece, you don't throw them away unless they're toast), so I whittled it to fit and wedged it in. Nicely balanced and with some weight, it should work pretty good.
Got another one with a smaller diameter waiting for it's handle to be fitted.

The shot bag I sewed up with some heavy leather. A little bigger than my old one it should be easier to keep the steel in place.

That looks very nice...I like it! What did you fill the bag with?
 
I used to use steel shot but the last time I filled up the old shot bag i used sand blasting sand... worked well, better than steel shot and cheaper to boot.
 
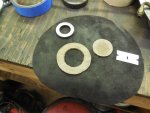
Last night I made a gasket for the fuel tank sending unit and I installed the sender in the tank then the tank in the frame.

Can you believe we found a NOS fuel sender for this old girl?

DSCN1319 resize.JPGDSCN1318 resize.JPGDSCN1321 resize.JPGDSCN1322 resize.JPGDSCN1323 resize.JPGDSCN1325 resize.JPGDSCN1326 resize.JPGDSCN1327 resize.JPGDSCN1328 resize.JPG
 
You found an NOS sender for a Jurassic Oakland but I can't find one for a 1960 Valiant. :(
 

SiteLock

SiteLock
Back
Top