Signet-ficant Other

I hear you about customer service or the lack thereof. I ordered a boat bow and cabin cover for my boat, the supplier did not have the pattern for my boat so requested that I send him the old cover to make the new one with. I sent him the old cover and a couple weeks later received the new covers. As they don't pre-install the dome snaps to insure proper location to the boat snaps, I followed the instructions as to installing the new cover. I did the bow cover first only to find that it was too short to fit properly. I moved on to the cabin cover only to find that the cover was too short across the windshield, the beemi cover cutouts were out of place by 3", the back was not wide enough or long enough to fit properly. I sent him photos and he got back with a request for better pictures so I sent him videos of the whole cover on the boat pointing out the discrepancies of the fit and told him that if he wanted to see it in person that I would be at a campground within half an hour of his location for a week and a half. He was a no show and has not gotten back to me by e-mail either. I guess I will have to go to file a small claims court claim if he doesn't respond to me this week. All this from his peoples failure to use the old fitting canvass to use as a pattern and not doing it right. His failure is lack of customer service and satisfaction.

To say I'm pissed is an understatement.
 
To say I'm pissed is an understatement.
I can definitely understand that. After all that, I assume you don't even have a pattern (the old one) anymore. I'm sure he thought, "I'll see what's happening in the photos/video, correct him, and on with my day," then realized that wasn't gonna happen upon seeing them. The other 99% of the time, that's probably been the case. Well, this time it isn't and he needs to step up to the plate.

I had a similar problem with a tonneau cover from Summit Racing in 2017. It did not fit, period. It was not an installation error. The manufacturer didn't believe it, and Summit argued with me. The customer didn't want another one because of the error. Summit, whose customer service had been phenomenal up until that point, would do nothing for me. Between work and my own projects, I did thousands of dollars of business per year with Summit to that point. I haven't ordered from them since.

I imagine I'm going to have to call them tomorrow and talk to someone other than whom I've dealt with until now. If they can't get 'em to me I'll have to order a "roll your own" set from Mancini or similar. I can't wait forever; summer's halfway gone.
 
I tripped and fell in that garage once. Thank God there was a bunch of tools and cast iron car parts to break my fall. :D. I had the biggest "old Lady" style purple bruise in my arm pit and into my rib cage! It was awesome!
 
I finally got a ship notification on the pushrods about 10 minutes ago.

Looking at the hit to my bank account, the pushrods set me back around $70 more than what their site said, based on the rest of my order and assuming shipping of about $20. That puts them smack in the middle of the Isky and Crower equivalents price-wise. It's just another thing about which I'm not happy at the moment, but that being said I may have misinterpreted what I read. No matter now, they're on the way.

I neglected to mention that I had spoken to someone about offset-drilling a set of rocker shafts, but they're no longer making them. Apparently they have approximately a face cord of them stacked in the warehouse so they're not set up for 'em at the moment. That's OK, because I finished the offsets to both of the Sealed Power shafts over the weekend. Boredom and getting in a hurry left me with a couple of less-than-desirable results, but they're still a huge improvement over my originals. Also, with the plugs in them there's less internal oil capacity, which should help get the shafts and arms up to pressure just a bit more quickly. For the record, the shaft modifications may be the most tedious car-related thing I've ever done. It rates right up there with port-matching those heat-treated Kevlar-composite intake gaskets. But done it is, so after some additional oiling holes are drilled and a little cleanup work I'll be ready for reassembly.

I've decided to abort attempting to replicate factory-style banana grooves for the moment. I had some ideas that I'm sure would make the desired shape, but none would leave a particularly clean groove. A rough edge leads to cracks, something entirely possible with the gorilla valve springs. Ideally I'd use a large-diameter, fine stone in my drill press. Since I don't have such a stone--and I'm not willing to spend any more money on this after seeing the hit to my checking--it's something I'll potentially explore at a later time for another project.

Regardless of track results (about which I've become increasingly pessimistic), the engine's going to be domesticated after all this. It'll probably get normal W2s, a less-horrific cam (probably solid flat-tappet), production-style oil pan, etc. Whether it lands back in that particular engine bay or I sell the car remains undecided.
 
There was a box on my porch after work today.

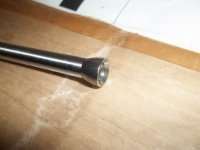
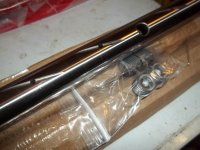
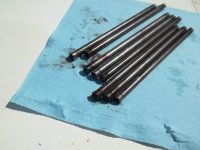
OK, in all fairness and honesty, these are the most beautiful pushrods I've ever seen, period, and I spent a fair bit of time around Pro Stock Truck engines and Super Stock Hemis at my old job. Damn.

100_3881.JPG

100_3880.JPG


The rocker shafts are the best aftermarket ones I've seen, but still not quite at the level of the factory T/A or old DC/MP W2 offerings. These rank behind those a little, but are actually much better than the Harland Sharp parts. If you're running ductile-iron or non-needle-fulcrum aftermarket rollers, these are high on my recommended list.

100_3878.JPG

100_3879.JPG

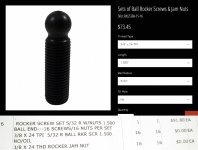
The adjusters are, well, adjusters. Nothing earth-shaking there other than being charged $18.35 more than the price listed on the website.

PriceDiff.jpg


That will generate an e-mail, and I'll also mention that the $27 shipping was a bit exorbitant, considering "jackass off the street" UPS shipping would be $17.70 and I'm sure they have a UPS account (usually 20%-25% cheaper).

Lesson learned, I guess... but at least I'm back in business.
 
While I still have the parts I need to move forward, things are a bit worse than I first thought.

During disassembly of the rockers I found I've got six burned adjusters just on the driver's side with corresponding pushrod damage. I planned on changing everything anyhow, but was considering running the shafts as they are now. After seeing those adjusters, I definitely need to further modify the oiling strategy.

Strange as it sounds, it almost seems like the adjusters are running out of travel, i.e. they're hitting the edge of the pushrod cup. Almost, but I'm not quite sure. I'll have a look-see while I'm setting lash and see how the geometry looks... again. I'm sure I did this once already and it was OK, but the wear's a little strange on two the truly-fried adjusters.

I'm finally putting my Harbor Fraud ultrasonic parts cleaner to use. So far, I'm pretty impressed with the results even without the heater, but I'm sure part of that is the solvent I'm using. More on that later.
 
I'm finally putting my Harbor Fraud ultrasonic parts cleaner to use. So far, I'm pretty impressed with the results even without the heater, but I'm sure part of that is the solvent I'm using. More on that later.

We'll call the results mixed. At best. Does the ultrasonic cleaner work? Hell yes. It's quite an effective method of cleaning small, detailed items. Does the solvent I chose violently attack aluminum? You bet your ass it does.

The toilet is faster, but if you're looking for creative ways to throw away $500, the wrong solvent in a parts cleaner can lighten your wallet by that amount in about eight minutes. Pics to follow after I've fully neutralized the solvent.

WANTED: Eight Mopar Performance W2 rocker arms, two left intake, two right intake, and four exhaust. Have cash.
 
It do.

But, it's all on me. I should've known better. In fact, I think I was aware that CRC cautioned use of that product with aluminum, but I was all gung-ho and just went for it.

I actually think they can be saved with some glass bead or maybe walnut shell lovin'. Most of the rollers still roll smoothly. For the moment, though, I'm going to have to break into the stash. This does not particularly amuse me, as I'm not crazy about the idea of damaging or destroying new or nearly-new rockers. Gotta love my confidence level regarding this engine, huh? 😁

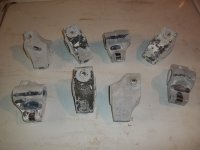
This is what came out of the ultrasonic bath, after neutralizing the CRC stuff with hot water (damned right I put 'em in the dishwasher!). That white stuff is not soap residue, it's aluminum oxide.

100_3927.JPG
 
This is what $500 worth of rockers being destroyed looks like:

100_3901.JPG


Despite the setback with the rocker arms, I did make considerable forward progress today. The shafts are 100% finished other than replacing the end plugs, which I did attempt but NAPA and their attached hardware store did not have them.

With the modified hydraulic shaft on the left and the OE T/A piece on the right, the extra oiling holes are evident, as are the banana grooves I'm not attempting to duplicate. The grooved holes are the located in the same place as the ones in the hydraulic shaft--check out how much bigger the "hydraulic" holes are. The non-grooved holes on the T/A shaft are the pushrod oilers:

100_3911.JPG


Pushrod oiling is important!

100_3904.JPG


All six of the smote adjusters from the driver's side of the engine:

100_3903.JPG


Things were not so bonny with the pushrods, either. If you're looking at the stuff in person, you can nearly figure out which adjuster came from which pushrod just by wear and color. Oy vey.

100_3915.JPG


On to the rocker shafts...

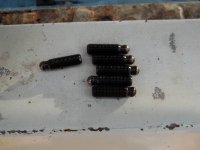
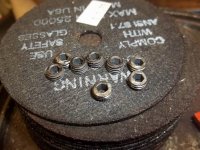
The first order of business was to reduce the size of the main oiling holes to the size in the T/A shafts. That shouldn't be too tough. The existing hole was exactly the right size for a 12-24 machine thread. I have that tap, so I strolled to the local hardware store looking for 12-24 brass set screws. Not only do they not have any brass set screws, they had no 12-24 set screws in any material. Desperate to maintain progress, I grabbed 1/4"-28 x 1/4" long steel ones, knowing they'd be far less fun to drill. The attached parts store didn't have core plugs the right size, so I knew I was ultimately dead in the water anyhow but I may as well keep going.

I came home and tapped the existing holes on the shafts:

100_3919.JPG


'Twas about that time that I realized the set screws I'd bought were far too long (not that they had anything shorter). Now, realistically that shouldn't create a huge issue since there's still plenty of room inside for oil to find its way in there. Still, not wanting to create any kind of obstruction I decided to grind them down after drilling my new orifices. I was not looking forward to that process. How the hell do you hold a 1/4"-long set screw while grinding it to half length?!

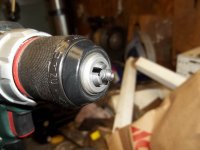
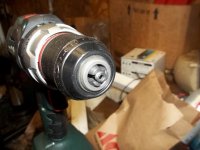
Steel set screws can neither be drilled easily nor reasoned with. I tried several bits--all new ones--and could get nowhere... not even a single chip. Damn. However, my method of drilling set screws gave me an idea in terms of grinding: What if I chucked them in the drill, then ran the drill while holding the screw to the grinding wheel? Hmmm... at least I could get the shortening part handled.

100_3921.JPG


Well, I got a bit too exuberant against the grinding wheel, and totally by accident I solved the drilling issue. I ground it so far that I exposed the hex from the far side. Serendipity!

100_3923.JPG


Truth be told, I wanted a slightly-smaller orifice, but beggars can't be choosers. Also, the flat sides decrease the area of the opening very close to my desired size. I quickly cranked out seven more for the shaft sitting in the vise:

100_3924.JPG


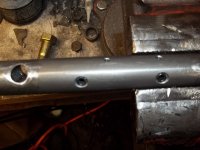
A wee bit of the ol' blue stuff (Loctite) and I was back in business! I countersunk all the holes to remove any burs prior to threading. That's as close as I'll get to banana grooves here. Also, you've probably noticed that the second row of oil holes are already drilled in this photo; the camera was in the house during that process. It was not a fun procedure, though. I've walked my dog shorter distances than my drill bits wanted to deflect. Anyhow, if you scroll back up to the picture of the T/A shaft, you'll see the difference in offset in the oiling holes required by the W2 intake rockers.

100_3920.JPG


I went back and countersunk the pushrod oilers then called it a day. I'm four plugs from screwing this sucker back together. I'm not sure when that'll happen, since it's supposed to start raining right around the time I get off work tomorrow. I might make a little progress Tuesday before dark but I doubt I'll finish it, and Wednesday looks to be rainy in the evening again.

Anyhow, they're far from perfect but perfect from afar. They're as good as I could get 'em with the equipment on hand. All of this could've been accomplished in a couple of hours on a mill rather than taking days in my shitty drill press but alas, I have neither a mill nor easy access to one. A lathe would've been ideal for cleaning up the plug welds as opposed to my bench grinder, too. You piss with the cock you've got.
The "WHOOPS!" is an area where I drilled the oiler in the wrong spot. I just welded it up, ground away the excess, and tried again.

100_3925.JPG


That's it for now. Stay tuned to see what else I can fuck up catastrophically in the near future!
 
Wow! Those are fucketed real nice! Damn!
Fucketed? 🤨 By the man from Natucketed? 😁

As I said, I'm pretty sure they can be saved. They won't be pretty, though. Regardless, that's time I don't have at the moment--summer's getting away from us--so I'll use some from inventory and worry aboot those later.

Then again, if the weather doesn't cooperate that'll give me some time to waste on 'em.
 
hell you could probably just use a worn down stacked set of drill polishing wheels to clean just the inside of the rockers in short order

the solution i tend to use in my cleaner is a dilution of pinsol...works AMAZING on bike carbs n stuff, and so long as you dont leave stuff in too long the amount of dilution doesnt mater, ...too high of mix and youll strip the finish off aluminum...simple green dilution works good too with neer zero chance of ripping the coating off a carb..it can still do it it just takes a full 24hours at neer full concentrate
 
Cooperative weather, parts in hand... time to make some progress! Or not.

The plugs I bought for the rocker shafts are just a hair too small. They install a bit too easily and it's likely the oil pressure would have little problem uninstalling them just as quickly. I was also disappointed to find the NOS Mopar Performance adjusters I'd purchased have the smaller 1/8" hex drive. I'm not a fan. On the "positives" forefront, only one hole on the first shaft I tried needed light massaging with the rasp. The rest fit well, which is saying something considering my garbage drill press and, er, questionable methods. The oil holes look like they should do the job.

Instead of spending an hour or more digging in the basement for replacement rockers, I grabbed what was close: Four intakes that were ground for valvespring clearance but were never run and four NOS Crane Gold exhausts. I'll probably run the rest of that "set" on the other side too, rather than spend hours cleaning the ground iron off the ones I removed. That iron dust is incredibly fine and some of it likely found its way into the rollers. It's not a concern with new parts.

Any worry about the potential demolition of impossible-to-find, brand-new arms is offset by the fact that they are new, and hence very clean, and any problems I find are not pre-existing. Additionally, there's the fact that ultimately I have no other plans for them. Crane Gold rocker arms (and therefore the MP blue arms Crane made) are notorious for not holding adjustment well long-term. Anything I build for street use (like the Imperial engine) will get the can't-kill-'em ductile-iron parts that hold adjustment forever. If I build another goofball race engine or even further work this one, I've got Harland Sharp and T&D rockers up the wazoo--two full sets of each, plus a bunch of spare Sharps. Should these heads survive this experiment, I'll likely have them rebuilt with the correct-length valves (assuming I can find another set of exhausts). Doing that in the first place would have solved all my valvetrain issues three years ago. Hindsight's a bitch.

I'm so close to $8,000 that the comma in that number is tickling my scalp.
 
I haven't worked on the car since injuring myself on Friday by scissoring off part of my right ring finger whlie installing an arm on one of my shafts. Saturday I took an early-morning jaunt to south WI to check out the Elkhorn swap meet, which consumed less than 3 hours of my time to go through essentially twice. I guess it was nice to get out of town for the day, but it still feels like wasted time. Spending about 9 hours in a lifted '08 Ram Mega Cab with mud tires on it (and stock front control arms; it's a geometry thing) really wears on a guy, so Sunday I had exactly zero motivation.

I thought to go out and work on it tonight, but then a seller on eBay accepted my offer on a set of NOS W2 offset rocker shafts. No, they're not offset far enough (they're only .100") but I've never experimented with exactly-right shafts on this combo, either. I have a set of NOS .100" offset stands (in mid-'70s DC packaging!), so rather than go out and potentially destroy something, it seemed prudent to wait and try a complete MP setup with all-new parts. I'm not likely to break anything by manually turning the engine over with the .100" offset setup to check the rocker tip:valve relationship at max lift, although one shouldn't underestimate my ability to break things that shouldn't.

The Browns (UPS) tell me I should see the shafts on Monday, so I'm holding off further engine work until then.
 
I took an early-morning jaunt to south WI to check out the Elkhorn swap meet, which consumed less than 3 hours of my time to go through essentially twice. I guess it was nice to get out of town for the day, but it still feels like wasted time.
Typical Elkhorn. 500 or more show cars and parts for every chevy ever built in 1 acre of land. The only saving grace is all the trees for shade.
 
Ever get so caught up in one aspect of a project you completely forget the obvious? I got my new shafts as expected, and of course they're a thing of beauty. As I was fondling them in my office, it occurred to me: The offset is in the wrong freakin' direction. The offset valvetrains were always for longer valves, which necessitated moving the rockers away a bit so the tips would align. The new shafts actually exacerbate the problem. "Just install 'em backward!" I hear the crowd shout in unison. I considered it until I realized that all those W2/W5-specific pushrod and valve-tip oiling holes will end up in the wrong place, i.e. I'll quickly burn up another $300+ set of adjusters and pushrods.

So I'm back to the drawing board here. Well, OK, I'm not that far back, but I'm no better off than I was prior to ordering the rocker shafts. I'm still eyeballing the sketchy shafts I cobble-fucked in the garage as my only option. They do not inspire confidence, and as funny as they are (and yes, they might--and probably will--work, at least temporarily) odds are at least even that I'll trash a bunch of rare, nearly-irreplaceable NOS parts based on crossed fingers and half-assed shafts. All this in the name of a long-evaporated budget and 20/20 hindsight. Yes, I have more W2 rockers than I do IQ points, but that doesn't make either item particularly expendible.

So I'm seriously reconsidering this engine at the moment. Obviously, it's been a ton of work to get where I am now, which is "so frustrated I can't bring myself to work on it" and no progress in a couple of weeks. That needs to change, and soon. It needs to at least get itself in the trailer for the winter, which will be here all too quickly. What I have done a lot of lately, since I've got a lot of free time, is think. Or thwim. :unsure:

Let's consider, for a moment, the long-dormant Imperial project. Based on the lucky purchase of an MPFI Strip Dominator intake 12 or so years ago, that project has spiralled from its original "mildly powerful MPFI 340 or 360" to a completely-insane "aluminum-rod, W2-headed mild stroker with an EFI-modded tunnel ram, a couple of turbochargers, and dual-fuel (E85) capability" monstrosity. I'm not sure how it morphed to the point where I felt I needed a 9-second, two-ton daily driver, but that's apparently what happened... and yes, I already have all the necessary parts to create such an animal. I certainly don't need it, and I'm no longer sure I want it either. That project is work enough without all the W-series nonsense thrown in, so I've decided to scale it back to standard-pattern ~70cc LA heads and the Strip Dominator intake. I still plan to use the hairdryers, and that's project enough.

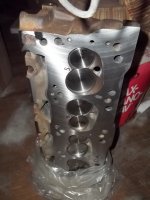
With that necessary sidebar out of the way, sitting in my living room are a long-valve set of brandy-new, freshly-machined W2 heads with 65cc chambers and long (2.08"/1.65") valves. They'll handle more lift than the Sears Tower elevator, which means I don't have to reconsider/change the camshaft. They'll also bump the Valiant engine from 10.0:1 with the 70cc heads up to 10.6:1, which can only be good with that gnarly roller. I literally need only locks, retainers, valve seals and springs to complete those heads--and I may already have the locks and retainers. I'm not sure if they require offset shafts and stands, but I have the right parts either way (my Econo heads have on-center W-series shafts; the old heads came with stands). No grinding, no welding, no sketchy "close enough" bolt holes. I have more NOS W2 intakes, because I'm a pervert like that. The heads are unported; I'm not sure if I'll have the time/werewithal to port them this year, but I'd like to do it at some point. The only real drawbacks here are that I'll need to do more grinding for pushrod clearance (they're definitely 48° heads) and I'm almost sure my gorgeous 1969 valve covers will not clear that valvetrain (the valves are .300" longer).

"Sayonara, imaginary budget!" say the pessimists among you, but therein lies the rub: Back when I still had three grand or so with which to play, I spent a lot on those heads. Rockers, titanium locks/retainers, valve springs, shafts, stands, you name it. The current total includes parts that got set aside or mangled along the way--there are, or were, a lot of them. If the heads come off, that stuff gets chalked up to tuition rather than the project budget. Reaching? Not really because they're no longer part of the car (my personal spending would still be divorce-worthy, of course). Where does this land me overall? By my current estimate, my total will be a bit lower than it is now--not by much, but a couple hundred bucks. If I can get away with ductile-iron rockers with the longer valves, that would get my total spent below seven grand. I also get to deduct the Smith Brothers pushrods, which are now at least .125" too short. Thank the good Lord above that the headers will still work!

What becomes of the Glidden/Petty/whomever rectangle-port heads, then? Good question. The short answer is, "A serious re-evaluation." The longer, more-detailed answer is that I'll disassemble and find out what I need to make them work the right way. I have another set of long valves, which due to rarity I won't use in those heads, but I can use them in conjunction with non-offset rockers to assess what valve length they really require. Standard W2 long valves, which I have in the 65cc heads, are 5.28"/5.29". The massive shaft offset leads me to believe the rectangle-port heads require over 5.400"--nearly half an inch longer than what's in them now. I'll figure them out over the winter after I get enough bravado to mess with those valvesprings again, and they'll reappear somewhere... maybe even on this engine. I don't know yet.

This was not an easy decision, but it's one I've been mulling over since before @Stretch mentioned that he and Sidekick had actually discussed this situation... the fact that it troubled them enough to be a subject of conversation in my absence gave it a lot more weight since, though. They get a ton of credit for me coming to it. Sadly, The Expandable One managed to talk his way out of acquiring the MPFI Strip Dominator in the process. Sorry, dude... it's for what's left of my sanity.

I've spent a lot on this project, but I've reached the point now where I'd be trashing parts literally for the sake of trashing parts and trying again. I'm not hopping on that treadmill. It's too expensive.
100_3945.JPG
 
Last edited:

SiteLock

SiteLock
Back
Top