Signet-ficant Other

Research. Read. Research further. Study. Comprehend. Form a plan, and make preparations to execute it.

Then order a bunch of parts that--completely coincidentally--completely usurp the need to use any of the $200+ worth of other parts and tools you bought to execute the aforementioned plan. See the "eBay Holley" thread for details, but the new metering blocks and base plate are configured nearly perfectly out of their boxes. Well, I guess I'm ready for any future battles.

That's essentially where I am right now. I'm fairly certain that once assembled, the 9381 idle-mixture screws will work as intended, and cruise AFR will be within acceptable tolerances. The idle will probably be confirmed yet this year, but cruise appears to be out of the question until spring. We've already had a bunch of snow fall--not a lot of accumulation, but there's no going back now--and with daylight diminishing so early I likely won't get much further than straightening out the idle and putting Agnes to sleep for the winter.
 
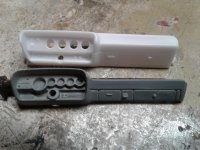
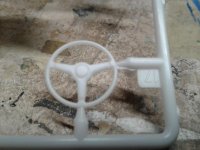
Here ya go, Doc.
Top one is 1/25 and 'Cuda
Lower is 1/24 from a T/A
 

Attachments

  • rallye dash.jpg
    rallye dash.jpg
    113.2 KB · Views: 4
Time to get back after the carburetor.

I posted on a forum dedicated to nothing but tuning, and got some feedback about a good initial setup for my carb. The opinion seemed to think most of the setup is pretty good as-is, but I do have some drilling and tapping to do. The carb's further out of calibration than expected, but a lot closer than it was when i started... and I'll be doing a lot less drilling and tapping than I thought I would six months ago, so that's good. If I can get it to idle without burning my nasal passages, that'll be half the battle as far as I'm concerned.

Now where did I put that jet kit?!
 
see..and this is why i HATE holleys.....of course that lil 22r i built wont run on anything less than a 750 dp.......but its the ONLY thing ive got with a holley on it...and yes its pig rich burn your nose hairs off at idle but happy everywhere else..i gave up
 
see..and this is why i HATE holleys.....of course that lil 22r i built wont run on anything less than a 750 dp.......but its the ONLY thing ive got with a holley on it...and yes its pig rich burn your nose hairs off at idle but happy everywhere else..i gave up
What did you do to a 2.4l ‘yota motor to run a 750 double penetrator on it?
 
What did you do to a 2.4l ‘yota motor to run a 750 double penetrator on it?
its been so long that the details are fuzzy at best..but the specs were taken off an ivan iron man sewart baja 1000 engine, i remember something about a hybrid 20/22r crank rod n slug combo and some over bore, ported to hell head of a specific year(again details fuzzy), split port cliford intake that actualy comes setup for a 4brl, the cam is the biggest thing you could get at the time...mind you i built it but it was the last engine i built prior to digital cameras,...a plethora of carbs were thrown at it trying to get it to run right, 32/36 webber worked great at itdle and slightly above, fiddled with jets for a week..jokingly gave up and tryed a 425 carter with much better response but still wouldnt rev out tryed the 525 and 625 still a dead spot up high but continualy improved...laughingly i grabbed the 750 dp from my 472 caddy...and it ran..it revved out outside of idle issues ie a fail to idle i was just jaw drop...it needed this much carb?!?!?!?...spent a few days trying to dial an idle out of it and got one lumpy but stable, rich as fuck but it idled...gave up for the time being and ran with it tweak with it and leaned it out a bit up top did what i could to dial the mid range, overall its happy across the board just not at idle

some time later and more fighting with idle, a track day was in order but this thing couldnt hook on the street (74 celica) we welded the diff and hit the track, spinning thru the 60ft mark and then some...some other guys couldnt hook either..they slathered the track in compound...she hooked jumped and pretzled both axle shafts at the same time at which point we gave up on ever running it down the track....over the course of a year it blew thru 3 transmissions as they couldnt take the abuse
 
Time to get back after the carburetor.

I posted on a forum dedicated to nothing but tuning, and got some feedback about a good initial setup for my carb. The opinion seemed to think most of the setup is pretty good as-is, but I do have some drilling and tapping to do. The carb's further out of calibration than expected, but a lot closer than it was when i started... and I'll be doing a lot less drilling and tapping than I thought I would six months ago, so that's good. If I can get it to idle without burning my nasal passages, that'll be half the battle as far as I'm concerned.

Now where did I put that jet kit?!
A long-deceased customer used to have a carb shop here in town.
He swore by a Holley 750 with four corner idle. He had one on his 446 in a loaded-down with bondo '71 Charger, reverse pattern 727 with a 2800 stall and a 3.91 SG.
That thing WORKED!
Even with his slower-than-cold-molasses-going-uphill-on-a-winter's-day reaction times, the basically stock long block engine regularly puller mid-13s on street radials.
He said once the idle circuits are sorted, it's the ONLY carb you'll ever want.
 
see..and this is why i HATE holleys...
...and that's why I love 'em, at least the old ones. They work very well when they're calibrated correctly, which few have been in the last 25+ years. The original (Chevrolet-spec) 3310 750 dual-feed was a phenomenal carburetor, but the aftermarket version isn't calibrated the same. Air bleeds, fuel restrictions, etc. were modified in the name of "performance" but the only difference in performance was, you guessed it, pig-rich idles and terrible cruise AFR (and economy). The Holley guys thought they knew better than the OE engineers. By and large, they've been wrong.


A long-deceased customer used to have a carb shop here in town.
He swore by a Holley 750 with four corner idle. He had one on his 446 in a loaded-down with bondo '71 Charger, reverse pattern 727 with a 2800 stall and a 3.91 SG.
That thing WORKED!
He said once the idle circuits are sorted, it's the ONLY carb you'll ever want.
My carb is an 830 mechanical-secondary with annular discharge and four-corner idle... it's the idle and cruise circuits (and they overlap) that are the big problem with the newer carbs. In my case, it was a 4-corner main body with a 2-corner base, aftermarket metering blocks with too many main well bleeds (erroneously, but almost universally referred to as "emulsion" bleeds), etc. My 9381 was so far off its original calibration it wasn't even funny. It's little wonder one could nearly light the exhaust on fire.

After researching, I'm very close to the old factory 3310 bleed arrangement, with a few exceptions. In conferring with the experts, they seem to think my current layout is very good, only requiring a couple of mods. Primarily it's because I do have "vintage" blocks on a larger-CFM main body (that Holley has since screwed up royally; mine's an early version). The guys helping me do seem to think the 830 is about right for the combination and expected shift point. In fact, one suggested an 850 ThermoQuad, which as I've mentioned is simply not possible without cutting the hood. I'd probably have run something like a dual-feed, 4-corner vacuum-secondary carb had I left the car an automatic, but 4-speeds really like that extra pump shot.
 
Today I was (finally) back in the garage, working on the carburetor.

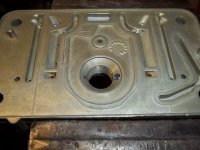
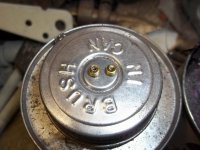
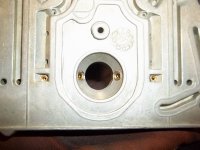
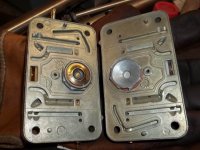
My new metering blocks were pretty well-calibrated right out of the package, but as was pointed out to me I'm running an 830CFM carb, which had Signet-ficantly different jetting from the carb for which the original blocks were designed. Although agreement was almost universal that my air and fuel bleed combination is very close now, the 9381 used much larger power-valve channel restrictions (PVCR, the holes in the metering blocks behind, and fed by, the power valve). My PVCRs were .055", but the 9381 originally used .070".

000_0006-1.JPG


It was suggested that, since I had to drill anyhow, I might as well make them "adjustable" meaning I could thread them for replaceable screw-in restrictions of varying sizes for further tunability. The screw-in restrictions are 8-32 thread, meaning out came ol' #29 (the drill size, .1360" if you're curious). Why yes, that is a dramatic increase in orifice size. If you're playing this game at home, make note that these holes are on an approximate 45° angle into the main wells. If you drill straight down, go ahead and order a new block.

000_0009.JPG


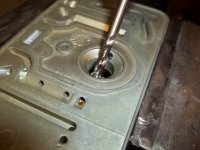
After both sides are drilled, they get tapped for 8-32. Helpful hint: Use a spiral-flute bottoming (a.k.a. "gun") tap for this. Spiral flute taps eject the chips to the side from which you're working. On these blocks, which are zinc rather than aluminum (toldja they were old-school) drilling and tapping are extremely-easy operations, so don't go bananas leaning on the drill or tap. The tool will do the work with very little input.

000_0010.JPG


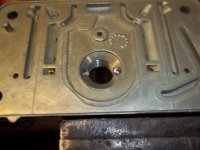
When finished, you'll have something that looks like the next picture. Yes, the modification found its way into the threads for the power valve. This is not a huge issue, since the zinc is easily manipulated. I simply used an old power valve and very carefully threaded it into place, working back and forth until it fully seated. I was able to it 100% by hand--no tools whatsoever.

000_0012.JPG


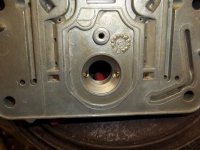
I modified the secondary block first, with good reason. It was suggested I block the power valve and jet up (way up!). The secondary side of a double-pumper doesn't really come into play in most part-throttle driving, so the power valve is simply another thing that can go wrong. Why bother with the modification, you ax? Practice. I wanted to have a good feel for what I was doing before I did the all-important primary block. After a teensy dab of blue threadlocker, I installed plugs. Make sure the plugs are slightly countersunk so they don't interfere with the power valve (or plug, in this case). There's plenty of room for it.

000_0014.JPG
 
After performing the drill & tap routine to the primary block, it was ready for the new, larger restrictions. They're readily available from both Holley and several other suppliers for a few bucks a pair, but I'm too thrifty for that nonsense. Besides, there aren't any speed shops in the area so it's guaranteed I'll wait two days to get any. I ordered a bunch of brass hollow-tip 8-32 set screws from McMaster-Carr instead. Now I can make my own whenever my little heart desires. I also ordered them in 6-32 and 10-32 thinking I'd be doing a lot more of this, but at the moment it appears that won't be necessary.

Drilling a tiny 8-32 set screw can be a real challenge. How do you hold it? A vise would mar the threads and doing it in the metering block is too risky. I briefly considered drilling and tapping a hole in an old carb adapter to use as a fixture, but I decided on a different approach. I may watch entirely too many machining videos, but this time that was an absolute godsend.

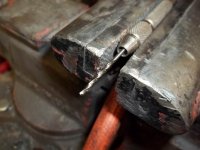
I installed my .070" drill bit in the pin vise, which I then clamped in the bench vise.

000_0015.JPG


Using the appropriate size (tiny) allen wrench to hold it, I then chucked the set screw in my drill.

000_0019.JPG


I dabbed some oil on the drill bit, and carefully put the set screw up to it. Working at very-low RPM allowed the drill bit to "find center" in the hex recess. A bit more speed and a tiny bit of pressure on the drill, and damned if we ain't got us a .070" metered restriction!

000_0020.JPG


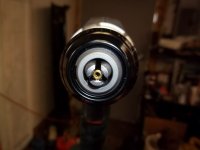
Yeah, it looks great from the hex side, but what about the business end? I'm glad you asked! It's about as dead-nuts centered in the cup point as one could hope without a lot of time-consuming machine setup with a drill press or lathe. Even then, it would be tough to get much better. Never mind the optical illusion caused by the threads, you can see the "countersink" formed by the remaining part of the cup around the edge of each hole.

000_0028.JPG


Once again, a wee bit of the ol' locking goo and in they went.

000_0030.JPG


The completed metering blocks, ready for installation... and they'd be installed, were it not for a lack of jets. Two of the recommended sizes were not in stock, not surprisingly the 78s for the primary side. I ripped apart every carburetor not currently bolted to an engine and checked, but no luck. I ordered a pair through work. I could make my own, but don't feel like having mis-marked jets lying around. The secondary block is ready to go, fitted with 88s on jet extensions which is what was suggested as a starting point.

000_0031.JPG


I won't have the jets until probably Thursday, so I'll have to figure out something else to keep the momentum going. I guess the steelies could get sandblasted...
 
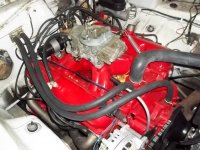
Well, I tried to make some headway, but I didn't get very far. I got the carb reassembled the other night and removed the 4010-series Holley placeholder that got Agnes in the trailer. The throttle-lever adapter got swapped back to this one and everything got connected... except for the fuel line. I looked for it for two hours and it's just plain not here. The only thing I can figure is I threw it in the Dakota when we put it back in front of the trailer last fall, and it's still sitting in there. I refilled the radiator since we're past ultra-cold weather and made sure there's enough oil to start it since the oil pan still leaks. I put the battery on the charger, though it didn't really need it.

One fuel line and a twist of the key and it's first start of the year. Then the tuning starts anew.

100_3792.JPG
 
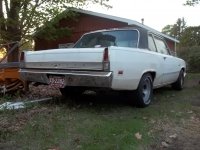
Agnes rides again.

The old girl fired up immediately, as if I'd just shut it off earlier today rather than seven months ago. The Resilient One pulled the trailer forward for me after work, and I set about getting her out for the year. Drove out of the trailer just fine and jockeyed the parking so the trailer can be moved back. She never ceases to amaze.

100_3797.JPG

100_3801.JPG
 
For the record, the missing carburetor fuel line was found lying in the remains of the hot tub, partially visible to the right of the car in the first picture. I must have set it on the edge, and it fell in over the course of the winter. 😐
 
You have hot tub remains too? Cool. Those things are just a different version of the same thing as a treadmill. You buy them just so you can never use them.
 
You have hot tub remains too? Cool.
I did right up until last night. I cut it in half with the Sawzall, then a friend and I loaded it on his trailer for its final journey to Jacuzzi Valhalla.

Those things are just a different version of the same thing as a treadmill. You buy them just so you can never use them.
This far north, they're a ridiculous purchase. Put it inside the house and it'll eventually destroy the place with humidity. Leave it outside and it'll drive your power bill through the roof. Then its heater dies mid-January, at which point it freezes and self-destructs. That's actually how I got mine, but after discovering how someone had attempted to fix it, including but not limited to bypassing the factory wiring with a household light switch and ceiling-fan speed control, it turned into "thirty-six square feet I no longer have to mow or rake" pretty quickly. It would've been safer to make toast in my bathtub.
 
After messing around with the carburetor for quite awhile today, I'm almost convinced the 9381 won't work. It's much better than it was last year with either carb, but it's still not right. There seems to be a very narrow window where I can get the idle fairly clean, but it's only at about 750RPM and I'm right on the edge of throttle opening... another 1/16th of a turn and I'm on the cruise circuit (vacuum advance signal starts, idle jumps 350RPM, etc.).

My thought process may be that the camshaft and huge ports are creating such a choppy vacuum signal that the carb just can't do its thing correctly. I'd try a 4-hole spacer, but alas: no hood clearance, as has been discussed previously. In that one narrow window, I managed a whopping 5" of vacuum; I believe there really should be more than that... but it wasn't puffing fuel out the back either. Opening a vacuum port did not cause the idle to increase at that setting, but it did at other mixture-screw settings. The 4-corner idle, while technically superior and desirable, is a bit of a pain in the ass. Every change you'd make to a normal mixture screw needs to be halved and done twice, and when the gauge isn't moving noticeably against the needle chop created by the rowdy cam, it's hard to tell if you're helping or hurting.
 
oh im sure the 4 corner is great on anything not crazy, but your in full boogy territory where those changes become crazy hell to work with....hate on my afb's all you want but by god when you get to that point it sure a hell of alot easier to tune
 

SiteLock

SiteLock
Back
Top