You are using an out of date browser. It may not display this or other websites correctly.
You should upgrade or use an alternative browser.
You should upgrade or use an alternative browser.
Signet-ficant Other
- Thread starter Dr.Jass
- Start date
Dr.Jass
Pastor of Muppets
I whipped up these bad motherforklifters Monday night (08/17) using leftover 3" pipe, some eBay mild-steel V-band rings, and pieces I cut from the belt guard of my air compressor. 
Undo one half-inch nut per side, and it's back to open exhaust. They'll be installed downstream of the X-pipe, right where it turns to head toward the mufflers.


Undo one half-inch nut per side, and it's back to open exhaust. They'll be installed downstream of the X-pipe, right where it turns to head toward the mufflers.


Last edited:
Dr.Jass
Pastor of Muppets
While tuning to get a rather rumpity 900RPM idle, I thought I could hear combustion in the intake. Not having the greatest confidence in the valvetrain anyhow, it seemed like a good time for an after-run valvetrain checkup. I guessed there was probably a lash issue, possibly a broken valvespring or bent pushrod, or maybe something had displaced itself.
I pulled off the valve covers and everything looked good on initial view. Closer inspection showed no broken springs nor banana-shaped pushrods (of the ones I could rotate easily--about 10 of 'em). Lash on #6 exhaust is a bit excessive but nothing alarming--probably .030-.035". The others that weren't hard against a valve seemed about like I remember setting them. All the pushrods were still seated in their lifters and adjusters. Lots of purple oil everywhere, so the top end is getting plenty of lubrication.
I began to set the lash on #1 using the EOIC method, which stands for "Exhaust Opening, Intake Closing". It's much simpler than the DC/MP lash chart, which has you adjusting two valves on different cylinders every 90° of rotation. Rotate the engine by hand (or with a bump switch), and when the exhaust valve starts opening, you adjust the lash on the intake rocker. Roll it some more, and when the intake starts to close, adjust the exhaust lash on that cylinder. It involves a bit more cranking but you can go in order of the cylinders, so it's much easier to keep track of where you are in the process.
That's when I heard Adam Savage's voice saying, "Well there's your problem right there!" As I was rotating the engine to adjust #1, much to my surprise and horror, the forward end of the rocker shaft walked at least 1/8" toward the intake manifold. The bolt was simply flexing out of the way, pushed by the rocker shaft. The whole shaft squirms like a puppy avoiding a bath; you can watch the bolt heads move. Never really knowing where the rocker shaft is makes lash a moving target, so I abandoned the plan for the time being.
This situation shouldn't be a great shock, considering valve springs that create about 565lb of force at max lift combined with the surgery required to get the rocker shafts to work with the stands. I'm using rocker-shaft bolts that came with the heads; I assume they're Harland Sharp bolts because the rocker stands were (ancient) Sharp pieces. Whatever they are, they're simply not enough torqued to 35lb/ft, dry. So, my first angle of attack is going to be stronger bolts: ARP 8740 chromoly, which get torqued to 45lb/ft with lubed threads. The shaft bolt holes are blind and about 1" deep; the stands are 1.5" thick. I plan to use 2.5" bolts with a washer to give me a bit of breathing room at the bottom. I'm hoping that solves the issue. If it doesn't, then I'm looking at about $300 worth of special-order, purpose-built offset rocker shafts, which are much thicker than the ground-to-death OE ones I modified.
I won't get the bolts until Monday unfortunately, so any further effort on the engine isn't warranted until then. In the meantime, I'll swap out the faulty temp gauge for the NOS one and probably replace the recalcitrant tachometer once the new one--a vintage S-W Stage III, also a 9K-RPM sidewinder--supposedly arrives Friday. Neither task should be overly time-consuming, so I might get after the enormous holes in the LH rear inner fender. I may concentrate on the stereo a little too, depending on my mood. I need to determine which amp or amps I want to use and how I'm going to wire everything. I stil haven't decided whether I want a subwoofer in the car; if I go with one it'll come later but I might as well be ready for it if/when the time arrives.
Not a great evening's effort tonight, but I'm still very positive about the final outcome. When one considers that amount of shaft squirm, combined with the already-wonky LA pushrod angles compounded by W2 heads--further strained by the offset rocker shafts--it's kind of miraculous that the engine's already seen well over four grand and nothing's popped out of place. The only real downer is that I have to wait past the weekend for the replacement bolts... but worse things have happened to better people. It'll get done, but I may not get 'er to the track this year.
Dr.Jass
Pastor of Muppets
A bit of a lazy weekend...
Thursday the weather wasn't cooperative, so I didn't spend any time on the car. Friday, the new tach arrived and to my surprise it was smaller than expected. I found a new tach cup lying around, and there was no way the tach would fit it--it was way too small. I went outside and grabbed a Track Force pedestal tach from the garage, and that cup was also too large (the bezel was part of the tach movement/face anyhow). The new tach had come with a dash mounting bracket, but it was retained by a single machine screw, so I looked at the tach currently hanging from the dash--the one in previous photos that's been problematic for me. Thinking "there's no time like the present," I managed to figure out how to get the bezel and lens/spacer off, and disassembled the old unit. 'Twas then I discovered my wiring error (see the "Goofy Tach" thread). With the cup gutted, it was time to see if I could make the "new" tach work.
The case is a three-piece affair, the key part being the rear cup that also incorporates the tach half of the mount. It has a single bolt hole and is black plastic (the main body and bezel are chromed steel). Clearance is tight (especially the bulb socket), but the Stage III tach bolts into the rear cup using the screw from the old tach guts in the original hole. Halfway home.
There are two tabs on the main body that mount the old circuit board. There was no provision on the Stage III, and in fact they limited the rearward travel enough that the rear cup couldn't be assembled to the main body. I simply bent those out of the way, determined where the tach body needed to sit, then bent them again so they're now folded over the rear of the tach body to hold it in position. Once I'd done that, the bezel snapped into place without the old lens or spacer. The bezel fits over the Stage III's bezel like it was born there, and since the Stage III has an integral lens there was no issue... other than the redline. It's not externally adjustable. No big deal; I wanted to rewire the tach and slightly modify the bulb socket for extra clearance anyhow.
Sneak preview... this was taken later, but it shows that my creation could almost pass for a factory-assembled unit:
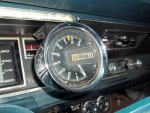
Yes, that's rust around the outside edge, behind the tach lens. It's Agnes... you thought I'd spring for NOS?! It was $40 and guaranteed to work. The corrosion adds character.
Since the tach was down, and it's a pain in the arse to mount, Staruday was a good time to install the new factory temperature gauge in the cluster. Despite starting quite late, down came the column, out came the cluster, and with a few more nuts I had the burned temperature gauge out. I set it next to the NOS unit, and contacted Houston ground control. The problem? Apparently, older cars used fluorescent orange needle paint, where I'd thought they were faded and used fluorescent red on the other needles when I repaired and freshened the cluster. The little bit of mismatch is the kind of thing that would bother me to no end, even though with the cluster assembled it's much less obvious. Smoked gauge is on the left, evidenced by my paint overrun.

I rounded up my needle paint and proceeded to do a much-neater job on the new gauge. Seemed a sin to paint an NOS gauge, but it was a lot less effort than repainting all the other pointers. They all match, which is all that matters to me:
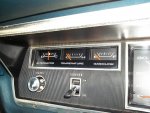
With the cluster apart, my freshly-detailed lenses didn't seem so fresh anymore. Glass cleaner had no effect, and upon close inspection I realized the "dust" was white overspray from painting the floors. Out came the Mother's Mag & Aluminum polish--I can't recommend this stuff enough--and with some time and elbow grease the lenses look as good as really-good used... "new" would require disassembing the bezel, and it's not designed nor intented to be taken apart. It's heat-staked together, and I'm not making that kind of effort. I reassembled the cluster and connected the headlamp switch and ammeter leads, then called it a day.
Today involved blowing the tach apart for wiring and socket modification. I'd left the cluster out because the tach is much easier to wire through the cluster hole, despite being largely plug-and-play due to my jumper harness (the tach-signal wire is solid to the bulkhead disconnect, so it required solder/heat shrink). Before reassembly, I wanted to see if I could match the tach lighting to the dash, so I installed an AutoMeter green bulb filter (condom). It didn't quite cover the bulb's glass, so I put a heat-shrink "collar" on the part of the bulb not covered. Reassembly was straightforward, other than the time-consuming bit of running the new wiring through the old sleeving and soldering terminals recycled from old factory harnesses. Fishing all of it through the hole I drilled behind the radio/heater bezel wasn't particularly fun, but once I did I let the tach hang by its wires so I could reinstall the cluster... which I did. The steering column was bolted back up, and while I was lying down on the job I decided to install the two remaining bulb condoms on the aftermarket oil pressure and temperature gauges.
The office is all back to normal, with the new furnishings fitting in nicely:

After dark, I went out and checked to see how the filtered bulbs worked. Despite being nowhere near the same color as the factory cluster's built-in bulb filters, the AutoMeter covers provide a very-close match to the factory illumination... a pleasant surprise.
Tomorrow the new rocker-shaft bolts arrive. Fingers crossed... and Agnes is anxious to get 'em.
Thursday the weather wasn't cooperative, so I didn't spend any time on the car. Friday, the new tach arrived and to my surprise it was smaller than expected. I found a new tach cup lying around, and there was no way the tach would fit it--it was way too small. I went outside and grabbed a Track Force pedestal tach from the garage, and that cup was also too large (the bezel was part of the tach movement/face anyhow). The new tach had come with a dash mounting bracket, but it was retained by a single machine screw, so I looked at the tach currently hanging from the dash--the one in previous photos that's been problematic for me. Thinking "there's no time like the present," I managed to figure out how to get the bezel and lens/spacer off, and disassembled the old unit. 'Twas then I discovered my wiring error (see the "Goofy Tach" thread). With the cup gutted, it was time to see if I could make the "new" tach work.
The case is a three-piece affair, the key part being the rear cup that also incorporates the tach half of the mount. It has a single bolt hole and is black plastic (the main body and bezel are chromed steel). Clearance is tight (especially the bulb socket), but the Stage III tach bolts into the rear cup using the screw from the old tach guts in the original hole. Halfway home.
There are two tabs on the main body that mount the old circuit board. There was no provision on the Stage III, and in fact they limited the rearward travel enough that the rear cup couldn't be assembled to the main body. I simply bent those out of the way, determined where the tach body needed to sit, then bent them again so they're now folded over the rear of the tach body to hold it in position. Once I'd done that, the bezel snapped into place without the old lens or spacer. The bezel fits over the Stage III's bezel like it was born there, and since the Stage III has an integral lens there was no issue... other than the redline. It's not externally adjustable. No big deal; I wanted to rewire the tach and slightly modify the bulb socket for extra clearance anyhow.
Sneak preview... this was taken later, but it shows that my creation could almost pass for a factory-assembled unit:

Yes, that's rust around the outside edge, behind the tach lens. It's Agnes... you thought I'd spring for NOS?! It was $40 and guaranteed to work. The corrosion adds character.
Since the tach was down, and it's a pain in the arse to mount, Staruday was a good time to install the new factory temperature gauge in the cluster. Despite starting quite late, down came the column, out came the cluster, and with a few more nuts I had the burned temperature gauge out. I set it next to the NOS unit, and contacted Houston ground control. The problem? Apparently, older cars used fluorescent orange needle paint, where I'd thought they were faded and used fluorescent red on the other needles when I repaired and freshened the cluster. The little bit of mismatch is the kind of thing that would bother me to no end, even though with the cluster assembled it's much less obvious. Smoked gauge is on the left, evidenced by my paint overrun.

I rounded up my needle paint and proceeded to do a much-neater job on the new gauge. Seemed a sin to paint an NOS gauge, but it was a lot less effort than repainting all the other pointers. They all match, which is all that matters to me:

With the cluster apart, my freshly-detailed lenses didn't seem so fresh anymore. Glass cleaner had no effect, and upon close inspection I realized the "dust" was white overspray from painting the floors. Out came the Mother's Mag & Aluminum polish--I can't recommend this stuff enough--and with some time and elbow grease the lenses look as good as really-good used... "new" would require disassembing the bezel, and it's not designed nor intented to be taken apart. It's heat-staked together, and I'm not making that kind of effort. I reassembled the cluster and connected the headlamp switch and ammeter leads, then called it a day.
Today involved blowing the tach apart for wiring and socket modification. I'd left the cluster out because the tach is much easier to wire through the cluster hole, despite being largely plug-and-play due to my jumper harness (the tach-signal wire is solid to the bulkhead disconnect, so it required solder/heat shrink). Before reassembly, I wanted to see if I could match the tach lighting to the dash, so I installed an AutoMeter green bulb filter (condom). It didn't quite cover the bulb's glass, so I put a heat-shrink "collar" on the part of the bulb not covered. Reassembly was straightforward, other than the time-consuming bit of running the new wiring through the old sleeving and soldering terminals recycled from old factory harnesses. Fishing all of it through the hole I drilled behind the radio/heater bezel wasn't particularly fun, but once I did I let the tach hang by its wires so I could reinstall the cluster... which I did. The steering column was bolted back up, and while I was lying down on the job I decided to install the two remaining bulb condoms on the aftermarket oil pressure and temperature gauges.
The office is all back to normal, with the new furnishings fitting in nicely:

After dark, I went out and checked to see how the filtered bulbs worked. Despite being nowhere near the same color as the factory cluster's built-in bulb filters, the AutoMeter covers provide a very-close match to the factory illumination... a pleasant surprise.
Tomorrow the new rocker-shaft bolts arrive. Fingers crossed... and Agnes is anxious to get 'em.

Dr.Jass
Pastor of Muppets
The new rocker-stand bolts came in today, so after work tonight I installed them. I backed off any tight rockers as far as they would tolerate--the lobes near max lift would simply wedge the pushrod to the rocker with the adjuster removed--and installed the new bolts per ARP's directions, torqued to 45lb/ft. I then installed a jumper wire to use as a bump switch, cranked the engine and checked torque again with all the rockers in different positions. I did this a few times on each bank just to settle my mind. After doing so, I cranked the engine several times. Damn, those valves go a long way... but the rocker shafts are now absolutely solid. No discernable shaft wobble whatsoever. That's real peace of mind for me (and money I didn't have to spend on shafts!).
Man, I hate fighting this valvetrain... not because it's difficult or particularly trying, it's just been such an area of concentration for so long. I simply want it to be done and working correctly. I finally think I've got it as good as I could possibly get it, given the constraints with which I started (odd castings, too-short valves, etc.). Anything beyond what I've done is simply up to the geometry gods. Let's hope they smile upon me.
Tomorrow with the permissions of weather, time, and daylight, I'll set the valve lash--hopefully for good.
Dr.Jass
Pastor of Muppets
I got the lash set last night, reinstalled the valve covers, and fired it up. She's cold-hearted; it takes quite awhile to reach operating temp (more than five minutes) and there's just no idling until then. I picked up a few inches and a much-steadier needle on the vacuum gauge, but she doesn't want to idle below 1,100RPM now... time to go back and fiddle with the carb and timing some more. It should do 850, I would think, but at that RPM the oil light starts flickering (it's a 20PSI switch) which is more an annoyance than a concern. Even with the lash set at .018"/.020"--a couple thousandths tighter than the cam card, which Lunati said could be set as tight as OE solids--it's a noisy valvetrain. It's quieter than it was, though... enough so that I noticed an exhaust leak. 
The tachometer works perfectly other than a little condensation that'll burn off with time, and the new OE temp gauge installed over the weekend works correctly too... so chalk a couple more happy points on the scoreboard.
The tachometer works perfectly other than a little condensation that'll burn off with time, and the new OE temp gauge installed over the weekend works correctly too... so chalk a couple more happy points on the scoreboard.
Dr.Jass
Pastor of Muppets
[Frank Sinatra]
Regrets... I've had a few,
But then again,
Too few to mention...
[/Frank Sinatra]
Regret #1 is not having enough carb gaskets on hand. To wit, after the sixth or seventh carb removal, the first one said "no mas!" and became a vacuum leak. So, digging around in my Holley stuff I found a kit for a 4010 carb and robbed the base gasket from it. Big mistake. That particular gasket was about 3/8" thick, something of which I'm not a big fan but neither does it terrify me... or didn't, anyhow. It had plastic "torque limiters" built-in, so there's some measure of safety, right?
Wrong.
Those plastic inserts aren't nearly as thick as the gasket itself, and while carefully tightening the carb I heard a click... "Nah, couldn't be. It's not even snug yet." Then I heard another and remained in denial about its origin. Sure enough, I snapped not one but two ears off the carb. Hey, Holley 9381s are cheap, right?
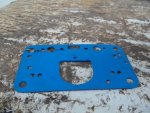
For the moment, I've swapped on the baseplate from a Mighty Demon 750 mechanical secondary, which has the right size throttles and all the right openings... except it's a 4-corner idle, whereas the original base was 2-corner. That necessitated using the Demon secondary metering block too.
I did what I had to do,
And saw it through
without exemption
Regardless, I can't get this thing to lean out at idle to save my life. The idle mixture screws have little/no effect (depending on which one you're turning) and it's so rich at idle it literally smokes. I'm starting to think I got a defective power valve out of the box, since A) I installed a PV anti-backfire valve and B) the car never backfired. Well, it has now but this issue's existed since initial start. "Eye-watering" is much too mild a term for the exhaust fumes.
I've loved, I've laughed and cried
I've had my fill,
my share of losing
Losing track of things that needed finishing, such as the wheel bearings. If I've not mentioned it previously--even if I have--make a note to yourself: The life of 8.75"/Dana 60 tapered rear wheel bearings can be measured literally in yards if you install them and don't set the endplay immediately. The car's moved less than 100 yards under its own power; the only other rolling was pushing and winching. That little bonehead move, Regret #2, cost me around $90 to unfuck. At least I had spare axle shafts, so I didn't have to pull them off the car for the repairs.
And more, much more than this,
Don't do it my way.
Dr.Jass
Pastor of Muppets
Some photos of the various carburetor offenses, with an update at the end...
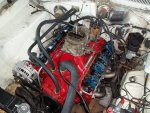
I started with this:
...and changed to this (I swapped out main bodies to go to annular discharge boosters)...

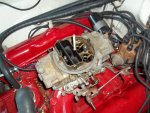
... but I ended up with this...

...because of this...

...which was caused by this (original gasket on left, thickburger on the right)...
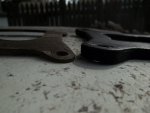
...with its countersunk torque limiters...
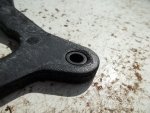
...and easily-compressed material (this is the manifold side):
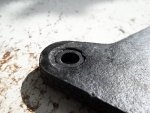
The current base gasket is thinner than either of the two prior:
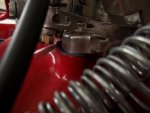
Today I went out to check and see if I had a blown power valve, which as mentioned it shouldn't have been. However, I wondered whether I had too "high" a power valve; vacuum on this engine hovered around 6" most of the time. Whilst taking the metering block off, I found this little issue:

Yeah, when your idle-circuit main well is bleeding directly into the freakin' booster, you're gonna have an out-of-control idle mixture, and bleeding into the mixture-screw orifice ain't helping anything either. How I didn't notice this when I swapped the main body is beyond me, but it had to already be cracked because this issue existed with the 4780 main body. Regardless, after a new gasket the mixture screws now do their thing correctly... at least the driver's side ones do. I managed to get 10.5" of vacuum from it--the idle moved up to around 1,200RPM in the process--just tinkering with those two screws. Then I ran out of fuel. Oy.
Regardless, I think the 4.5" power valve will be OK once the mixture's nailed and the idle reduced to a livable number. I ordered a 2.5" through work just in case, but I'm guessing I'm going to land in the 8-9" range on manifold vacuum which should work out fine.
But, for the time being I'm out of juice... the precious juice. I thought to swap out the axles, but my boss failed to grease the bearings and I'll be damned if I can find any suitable grease around this place... Oy, redux.
I started with this:

...and changed to this (I swapped out main bodies to go to annular discharge boosters)...

... but I ended up with this...

...because of this...

...which was caused by this (original gasket on left, thickburger on the right)...

...with its countersunk torque limiters...

...and easily-compressed material (this is the manifold side):

The current base gasket is thinner than either of the two prior:

Today I went out to check and see if I had a blown power valve, which as mentioned it shouldn't have been. However, I wondered whether I had too "high" a power valve; vacuum on this engine hovered around 6" most of the time. Whilst taking the metering block off, I found this little issue:


Yeah, when your idle-circuit main well is bleeding directly into the freakin' booster, you're gonna have an out-of-control idle mixture, and bleeding into the mixture-screw orifice ain't helping anything either. How I didn't notice this when I swapped the main body is beyond me, but it had to already be cracked because this issue existed with the 4780 main body. Regardless, after a new gasket the mixture screws now do their thing correctly... at least the driver's side ones do. I managed to get 10.5" of vacuum from it--the idle moved up to around 1,200RPM in the process--just tinkering with those two screws. Then I ran out of fuel. Oy.
Regardless, I think the 4.5" power valve will be OK once the mixture's nailed and the idle reduced to a livable number. I ordered a 2.5" through work just in case, but I'm guessing I'm going to land in the 8-9" range on manifold vacuum which should work out fine.
But, for the time being I'm out of juice... the precious juice. I thought to swap out the axles, but my boss failed to grease the bearings and I'll be damned if I can find any suitable grease around this place... Oy, redux.
Dr.Jass
Pastor of Muppets
The lower-value power valve did not help. In fact, things are arguably worse now.
It simply will not idle below 1,200RPM which is where it lands with the idle-mixture screws set at highest vacuum--around 10". It's still fatter than a Viennese opera singer. In fact, for fun I disconnected the PCV hose tonight and the engine picked up, I dunno, 1,000RPM? More? That's pretty fuckin' rich. What's really strange is that now it's happiest with the RHF mixture screw completely closed. No, the gasket isn't damaged this time.
I'm completely flummoxed. Even if the carburetor's theoretically too large for the engine, it should idle down and reasonably lean. The jets shouldn't come into play, and they're a reasonable size (I believe 72/78; they're whatever was OE in the 4780). There is no rear power valve; in fact the metering block isn't even machined for one.
I thought to try adjusting the accelerator-pump arms to make sure they're not partially open, but that shouldn't make a difference since unless they're moving, they shouldn't be capable of delivering fuel--and I see no evidence that they are.
I also started to double-check my float level, but made a boo-boo and ended up with gasoline everywhere. When last I set the float level, it just dribbled out with the sight plugs removed.
The fuel pump does not seem to be pushing past the floats. It supposedly self-regulates at 5.5PSI, and when the float bowls fill you can hear the pump's pitch change significantly. To me, that means it's working correctly.
There almost has to be an internal leak somewhere, but where it is I can't figure out. All the gaskets are new within the last week. I'm wondering if the PV's vacuum passage isn't blocked, which would leave the PV wide open all the time. There's not really much else that comes to mind.
Tomorrow I'll re-set the float level and start over from baseline (again): idle speed screws at 1/2 turn from initial throttle movement and idle mixture screws at 3/4 turn from seated. If the same condition exists, I may try installing a PV plug in the front metering block and see if that changes anything. However, I don't expect it to, since this condition has existed with two different base plates and two different main bodies.
If none of that stuff has any effect, I'm probably going to rebuild the mechanical-secondary 750 4010-series carb lying on the shelf in the basement. It's either that or the Bo Laws-modified 650DP which, despite all the custom work, I expect is too small to run nearly 8 grand on that engine. The only other carburetor that's not in terrible condition is a 650 4011, which is definitely too small. It's also a spreadbore and would require an adapter plate. My air cleaner already has hood damage to the paint so that ain't happening.
If anyone's got suggestions I'm all ears.
restoman
The paint fumes have cleared so I'm
Have you tried the hand-over-the-top-of-the-carb-while-running to see if it makes any difference?
Sorry, that's all I've got.
I remember one of our customers had a 750 Holley with 4 corner adjustment on his 446, and he loved it. He also owned a carb shop, and said getting it set properly was an effort, but totally worth it. ?
Sorry, that's all I've got.
I remember one of our customers had a 750 Holley with 4 corner adjustment on his 446, and he loved it. He also owned a carb shop, and said getting it set properly was an effort, but totally worth it. ?
Dr.Jass
Pastor of Muppets
Putting my hand over it--effectively choking it--would kill it dead. It's way too rich. I did a lot of research last night into various causes and got some ideas to try; apparently the idle feed restrictions are notoriously oversized on 800+ Holleys and the idle air bleeds could stand to be a little larger.
I saw more than one instance of people saying to block the kill bleed entirely on annular-discharge carburetors, which is exactly what the 9381 is. Another common suggestion was to use older metering blocks, on which the idle feed ports are below float level. It's more consistent flow, allowing for smaller orifices. I believe my front metering block is so equipped; the rear I'm not sure since it's currently using the Demon's billet block.
Correcting some of those issues requires some careful modifications, so if I decide to attempt them it's likely I'll throw one of the other carburetors on for the time being.
thrashingcows
Drowning deep in my sea of loathing...so I'm
Go Thermoquad...

74DartSport
has asparagus pee
<Doc Fiberglass enters the chat>
Dr.Jass
Pastor of Muppets
If I had a spreadbore-compatible intake on the engine, a decent ThermoQuad, and a Strip Kit I might consider it. Since I have none of the above it's not happenin'. As previously mentioned, the air cleaner already lightly touches the hood so any kind of adapter is impossible. The only intake I have that fits both W2 heads and a spreadbore carb is a Mopar Performance cheater intake. Drawbacks include it being:Go Thermoquad...
- A dual-plane
- Cast iron
- Based on a factory 360-4V intake circa 1980
- Approximately 80lb
- Not matched to my ungodly-huge intake ports (approximately 2"x3")
Dr.Jass
Pastor of Muppets
Of course, my week's vacation (September 20th-on) sucked any momentum out of the carburetor project. I didn't have all the tools until after I got back, and it was quite an eventful week for me, culminating in a 700-mile road trip with Stretch on the 26th to fetch the 26' enclosed trailer I'd bought nearly a year ago. In the week since, the weather's sucked, I was sick a couple of days, and work was a bit stressful (I was there almost 12 hours on Tuesday) so I haven't got back into the big Holley yet.
Interesting side note, though: In preparation for the trailer, I needed to move the car. The only assembled carb I had that fit was a Holley 4010 series 750 mechanical that I bought at a swap meet a year or two back. I never rebuilt it; I just tossed it on the shelf. It ran with no leaks, but idles best (highest vacuum) with both idle mixture screws fully seated... it's also an eye-burner. That being said, I've no idea of the condition of anything inside it in terms of gaskets, power valves, etc. and I'm sure there's internal leakage causing the issue with that carb... but, it starts and moves the car without spraying fuel anywhere but into the intake, which is all I need it to do for the moment.
Interesting side note, though: In preparation for the trailer, I needed to move the car. The only assembled carb I had that fit was a Holley 4010 series 750 mechanical that I bought at a swap meet a year or two back. I never rebuilt it; I just tossed it on the shelf. It ran with no leaks, but idles best (highest vacuum) with both idle mixture screws fully seated... it's also an eye-burner.
