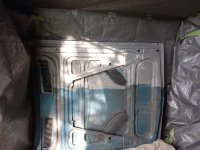
Rusty's not very quiet cuda progress

On a large expanse of sheetmetal like a hood, I'm afraid the only guarantee of not ever again seeing the joint seams is to solid weld everything.
Any product that is dis-similar to the steel is not going to last without at least ghosting at some point.

Vibration alone will fail the product, not to mention the hot and cold temperture variances that a hood goes through.
 
jb will hold for a few years TOPS of ZERO use, and will split and fail just to heat cycling ...under use ie vibration its just a lit fuse who knows how long it will last

i wonder if one of the new body repair no weld metal glue's would work?

if you need help fillling it in cut some thin strips of steel hell use some corners n such of what you cut up and feed them into the gap as your welding, use them like a tig filler rod, yes you can do it with mig i do it all the time on stuff like this where youve got a gap that you cant do anything about but fill
 
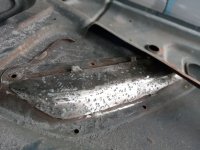
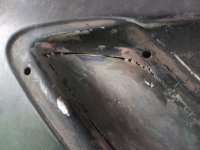
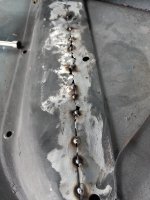
If this was gonna show I would have to do better, it's the back of the scoop area & will be hidden on both sides, I did do some welding from the outside & filled some of those gaps, the JB is just to fill (well normally) pinholes, some of these are a bit bigger
 
ill tell you the whole why of not using jb weld

on my RC tub, i didnt want seam sealer, so i jb welded EVERY firewall seam as i wanted a "clean" look, that tub has NEVER been assembled and yet the jb weld has ALL failed, from peal ups to cranking and splitting UNDER THE PRIMER, i also did some interior seams (front floor)as well all of those have failed too, NONE of these jb weld spots have seen rain, sun or vibration..at this point i am going to have to have the tub blasted to fix it.....also its the same tub i used rustolium on...all of which is pealing....STUPID choices alot of wasted time on a 100% dent and rust free unmolested 74 tub...if anything my wasted eforts have preserved it till i get back to it...shrug

.....sheetmetal just changes too much with temperature changes let alone vibration

id like to hear from resto on why seam sealer wont work.....or one of the new fancy "no weld sheetmetal glue", as imo both seem semi idea for you in this situation...in fact id think seam sealer was basicly made for it?
 
Modern panel adhesives will hold it in place till the cows come home, if used properly.
But... being as they are either acrylic or urethane in composition, they are not designed for a seamless appearance where two pieces are joined together.
Dis-similar products. Period.
Seam sealers... if one could figure a way to get one to lay down smoothly, in sufficient thickness to have some expansion and contraction capabilities, they'd probably work.
I wouldn't trust them on my car, though.

Years ago, I bet one of my know-it-all coworkers who said I couldn't weld on a hood without warping it.

He picked the hood, off of a mid-eighties Impala. ALmost flat sheetmetal.
The bet was for a $100, that when done, it would be ready for a light skim of filler to smooth things out.
He thought I'd use a MIG.

Being more than an equal to his know-it-all-ness, I used oxy/acetylene, and braised in a 6" x 6" patch halfway towards the back on the driver's side.
After some careful work, I used a very light skim of two-part putty to finish it for primer.
I never did collect.

:)
 
If I did a lap joint the glue would work, I used it on my outer wheel wells & quarter skins, but being me I also welded up all my screw holes & hit a weld on the seam every 6" or so , some areas were weld only where I couldn't overlap the joints. DSC08400.JPGSections of the front & rear I couldn't get the tool in to make the off set, so they were butt joint, I had to add A LOT more screws when I finally glued it, probably every 3 or 4 inches to get the glue joint tight.
Same on the quarter skin seam.
 
So after a few more rounds of welding & grinding I started cleaning up the other side for the cut.
Much better , I thought I went way out from the line, even so when I put it in place it overlapped most places but a couple were right on, now I'll gently grind away the extra metal & hope for a good tight fit! 20211003_150308.jpg
 
If I did a lap joint the glue would work, I used it on my outer wheel wells & quarter skins, but being me I also welded up all my screw holes & hit a weld on the seam every 6" or so , some areas were weld only where I couldn't overlap the joints. View attachment 22928Sections of the front & rear I couldn't get the tool in to make the off set, so they were butt joint, I had to add A LOT more screws when I finally glued it, probably every 3 or 4 inches to get the glue joint tight.
Same on the quarter skin seam.
On the inner wheelhouse: no problem.
Outer skin with nothing to hide the seam: :(

I sincerly hope it works for you, but truthfully, you'd be the first...
 
I did the same lap joint on the 73 but all weld, it shrunk in more than this one did for sure, but there's not a lot of putty on either.
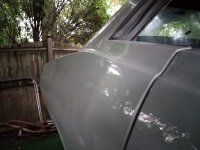
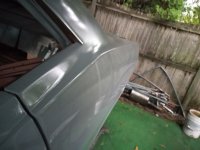
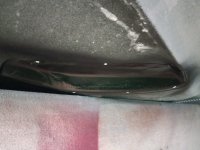
the joint is about an 1" or so from the top, hard to get a good pic with the shadows & reflections, but in the blocking stage it looks close, the coat of clear is to hold it over the winter, also helped me to see what I missed!20211004_171851.jpg20211004_171914.jpg20211004_172002.jpg20211004_172017.jpg
 
Spent most of todays session getting that piece to as close tp perfect as I could, it must have been in & out of that hole 40 or 50 times, check, grind a bit, check, grind a bit etc etc etc etc etc etc etc etc...........................well you get the idea!
Will start the welding tomorrow but she looks pretty close! 20211004_130713.jpg
It's a shame the patch is in worse shape than the hood, it's off the rust bucket 1st car, the rest of the hood went to the scrap yard.
then I ground down the JB a bit & cleaned & got some prime on the other side to hold till I do finish work.
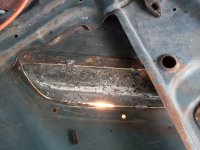
Back is pretty rough, probably smooth that out a bit...........20211004_141129.jpg
Front will take a coat Of putty, but first I have to make sure the scoop insert fits right.
only missed 2 small pin hole up under the framing, will hit em when I do the other side. 20211004_141111.jpg
 
I know I'm about a mile from perfect here, but it will never be seen & it's main purpose is to stop water from getting in & I think I at least have that covered!
 
You can check that butt weld for gaps with a bright light and a little bit of darkness. You might be surprised how many holes there are. I sure was.
 
Oh yea , I keep a drop light handy, today I got out the quartz so I could see a little better when welding, never got there but put the light underneath to help me set that gap.
Also helped me find the 2 pinholes I missed on the other side!
 
Last edited:
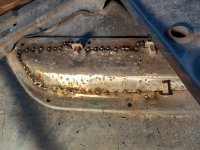
started welding in the other side.............20211005_110136.jpgAfter about 6 more rounds of welding & grinding I'm getting close, still a ton of pinholes.........20211005_145509.jpgthis whole section I have to do from the front...............20211005_145449.jpg
 
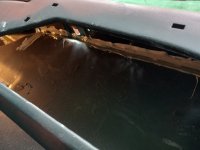
Major Fail! not a good day, could not get the scoop inserts to sit right, was pounding away to try & get it down & ended up tearing the weld out on one side, but that allowed it to stretch enough to get the scoop in right. 20211006_133100.jpg
Now either my welding or the metal itself was better on the other one no give at all, I ended up slicing it so I could bang it out some & get the scoop in, if this attempt fails it might be time to buy a repro hood??20211006_133108.jpg
 
Thank the powers that be that this fiasco will never be seen, I have it air tight with a liberal coating of JB weld, she's truly nasty lookin, I'm tempted to buy the insulation now just so I don't have to look at it!

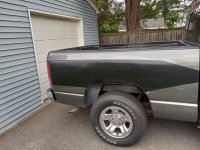
On a different note, do the nuts have any cool stickers, when I did the patch panels on the PU I got lazy & just did a homemade blackout panel , was thinking a nice scat pack sticker with a little yellow in it, but a nuts sticker would fit the bill even better? 20211008_152456.jpg
 
Finished messing with the hood for now, ground down some of the JB & shot a coat of primer on, it looks like a machine gun sprayed the inside corners but I think I got all the holes covered! I am going to build (I use that term lightly) a bigger blasting area so I can do the underside of the hood, but I have a few more small pieces I can blast so I'll do that before I tear my little "shed" down.
got a few nice days coming so I decided to start mesing with the seam sealer in the engine bay, if I the weather holds I may be able to get that painted???
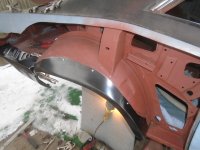
What a mess! I started inside the cowl, I was surprised that I think I could reach that whole front seam it always irked me that the seam sealer was at the bottom of a joint inviting water to lay in there, so I'm going nutso (at least I'm at the right place) & doing the top too! 20211010_134344.jpgthen I did a little on the outside, mann what a mess, is there any way to do this neatly, most of the places you use it will never be seen, but this is right up front!20211010_134355.jpgon the other side of the wheel well no one will be looking to close & I actually think I did a neater job out there??? 20211010_134414.jpg
 
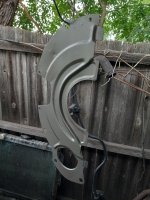
got the strut rods & tranny cover painted , eastwood bare metal, not sure I like it, but I guess where it's gonna be it won't bother me anymore? 20211013_152155.jpg20211013_152213.jpg
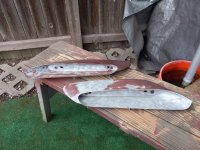
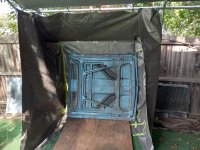
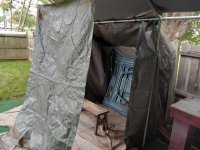
Started on these towards the end of the day yesterday.20211013_151205.jpgFinished off the scoop inserts, managed to get them done with one bucket of media so I only had to clean up once. Spent the rest of the session tearing down the "booth" (I use that term lightly) & built a bigger one to fit the hood in, now I'm trying to figure out how to contain at least some of the media, I think hitting this straight on is gonna be messier, maybe I should build a wall behind & over me!!!20211015_135032.jpg
rustys-workshop
 
Was pulling out my drop cloths to set up for some blasting & noticed I had one more tarp in there, turns out it was the perfect size to "build that wall" behind me. 20211016_105900.jpg
So after cleaning up the 30 or so pounds I had left once, after I shot the second time, before I cleaned up I pulled out the last 25lb bag & shot that, that went quicker, I could put the hose to the bottom & shoot away.
So 3 25lb rounds got me this far20211016_133958.jpg
So with the new & old mixed I had to go back to sucking from the top, not too bad only clogged up a few times, with the 50/60 lbs I could shoot for about an hour, I did have a little stress lifting the vacuum to sift it back in the bucket, I'm feeling OLD!!!
This is gonna take a couple of days. I'm wondering how many pounds are in the hood framing already!
almost a third of the way done! 20211016_144751.jpg
 

SiteLock

SiteLock
Back
Top