My 71 Duster work in progress

A quick check with a tape rule - for accuracy - and it looks like the engine is sitting 1/8" too far to the driver's side.
I thought yours was a native V8 car
It is, I bought the schumacher engine brackets because I didn't have any to start with. They're not conversion mounts. Also, the height is spot on.

The hassle I've run into with this thing is it seems to sit where it wants to no matter what I try. Drop it on the kframe and it just settles in the same place. I've tried holding it back but yeah sure 500 lbs will cooperate. It might involve some struggle but I'm going to loosen it up and make this thing happen and get the coupler away from that tube. As long as it's not hitting anything, I could not care less if it's in the exact right spot.
 
A quick check with a tape rule - for accuracy - and it looks like the engine is sitting 1/8" too far to the driver's side.
Loosen the insulator nuts and lift the passenger's side of the engine. See if you get clearance. If not, switch to the driver's side. Use either the accessory bolt holes in the head, or the intake bolts (on the same head/side of the intake).

They're not conversion mounts.
Then why do you have truck mounts rather than A-body mounts? They're not the same.

Also, the height is spot on.
As compared to?


Again, I'll find used factory before reproduction these days. That being said, you're having way more trouble with a "factory-ish" setup than I had with the cheapest six-to-V8 conversion setup I could find.
 
Loosen the insulator nuts and lift the passenger's side of the engine. See if you get clearance. If not, switch to the driver's side. Use either the accessory bolt holes in the head, or the intake bolts (on the same head/side of the intake).
Will do.

Then why do you have truck mounts rather than A-body mounts? They're not the same.
Right, they're not the same. These are what I have.

'67-72 A-Body V8 K-member to 340/360
1715793587450.png
As compared to?
As compared to that TTI chart I posted earlier.

That being said, you're having way more trouble with a "factory-ish" setup than I had with the cheapest six-to-V8 conversion setup I could find.
The last Duster I did was a /6 conversion and I remember doing that over a couple of days. Hedman hedders, drop the center link and boom they were in. That had manual steering and a column automatic. I think the stoopid power steering takes up so much room that every little measurement becomes critical.
 
The Schumacher mounts came with biscuits for a truck application and I'm not sure they are exactly the same as the a-body part, or if they're close enough to bolt in place and hold the engine up "good enough".
The truck mounts, in my experience, are thicker:

602265_1.jpg


Later applications also had overlapping limiter tabs, which is what's (curiously) on the right side of my engine:

2469-001.jpg


The A-body mounts are definitely thinner and have shorter studs:

2266-002.jpg


Going from memory, I also don't think the truck mounts are a direct replacement. I believe the stud offset is different, which merely involves ovalling the holes on the brackets. I remember reading something in Mopar Action about this decades ago. The limiter tabs were mentioned specifically since their "built-in" fail-safe design was a worthy upgrade "with a bit of modding" (or something to that effect).

The ones in the Schumacher picture definitely appear to be the OE A-body type, based on their thickness. The problem with trying to jog the engine one way or the other is that if you move it away from the column, that side sinks. Conversely, it will rise if you move it the other way due to the slant of the mounting pads. Check each mounts' thickness. If one's wider than the other, maybe a L/R position swap would do it. If they're the A-body mounts, maybe a truck mount would help on one side (or both). Vice-versa applies to that idea if they're actually truck mounts in the kit.

The Trans-Dapt kit came with one A-body and one truck mount, with the truck piece being specified as the RH side. My brain says the instructions said it would only go together that way, but that was several years ago now. Interestingly, we had to shim the LH mount to clear the steering box--about the same distance as the thickness difference in the two mounts. It's entirely possible that Trans-Dapt referred to "left" and "right" as you're looking at the engine, which virtually no other manufacturer has ever done at any point in history except Ford's cylinder-numbering system.
 
I loosened the nuts on the mounts to the point they were flush to the end of the stud, and loosened up the trans mount bolts.

First I tried the lift one side at a time idea, and lifting the driver's side gave me a little more room, lifting the passenger side jammed the header into the coupler.

But still not enough room.

So I shoved as many shims in beneath the biscuit as I could given where I had left the nut under the biscuit. No.

Next I tried lifting the whole thing and trying to pry it to the PS. No.

Next I tried prying at the shifter (best place to get purchase) and the transmission kind of bounced around but didn't really move.

The studs are sitting at the bottom of the V, both sides. Raising the DS helped but because the PS is still at the bottom it didn't actually move it only lifted.

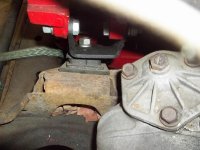
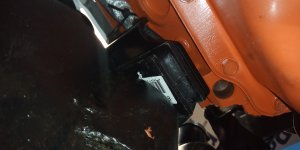
The DS biscuit is hanging about half off the k-frame pad, looks like more is off than is on. The PS biscuit pretty much squares up with it.

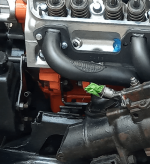
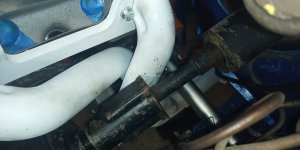
I get at best, a quarter turn of the coupler before it hits, and that's only because there's a wide and a narrow side to it. Don't forget, it's hitting both sides so a quarter turn actually means an eighth in two directions. It might as well not move at all.

Also, it looks to me that a dent would have to go half way through the pipe to get to clearance.

I haven't really looked hard at the k-frame bolts, maybe those are screwed up and holding it funny but I thought they were shouldered so they kind of had to go into place.


It's entirely possible that Trans-Dapt referred to "left" and "right" as you're looking at the engine
Which is why I try to always refer to the driver and passenger side and even that breaks down with a RHD vehicle.
 
Last edited:
Did you loosen all of the insulator nuts, or just the ones to the K-member?

OK, it's stupid question time.

I was going back through your photos to see if there was good, clear shot of the motor mounts. I found this one:

20240304_110510-jpg.27252


Definitely looks like an A-body insulator.

What stands out to me here is that the insulator is not flat to the bracket. There should be two holes in the bracket, one for the stud and the other for an alignment dimple (well, it sticks up but dimple comes to mind... wart?). It appears that said wart is holding the insulator away from sitting flat to the bracket. My stupid question: Is this mount installed correctly? Or is the stud in the dimple/wart hole?

This is the driver's side on Agnes, taken moments ago:

100_5963.JPG

You can see the hole for the alignment wart between the stud and the top edge of the bracket, and though it's hard to tell from the picture, the insulator is completely flat to the bracket. You can also see the shim we used to get the clearance needed at the steering box. Anyhow, my insulator appears to be much further down the bracket than yours. Yeah, it's a Trans-Dapt bracket but it looks pretty similar to OE--and that is an A-body insulator.

This is the passenger's side, showing the thicker truck mount with the limiter tabs off toward the left in the photo. Obviously, this is much different from the driver's side not only because of the insulator itself, but also the bracket and the relationship it has to the insulator--nearly flush. You can see the dimple hole more clearly here:

100_5964.JPG


This would move your primary well clear of the steering coupler, which is how I expect it's supposed to be.
 
Did you loosen all of the insulator nuts, or just the ones to the K-member?
Just the one to the k-member

What stands out to me here is that the insulator is not flat to the bracket. There should be two holes in the bracket, one for the stud and the other for an alignment dimple (well, it sticks up but dimple comes to mind... wart?). It appears that said wart is holding the insulator away from sitting flat to the bracket. My stupid question: Is this mount installed correctly? Or is the stud in the dimple/wart hole?
I will check but I remember the wart/hole locating dealio, and clamped each mount in a vise and torqued the stud to bracket nut to 70 ft/lb IIRC. I think the photo you found was when I was dealing with the alternator bracket so it might have been taken before they were torqued.

This would move your primary well clear of the steering coupler, which is how I expect it's supposed to be.
Be careful saying things like that because it's far from being clear of the steering coupler.
1715860524504.png
The coupler gets wider as it turns.

There is definitely something stoopid going on here because it's far from being in the right place.

This is what the insulators look like sitting on the k-frame, remembering I was fighting with level an balance while it was on the cart.

1715857674915.png

1715857745448.png
 
Last edited:
Found a photo of the mount area that shows either a bent bolt or odd visual angles but doesn't clearly show the area we're looking for.

1715859941315.png

The brackets came with new grade 8 bolts and washers but I had those factory bolts so I changed them because factory parts.

FWIW it seems to me to be so far off that the change needs to come from out at the tailshaft. The distance would multiply the change effect at the other end. Maybe.
 
Last edited:
If it comes down to it I see I can get Anchor 2469 mounts like are on the passenger side of Agnes locally. I really have to get this thing mobile. Starting to wake up too early to thoughts of the road runner showing up before I can move the Duster out of the way.
 
I checked the dimple and can feel it through the hole in the bracket. I took these photos a few minutes ago.

This shows how much of the driver side mount is hanging off the bottom
20240516_123400.jpg

20240516_123128.jpg
Passenger side showing the mount-bracket-kframe alignment. Note the mount looks "squished" toward the front. I need to investigate that.

20240516_123040.jpg
Driver side showing the mount-bracket-kframe alignment. It looks like it's sitting flat to me.

This shows how far wrong it is
20240516_122935.jpg
20240516_122923.jpg

I also loosened up the bracket-to-block bolts in case that was putting it in a bind. Nope. the only nut tight on it now is on the top bracket-to-mount stud. I really don't see that making a difference with all the rest being loose. Also in case I didn't mention it, the trans mount bolts are also loosened up.

No matter what I do I pick it up, I put it down, it's in the same spot and I'm not seeing anyway to move it.

Maybe it's time to take those brackets off and try a truck mount? With it on one side, the engine's going to be way off level, and with one on both sides I'm pretty sure the passenger torsion bar is going to hit the header. (based on experience when I first found the headers hitting everything). But at $10 each it might be worth a try if I'm out of other options.
 
Last edited:
Hope I don't open up another can of worms changing my motor mounts, my tail shaft seems to want to wonder over to the pass side after I mess with stuff.
I'm feeling bad about my low exhaust, but seems you have much bigger problems with those headers, hope you get it nailed soon!

Question, how much do motor mounts affect the tilt of the engine front to rear?
 
I had a battle with my tailshaft too. I think I noted upstream that I thought the threads where the mount bolts up were shot at one point, but chasing and retapping got me past that. I do not want to take those bolts all the way out again if I can avoid it.
 
OK, so this image gives me pause:

20240516_123128-jpg.27728


Before we get the insulator issue, the bracket does not appear to be fully bolted to the block at the lower bolt. It looks like there's a considerable gap there. Regarding the insulator, it's almost as if the engine's being forced forward.

Stupid question #2: What's the distance from the top of the passenger's side K-member mounting tab to the frame rail? I think I know the answer & am on a dead-end road, but it's worth asking.

Also the bolt holes for the transmission mount are slotted, although not a great deal, allowing for some fore/aft movement when messing around with this. Backing 'em off 1 turn should provide enough freedom movement.
 
Before we get the insulator issue, the bracket does not appear to be fully bolted to the block at the lower bolt. It looks like there's a considerable gap there.
You are correct - because I loosened it not long before taking that photo. It was tighter than Dick's hatband before that.

What's the distance from the top of the passenger's side K-member mounting tab to the frame rail?

Unclear what mounting tab you mean. You mean the part of the k-frame the mount sits on? As seen in that photo above underneath the biscuit? Then measure it across to the frame rail? I can find out.

Backing 'em off 1 turn should provide enough freedom movement
I've got more than that, just being careful to not run one all the way out and regret it.

I'm also thinking I might investigate what happens when I raise the transmission to see if there's any profit there ... and wondering if the Z-bar could be holding things in a bind keeping them from moving freely.
 
Unclear what mounting tab you mean. You mean the part of the k-frame the mount sits on? As seen in that photo above underneath the biscuit? Then measure it across to the frame rail? I can find out.
Yes. From the top of that (right under the insulator) over to the nearest part of the frame rail.

I'm trying to use different terms to clarify which part I mean. Bracket = bolted to engine, insulator = rubber mount, and tab = mounting surface welded to K-member. The terminology can get very confused when discussing this arrangement so hopefully it'll keep everyone on the same page without "do you mean the mount on the engine or the one on the K-member?" type questions arising.

I've got more than that, just being careful to not run one all the way out and regret it.
Once it's loose enough to move, any more is a little bit closer to regret. 😁

I'm also thinking I might investigate what happens when I raise the transmission to see if there's any profit there ...
There are transmission-mount spacers that were installed between the mount and tailshaft on some cars. Never knew why they were there, but they were. They're simply steel rectangles with holes in 'em, maybe 1/8" thick on the thickest ones.

... and wondering if the Z-bar could be holding things in a bind keeping them from moving freely.
I think I'd pull the clutch linkage entirely for the time being. It absolutely will restrict things somewhat, but it's also more potential for damage if it remains installed.
 
Yes. From the top of that (right under the insulator) over to the nearest part of the frame rail.
OK will measure next time out.

It is confusing I catch myself calling the bracket the motor mount so I started calling the motor mount the biscuit.

Once it's loose enough to move, any more is a little bit closer to regret.
It didn't really want to move at all last night but I also didn't think to put it on the rolling jack first either.

There are transmission-mount spacers that were installed between the mount and tailshaft on some cars. Never knew why they were there, but they were. They're simply steel rectangles with holes in 'em, maybe 1/8" thick on the thickest ones.
I have this boiled down (until I change my mind) to either the engine needs to move back, or it needs to move up. There's really only one of those that I can change. Maybe an 1/8th at the tailshaft will give me what I need up front, I won't know until I try. And with my luck, then the z-bar won't swing. But I'll cross that bridge when I come to it.

I think I'd pull the clutch linkage entirely for the time being. It absolutely will restrict things somewhat, but it's also more potential for damage if it remains installed.
Argh, those clips again.

I know in my heart of hearts that based on the shape of that thing there is a lickety-split way to slip it right on but nobody seems to know what it is because theirs always just pop right on, while I'm bleeding out from all the scrapes and pinches trying to get the dumb thing installed and looking for a header to beat a huge dent in to work off the frustration.
 
I finally realized where I saw truck mounts in a kit - they came with a trans-dapt bb conversion kit I bought.
"USES MOUNT PAD #TD 4221; OE pads for 69-71 Dodge D/W-Series truck (225/3.7L) (ie: 2266, 602266)"

Happy day, right? Nope, a 2266 is the same thing I've got.
 
The earlier truck (and '71 B-van) insulator is the same as the A-body one. The '72-'78 truck insulator (2265, 60-2265) is thicker than the 2266. The '78-'93 insulators (2469) is very similar to 2265 but with the limiter tabs. I also believe the studs on the '72-up truck insulators have a slightly different offset, but I don't have anything on hand for comparison.

What's curious is that in my computer cataloguing--which really can't be trusted much on 50-year-old stuff--shows a 2266 on one side (passenger's) and a 2265 on the other (driver'), depending on what year and engine A-booty I enter. Also, my similarly-suspect buyer's guide shows both as fitting various '67-'72 A-body models, as well as '73 Dart Sport 340. That last is why I know better than to put too much faith in it: All '73 A-bodies used spool mounts. It was not a rolling midyear change.

As far as the clips, you could disassemble the linkage by removing the bolts into the bellhousing, removing the nut from the inner fender, and only removing the clip for the pedal pushrod. Take it out in as much of an assembly as possible.
 
As far as the clips, you could disassemble the linkage by removing the bolts into the bellhousing, removing the nut from the inner fender, and only removing the clip for the pedal pushrod. Take it out in as much of an assembly as possible
That's exactly what I was going to try to do.

Now, measuring from the k-frame tab to the frame rail is 4-1/2". Same tape measure used as before, for accuracy. I ended up with a pretty straight-on look at it, from another position I saw 4-3/8 but that was on my back with the tape not level.

Raising the transmission goes the wrong way, it jams it worse.
 
K-member is about what I'd expect to see, so no more investigation there. I'd sorta suspected you had a Slant Six K, which isn't as different as you might think (and is why the adapter kits use the '72-up truck mount--to make up additional distance between the K and engine). As you mentioned, the K-member bolts are piloted, so it almost has to be located correctly to the frame rails if it's 100% secured. Besides, all your clearance issues are with things located by the K itself, not the body to which it's bolted. Move the K, you move the torsion bars, steering box/linkage, half the steering column, etc.

Looking at the photo on their website, it looks like your engine needs to go down and to the right (toward the passenger's side). It's hard to say, though, because the angle isn't quite the same. Their #7 primary appears to be lower in relation to the steering column, and while there's not a mile at the coupler it certainly looks to clear.

I seem to recall, and I could probably verify this with Stretch-a-Sketch, that when we were installing my headers we had to lift the engine on the passenger's side. I think it was while attempting the Thorley headers with the W2 adapters. With him pulling on the hoist/lifting chain toward the right, I had to give the valve cover several mighty heaves to get the engine to actually sit down all the way on the driver's side. Same issue--no matter where we tried to set it down, it ended up in the same spot. Remember, that slot in the K is 3 times longer than the diameter of the insulator stud. It wasn't easy, but it did eventually shift significantly and land where we needed it. Neither the steering column nor the header was in place yet, but weren't getting around the box when trying to install the header. We were also doing this with the car on the ground; in other words don't try such silly shit with it on jackstands. With the amount of push we needed to make it happen, it would have fallen off stands, no question.

Now, you'll forgive me making assumptions, but I'm going to guess B-Body-Babe is of smaller stature than myself, much less Jay-normous. Something that might help in this case would be to lift the driver's side enough to apply some kind of lubricant between the K-member and the insulator on the driver's side. Take both insulator-to-K nuts off completely. Set it back down, then lift the other side of the engine. Have Mrs. Bob (or a friend/neighbor/gullible passerby/your cabana boy) hold as much tension as possible on the chain toward the passenger's side while you push on that engine like it's a Kirby salesman that won't leave. Heave, release, heave again. I had to do it a few times, but it finally did move despite looking like it wouldn't. Stretch and I are both bigger guys (though I'm far from Mr. Atlas, 6" of extra height = leverage) so that's why I think putting grease, Vaseline, even maybe dish soap between the insulator and K might be a boon in your case. If you've got some way of prying on the engine in relation to the K, even better. Whomever helps needs to be ready to release the hoist as soon as you tell them (ASAP after it shifts). Oh, yeah--snug up the bracket-to-block fasteners so the assemblies can't cock and prevent movement. If possible, hold them up while you do so to give yourself maximum stud spacing at the K side of the insulator.

If that stud moves down only 1/8" in the K-member slot, it'll make a world of difference. Even if you still have to ding the headers for the coupler, it'll be dramatically less. I know you think it can't move, but I've got one American dollar that says it will. It just takes some serious effort to do it.

This is all I've got left to suggest. In my eyes, it really can't be anything else, unless your K is wrong (it isn't), the brackets/insulators are wrong or mis-installed (they don't appear to be, after going out and looking at a stock '68 340 K with the mounts and brackets still on it), or the car's been hit so colossally hard that both the frame rails and K-member are severely bent (it hasn't). Agnes had taken a hard hit at some point in the right front--the rail is still wrinkled--and it still went together. The only other possibility is that Doug's somehow completely blew the manufacture of a CNC-bent header (or two), or shipped you wrong parts. The former is possible but unlikely, and the latter is easily verified since the part number should be stamped in the header flange.

Note: 1/2" adapters be damned, we did get that Thorley header into place after the engine shifted. There was significant mangling of the primary, but that's to be expected with that much extra material added to the cylinder head.
 

SiteLock

SiteLock
Back
Top