My 71 Duster work in progress

I had that lever flipped up but it still wouldn't pull out. It turned out to have a kink at the end of the wire coming off the spool. The motor wound it up inside where I couldn't see it but wouldn't pass it through. Had to snip it near where it goes into the liner, then push that back toward the spool to get it out. Once that was done the rest of the wire came out by pulling at the stinger end.

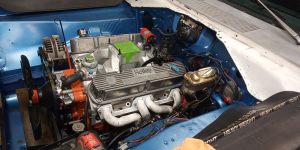
I even had all the parts I needed to change over from .030 to .025 wire. I'll have the exhaust back on it tonight, maybe the interior too. It's getting dangerously close to time to put the intake on it and try my luck at the flat tappet lottery. :poop:
 
The exhaust is all done. Didn't make it to the interior though.

1721914606511.png

Don't look too close at those welds. My eyes see pinholes where there are likely just shadows, so I end up putting welds on top of welds. I'm like the rain man and K-mart underwear.

I even put a new blade in the die grinder but didn't take but a minute of that to make me realize WTF am I doing, dressing welds on an exhaust system? I gave it more cleanup than it needed when I wire brushed the welds as I went.

It's hung right so the next work I have to do on the exhaust will be to cut it off and replace it, if I live that long.

I see a big muffler on the shelf there that came with a Duster I had. According to the guy I got it from there's something desirable about those, like the Caddy mufflers that were used on the Silver Bullet only not famous :D Something like they'er 2.5" straight through and quiet or something like that. I've got a pair but at the time I got them I didn't have a welder and they look like a lot of trouble getting them back to where they would be usable. A recent look found multiple adapters welded into it and some of the ugliest booger welding I've seen in the wild. And that was just on the end I could see.
 
I see a big muffler on the shelf there that came with a Duster I had. According to the guy I got it from there's something desirable about those, like the Caddy mufflers that were used on the Silver Bullet only not famous :D Something like they'er 2.5" straight through and quiet or something like that.
The two are mutually exclusive, in my experience. Sure, they may be quiet for the first couple of thousand miles, but every straight-through muffler I've heard sounds like a glasspack in pretty short order: loud, resonant, and blatty. It's a personal preference, of course, but definitely not my thing.
 
Sanity check me. Directions to prime the rocker shafts:
  • Turn the motor to 90* before top dead center coming up on #1 compression. The pass. side rockers should get oil.
  • Turn the motor to 20* after top dead center just past #6 compression. The drivers side rockers should get oil.

The engine was already past TDC on #1 compression so I started with the passenger side. I turned the motor around, lining up the 10 ATDC mark on the balancer with the 10 ATDC mark on the cover, so 20* past #6 TDC on compression. I primed the pump and saw oil at the driver side rockers.

Next I turned the engine directly around to the 3rd 90* mark which should be 90* before #1 TDC on compression, but when I primed the pump, there was no oil at the passenger side rockers.

Does my procedure match the directions?

Should I have left it be and let spinning the engine with the starter take care of it? I know I looked at the cam bearing holes.

I really don't want to take the rockers off. Planning for a Gina assist tomorrow, she can run the drill while I turn the engine.
 
I have to shake my head and look at the ceiling when someone over-complicates something. :rolleyes:
 
I went looking for photos, none showed the passenger side cam tunnel, but I know that's right, can remember looking at it, and the machinist was not an idiot. Have a photo showing the oil holes in the cam, of course there's about a 0% chance those were missed. The rocker shafts are on correctly, notches down to the front on the driver side, down and to the rear on the passenger side.

I'm just going to stop with this unnecessary frustration. It was pre-lubed and will be relubed quickly enough once I start cranking the engine.
 
Remember, the cam turns at half the speed of the crank. If you're sure you're in the right place, you probably need to rotate the engine another full revolution.

The oil feeds for the heads are part of the block and the heads themselves. The feed to the shafts comes through the rocker-shaft stand second from left when looking at the head. Unless you somehow got head gaskets with no oil hole--something I've never seen--or the cam bearing was installed wrong, the rockers will oil just fine. I'm guessing the latter would be on the machinist.

I'm just going to stop with this unnecessary frustration. It was pre-lubed and will be relubed quickly enough once I start cranking the engine.
That's what the factory did. If you've got fuel and the timing right, it should fire nearly instantly.
 
I'm not messing with it any more. I wouldn't have messed with it yesterday if I'd known it wasn't always as simple as the internet makes it seem. I had the driver's side primed in 5 minutes. Should've been done and out in 10.

FWIW That useless engine book I bought had one bit of info I could use - pull the coil wire and spin the engine to a count of 5 and repeat until you get oil pressure. I think that's because you gotta pump up the lifters or you'll be trying to fire with no valve action until they pump up, but it will also pump oil to the top.
Of course I was looking for info that wasn't included, so nothing really changed about my opinion of the book. It's hard to believe we ever got anything done relying on stuff like that before the internet.
 
FWIW That useless engine book I bought had one bit of info I could use - pull the coil wire and spin the engine to a count of 5 and repeat until you get oil pressure.
That's not information I'd use. That can be a lot of turning with no oil pressure. I'd use a priming shaft just long enough to hear the drill's pitch drop. At that point the pump is primed. I'd prefer that the engine start ASAP and the oil pump do the rest. I use break-in lube on virtually everything including the valve stems, rocker fulcrums and tips, and both ends of the pushrods. They'll survive the second or two preceding pressurization.

I think that's because you gotta pump up the lifters or you'll be trying to fire with no valve action until they pump up, but it will also pump oil to the top.
There's plenty of valve action to start the engine without pressurizing the lifters. Valves are open now with it just sitting; were that not the case, preload could be adjusted with no crank rotation. As I mentioned in the asterisked part of this post, you don't want the lifters pressurized on first start. Even if a valve doesn't hang, there's full valvespring pressure (x 1.5--rocker ratio) on the lifter faces before they're getting oiled (there's no splash oiling). To the second half of the statement: That's why I pre-lubricate all the valvetrain, even though the rocker fulcrums are the only pressurized parts in that subsystem.

I don't like the thought of any more cranking than necessary. It's an opinion so it can be disregarded. My thought is that if it fires immediately, the oil system will be rockin' full pressure in 1-2 seconds. Starter cranking might achieve only 10-15PSI, and it'll take much longer to achieve even that.
 
It was all lubed when assembled and it had 80 PSI on it yesterday.

I just went ahead and assembled until I got tired.

I know now why I don't like not using the cork under the intake manifold - I can't see to tell if I gobbed enough RTV in the gap at the rear of the engine. I think I did but it would be good to see it for sure.

1722131187512.png

Tomorrow starts with the rad and shroud, then the cut-to-fit hoses. I even had to trim the bypass hose.
 
I know now why I don't like not using the cork under the intake manifold - I can't see to tell if I gobbed enough RTV in the gap at the rear of the engine. I think I did but it would be good to see it for sure.
If the bead is thicker than the cork gasket, you're fine. 1/4" is more than sufficient.

Tomorrow starts with the rad and shroud, then the cut-to-fit hoses. I even had to trim the bypass hose.
Yeah, the hoses have all been cut to fit for decades now. It makes sense from a manufacturing standpoint, since the radiator fittings' locations are relatively close across body styles--even trucks.

The bypass hose is a bit of a puzzle, though. To my knowledge it only changed once, for the 1970 model year. Both the '64-'69 and the '70-'92 versions are still available. Gates and ACDelco show the early version fits several GM applications, while Dayco and Continental do not (and their hose looks different). The '70-up hose is almost exclusive to LA engines, with Dayco's wrong-looking version also fitting some Nissans. What's most curious is the geniune Mopar bypass hoses I have. Those are also cut-to-fit, despite being a very-specific hose used only on HD applications. They look like any other hose, but the inside of 'em is orange silicone:

image_2139.jpg


The OE number for that hose was 4012595, and the MP version was P4876373. The MP number included specific smooth-ID clamps, not the standard parts-store trash shown in the photo above. Both numbers are long discontinued. Hemiperformance.com.au apparently still has some--for a staggering $130AUD ($85USD) each.

Overkill? Probably, but it should outlast its owner. I bought a few several years ago when I realized they were going dodo.
 
You have to cut both ends of the lower hose and I managed to cut the rad end of it when I should've cut the water pump end. Somehow I got it turned around between the prior cut and checking fit. At least AZ has it in stock.

I've been seeing thumbscrew hose clamps on Motor Trend. I'm sure they're getting them for free. Have any experience with those? Seems like a one or two time convenience so I'm skeptical if they cost more. (I've already got clamps)
 
You have to cut both ends of the lower hose and I managed to cut the rad end of it when I should've cut the water pump end. Somehow I got it turned around between the prior cut and checking fit. At least AZ has it in stock.
I'm pretty sure every vintage upper/lower hose available at this point was originally a truck version, which explains the excessive length and need to cut.

I've been seeing thumbscrew hose clamps on Motor Trend. I'm sure they're getting them for free. Have any experience with those? Seems like a one or two time convenience so I'm skeptical if they cost more. (I've already got clamps)
I've never even seen them before today; I had to do a search. I guess they'd be great for a roadside repair, in race pits, or engines going on/coming off the dyno stand. If Motor Trend/Hot Rod has started pushing them, I'm sure I'll start seeing tons of 'em in online photos and at the few car shows I bother to attend. People might even start asking for 'em at our store. Magazine sheep are easily led.

They sure are ugly though, right up with valve-cover wing bolts--another "convenience" that isn't actually convenient. Honestly, if your valvetrain requires that much maintenance, quick access is the least of your problems. Regardless, speaking only for myself, it would be embarrassing to open the hood with either item in place.

If you've missed my multiple posts on the topic, I've 100% reverted back to factory-style Corbin clamps. With the pliers designed for them, they're fantastic: quickest on/off ever, constant tension, stone reliable, and cheap like borscht (unless you're buying restoration kits on eBay--holy markup!). Worm-gear clamps are a complete pain in the ass by comparison. Worm-gear clamps that also require my fingers? No thanky, my on-again/off-again carpal tunnel syndrome does not approve. I'll use a ratchet or screwdriver rather than aggravate the condition. On particularly bad days I can barely operate the twist-tie on a loaf of bread.
 
On my Roadster I went with the OE Corbin clamps at the radiator, but Gates Powergrip on the engine side, and the lower hose that goes to a pipe on the body.IMG_8750 Copy.jpeg
 
AZ lied. The hose will be here tomorrow.

I've got to do something about an accelerator cable. I don't know if a stock one is long enough with the air gap manifold or not. I had one made with a bike brake cable and some lokar parts but ended up It was stuck and I broke part of it trying to adjust it.

This is what I broke.
Lokar WCA-1034 Lokar Cable Fittings | Summit Racing

I'm confused why this kit includes gloves but the price is right.
https://www.amazon.com/Spurtar-Adjustable-Automotive-Replacement-Accelerator/dp/B0B6BLY7PH
 
Last edited:
On my Roadster I went with the OE Corbin clamps at the radiator, but Gates Powergrip on the engine side, and the lower hose that goes to a pipe on the body.
Those Powergrip clamps are awesome, but can get expensive fast since the only way to remove 'em is to destroy them. I've got some of those on the Valiant back by the fuel tank.

Bastards!

I've got to do something about an accelerator cable. I don't know if a stock one is long enough with the air gap manifold or not.
I think it might be, based on the fact that the OE ThermoQuad intakes are pretty danged high rise (in '71, there was a 3/16" spacer beneath the carb to boot, with a gasket on either side of it). If you want carb-pad measurements on a stock intake, I've got a few lying around including a '71 340. I can set a Holley on it if you need an air-horn measurement.
I used a Slant Six cable on Agnes for a couple of reasons: One could chuck a cat through the air gap under that W2 single-plane, and I had to make a custom throttle-cable bracket anyhow due to the different intake-bolt spacing on W2 heads. Mind you, a factory '69 Dart 340 air cleaner hits the fargin' hood on my car, and the bracket is well over an inch taller than a stock 340 part.

Don't feel too bad. Lokar parts have a well-earned reputation for being garbage.
 

SiteLock

SiteLock
Back
Top