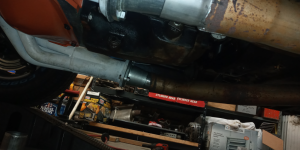
My 71 Duster work in progress

The worst are welded in H- or X-pipes. At least mine are separate so they can be swung out of the way and don't necessarily need to be removed to work around them.
Well, there's not much one can do in the case of an X-pipe. An H-pipe can be slip-fitted but the X has to be welded--to some extent--by nature. In the case of my car, it's welded to the header adapters, then to the headpipes. Overall it's about a yard, maybe 4' long. It's band-clamped at the rear so I can disassemble it there and unbolt it at the headers if I need it out of the way. A clutch or transmission change are really the only reasons I think it would need to be removed. If I pulled the engine/transmission as an assembly, the crossmember can be removed around it. When the tailshaft drops, it'll just clear the X-pipe as it swings down through its arc.
 
I cut/peeled the old welded in reducers off the old pipes, picked up the parts store loaner pipe stretcher and had at it.

The passenger side is going to need some tappy-tap hammer work because the front edge of it is bulged out so it wants to rock. But the length is good enough to where I can get a u-bolt clamp on it.

The driver's side is another story. To get the right length there I end up with about 1/2" or less of the collector in the pipe. Now I really do need a pipe stretcher. I plan to cob something up with a 2-1/2" adapter, cut to length.

Also, the collectors that came with the headers has the flange welded in place, so it's a trick to get it all aligned because once it goes together it will be a bigger trick to get the collector to turn in the head pipe if the flanges aren't lined up. I will remember to see if I have separate parts laying around that I can use.

It doesn't have to be perfect, it just has to move CO out the overhead door. The side effect of cutting down on the solid 1/2 hour of mind-bending noise can be either a good or bad thing depending on your POV. After all, I can always wear hearing protection but blasting the neighborhood would be priceless.

Since I had this and other things to do before the intake is a pressing matter I went ahead and ordered in a set of the print-o-seal intake gaskets just for good luck. Also, there's no reinforcing that poop shroud. It's going to have to work like it is until I find a replacement. I did consider buying a HF plastic welding kit and still might. A shot of gorilla glue is as good as it gets for now.
 
I've got the driver's side fit to length but the headpipe hits the frame so I have to drop it all down to heat and beat it until it will bolt up.

The passenger side turns out the problem fitting in the headpipe isn't so much clamp damage to the head pipe as it is an oversized pipe on that one reducer. The collector for the driver's side slips right in the new adapter, the passenger side is reluctant and stops short of the end. I've filed on it some trying to get rid of high spots; that only helped a little. Also might need to heat and beat this side too.
 
Also, the collectors that came with the headers has the flange welded in place, so it's a trick to get it all aligned because once it goes together it will be a bigger trick to get the collector to turn in the head pipe if the flanges aren't lined up. I will remember to see if I have separate parts laying around that I can use.
TTi welds the flanges welded solid to both the header and the "reducer" and I wasn't crazy about it. I'd bought a set of ball-flange reducers for them, only to find those won't work on welded header flanges, at least not the TTi because the weld is on the inside. The surface of the weld isn't smooth enough (and the ball flanges I got were poorly made). Back to the drau-ring board, just as I was all set up and into the job.

There's no reason you can't make your "final" headpipe adapters now. Both now and later you just need to get past the T-bar/transmission crossmember, be it for break-in extension pipes or the full exhaust. Why do it twice, and incur both cost and effort twice? It's wasted money if nothing else. What I ended up doing was bolting the reducers snugly to the headers, then making my X-pipe in situ. Not having an X-pipe will make it a lot easier--I had six slip joints to align to get my outlets where I wanted them. This is one of those places where I much prefer welding over clamps, X-pipe or otherwise. A real-world situation where one would want to remove only the first 6-24" of an exhaust system eludes me, and if it did get taken apart the realignment process would suck.

What I suggest is start like you're doing the final exhaust system. Bolt the collectors to the headers, then have a look at where you are and where you need to be. Get yourself an 18-24" extension pipe just for mock-up purposes, and see what you, the local parts store, or Walker (or any number of other vendors) have for angled bends. Whether the bends you use are mandrel or crush, that's your call (I'd suggest mandrel--read on), but make sure they're I.D/O.D., meaning they'll slip-fit into each other. Depending on where your header collectors are and how they're pointed, you'll probably need two 45s per side to get past the T-bar crossmember and then point straight back. You may need a short extension pipe after the collector on one or both sides to position the angle pipes correctly in relation to the crossmember--straight through the middle of the clearance dimples. If you look at my X-pipe, the difference in length in the 45s coming out of the collectors is evident:

100_3625-jpg.21582


You'll also notice that I slightly "over-bumped" (expanded) the pipes a bit. That gave me some extra adjustment. It made no difference in sealing since I was welding it anyhow. As goofy as it looks from this angle, that X-pipe is dead-nuts centered in the car (not to the engine). The TTi headers essentially point right through the center of the clearance humps which the Rubber Dougies might not, but you get the idea.

The reason I suggest mandrel bends in this area has nothing to do with performance. If you look again at the picture, you can see I cut the angle pipes coming out of the X on a bend (the four 45° pipes were identical). It was necessary to get the outlets where I wanted them. Good luck pulling off a nice fit, or any kind of sealing, with a crush-bent pipe in that situation. No, the rental pipe expander will not save you.

OK, so now you're past the crossmember and the pipes would point approximately straight back, but they're all flopsy and sensitivity because you expanded them a bit for wiggle room. If you hyper-expanded them, no problem--cut a couple of slots 180° from each other, pull it together with a U-bolt clamp, and weld (you may have to do this twice, in 90° intervals). Take your floor jack and a short length of 2x6 to hold the pipes up where you want them and level to each other. Use your extra 18-24" extension pipe to ensure they're pointing where needed (straight back) and that you've got floorpan clearance. Make any adjustments and tack-weld them in a few spots. Remove them from the car, weld them fully, then reinstall with gaskets--soft aluminum is highly recommended at the collectors. There's no reason to remove them again. You can rig whatever sort of diabolical flex-pipe horsef__kery temporarily for cam break-in, and when the time comes for final exhaust you've already got the "tricky" part out of the way.

Or, you could just order Summit Racing's house-brand A-body exhaust system. That's what comprises almost everything on my car rear of the X-pipe. It fit well, has plenty of adjustment, and is fully mandrel-bent. The mufflers sound good without being obnoxious, but you may be able to get it without 'em and use those of your choosing. I modded the hell out of mine for resonators and Flowmaster 3"-2.5" smooth tapers but that was after I'd fitted most of it. After seeing Rusty's TTi system I'd never order that--and I have a pipe bender at my disposal. I couldn't believe the crappy fit and lack of ground clearance. For that kind of dinero, I'd expect much better. The Pypes systems I saw appear to be no better.
 
The system will be OK like it is once I get it smashed past the crossmember. Also, the system is old, and I'm working on my back. If I had a lift, I might see things differently but there's no reason to make more work for myself.

I've already done the hard part - getting the welded in reducer out of the head pipe. Once it's together and going down the road I may end up hiring a new system installed. Probably not, unless the mufflers rot.

I installed either a Summit or Jeg's kit on a Duster before. They're probably the same except for the part # stickers. It fit OK. I remember having trouble getting the tail pipe twisted in the right place/direction, mostly because I was working on my back then too, but I was also 15-20 years younger than I am now.

The reducers are welded on the outside, but I still don't like not being able to rotate it to line it up with the header.
 
I was under the false impression that you needed an entire exhaust system.

I installed either a Summit or Jeg's kit on a Duster before. They're probably the same except for the part # stickers. It fit OK. I remember having trouble getting the tail pipe twisted in the right place/direction, mostly because I was working on my back then too, but I was also 15-20 years younger than I am now.
I don't think Jeg's does full exhaust for Mopars, at least not anymore. I looked fairly recently and couldn't find anything. They may have done them in the past, though. The Summit exhaust has a slip connection in the tailpipes directly above the rear axle, which I could see being a pain but in my case it made it a lot easier to align the tailpipes (I moved the springs inboard).

The reducers are welded on the outside, but I still don't like not being able to rotate it to line it up with the header.
Same as TTi, but the TTi collector flanges--the ones on the headers themselves--are welded from the inside. That made the ball-flange reducers unusable without a fair bit of grinding. I didn't do that for a couple of reasons, first being the weld didn't look like it had much filler and would grind through easily. The second is that it needed to be pretty precise grinding to actually seal. Ever try to die-grind a perfect circle with a taper? Yeesh.

After I finished the X-pipe, the fact that the flanges didn't rotate was actually a plus. Once a single bolt is in place, that side of the X-pipe is aligned, period. Having dealt with loose header flanges whilst working on the Trans Am, Cordoba, and '72 Charger (whose headers came with welded flanges and reducers, but I bought different reducers), it was a bit of an epiphany to realize how much I preferred the solid flange. When I had to disconnect the headers to get the heads off, nothing moved until the last bolt was loose. That was nice, because not only was I working on my back, I was doing it in my back yard.

All this talk of headers has me thinking I should probably order a set for the Challenger now. Lord knows they're not getting any less expensive. I have a brand-new set of Hooker DarkSide headers for it already, but those have some of the same drawbacks of the Cyclone and Blackjack headers of yore including fit and lack of ground clearance. I don't know if "already purchased" outweighs the benefits of TTi, which goes back to the "tired of fighting" discussion earlier.
 
OK it's hung.

This side will be OK with just clamps.
1721585192070.png

The passenger side needs to be welded before it can be trusted. There's no more room to cut back to add an adapter like on the other side. The exhaust is located front/back by the welded bracket on the tailpipe that mounts directly under the frame rail. I could move it forward if I replaced that, but then my tail pipe would be too short on that side.

1721585227189.png

The headers hang down a little
1721585268338.png

I didn't take a photo of the smashed pipe. It worked perfectly enough.

As a whole, the exhaust is kind of cobbled together, no different than if I had done it, 10 years ago. There are no holes but there are signs of rust where you'd expect it like at the muffler end of the tail pipe.

It could use replacing, for sure, but it doesn't need it.

I'm planning to replace the hillbilly lag bolt through the floor muffler hangers with nuts or maybe bolts welded to the floor. There should be a normal muffler hanger on one side but I don't remember seeing it. Right now it has a strap hanger that is lagged through the plate for the seat belt.
 
The passenger side needs to be welded before it can be trusted. There's no more room to cut back to add an adapter like on the other side. The exhaust is located front/back by the welded bracket on the tailpipe that mounts directly under the frame rail. I could move it forward if I replaced that, but then my tail pipe would be too short on that side.
Give it a couple of tacks and it'll be fine for break-in. You can lower it for full welding later.

The headers hang down a little
That's really not bad a'tall. The Hedmans on my '72 Charger were so low you could see part the upper primaries looking from the side of the car. I can't say that the TTi headers are any gooder; I didn't worry about it that much. On my car the primary concern is that ridiculous Moroso oil pan (which I want gone, honestly).

As a whole, the exhaust is kind of cobbled together, no different than if I had done it, 10 years ago. There are no holes but there are signs of rust where you'd expect it like at the muffler end of the tail pipe.
If it's surface scale and not actual rot, it'll probably last a few more years. Heck, it might last quite a while with some wire-brushing and paint.

I'm planning to replace the hillbilly lag bolt through the floor muffler hangers with nuts or maybe bolts welded to the floor. There should be a normal muffler hanger on one side but I don't remember seeing it. Right now it has a strap hanger that is lagged through the plate for the seat belt.
When I had the first exhaust put on the Valiant--the Slant Six dual exhaust now gracing Stretch's Dart--our exhaust guy welded bolts to the back side of the seat-belt plates. Hokey-lookin' but effective. I honestly don't remember if I reused them or cut them off and found a different solution. Either way, it's going nowhere.
 
You can lower it for full welding later.
Unless I take it off the mufflers I need to do the entire bottom where it is, then lower it and do the top.

It's close to falling out LOL so I have to tappy tap the bottom up, maybe add a floor jack to the equation to get the head pipe better aligned with the bottom of the reducer. Then bzzt, bzzt, bzzt. Really (not) looking forward to having that stuff falling on me.

our exhaust guy welded bolts to the back side of the seat-belt plates
I did bolts too. Would've done nuts if I had a helper but no way to hold a bolt in place then thread the nut on it in that direction. Putting nuts on from the bottom is easy and snugged the bolt head to the floor for a good weld. I added 1-1/2" bolts and have strap hangers on rubber bushings bolted to that.

Still gotta put the danged interior back in it though.
 
Unless I take it off the mufflers I need to do the entire bottom where it is, then lower it and do the top.
Methinks if you removed the hanger at the muffler you'd have much better access for welding across the top. If you've got 2-3 good short welds beforehand, it's not going to move when you drop it.

Still gotta put the danged interior back in it though.
I need to take half of mine back out. We forgot to weld the parking-brake cable bracket to the new floor. 😖
 
Methinks if you removed the hanger at the muffler you'd have much better access for welding across the top.
Yes I do that, unbolt all hangers and drag it out the side. The car's up high enough I can put the pipe on a kik-step so it's off the ground. I have to cover things with a welding blanket to be safe though.

One weird thing - I tried a clamp on the passenger side reducer, and there was enough of a gap at the bottom that the impact shook out some rusty crap. I noticed something that looked solid, and found a danged E-clip had fallen out of the head pipe.

This is not a tiny little carburetor sized piece, it's about 1/2" or so in diameter and looks like something out of a pump, maybe a transmission. It shows no signs of having been through the combustion chamber. How the heck did that get in there?
 
At the shop where the exhaust was originally installed, they still talk about that time the E-clip flew off the car Dave was fixing that's never been found. We know now that it flew into the exhaust system Mike was installing in the bay next to Dave.
 
There it is. When you see Dave get his address and I'll send it to him.

This was kind of odd too and happened recently. I took the lid off a spray bomb, and a u-joint clip fell out. Weird, but I use those lids for holding small stuff like that to keep me from losing them, so it's not out of the question. But naturally, my first thought was no you didn't, did you?

I took the driveshaft out, and both clips were in, but one had been put in crooked and was on the way toward popping out. I was working my way in to look at the clips and noticed the drive shaft moved the way it's not supposed to.

<insert spooky sound here>
 
I took the driveshaft out, and both clips were in, but one had been put in crooked and was on the way toward popping out. I was working my way in to look at the clips and noticed the drive shaft moved the way it's not supposed to.
This a bit murky, kind of like the warning that I believe was on a curling iron: "Do not use for the other use."
 
I noticed some similar e-clips on a jack last night, but none are missing.

The bottom of the wonky pipe is welded now, good enough anyway. I realize why exhaust welds look so crappy. Ain't nobody got time to spend on it like I did and it still looks terrible.
 
I wish I would've picked up welding before my vision started failing me.

I can only bzzt-bzzt a dot at a time because I might as well have my eyes closed after the big flash. By the time my eyes recover I could be welding anywhere. Plug welding's not bad because my eyes settle down about the time I need to start filling around the edges, but welding a bead is not something I'm even going to attempt these days.

The weld around the outside bottom is as pretty as it could be, then things jumped right in that handbasket to hell when I had to switch to the other side of it. I ended up in a position where I was pretty much one-handing it, and that's another recipe for a lot of grinding when I'm in charge. At least it's exhaust so I can just leave it like it is and not worry about it beyond knocking it down to be sure I didn't miss anything.
 
Ran out of wire about an inch before the end. Hammering it as I went left a raised up part toward the end so I had to split that and hammer it flat.

I was using .030, have a spool of .025, but couldn't figure out how to get the wire out of the housing. I don't remember it being difficult before and it was dinner time anyway so I stopped for the night. I would've sworn you just flip up the one gadget and pull the wire but that didn't work. I think it's stuck in the little roller it runs in. I'll figure it out. (Lincoln 140HD welder)
 

SiteLock

SiteLock
Back
Top