What are you working on?

Well thanks for that. I don't know that I really have any skills that anyone else doesn't have or can't have. My dad has an extensive wood shop and he taught both my brother and I how to use that shop and the tools in it. As for this project, Its just a matter of applying that to this. As far as the coach work body. I bought a book, read it, and asked the guy who will be doing the body work how he wanted things done. The rest is just learning as I go and using common sense.
Don't be so modest... I've seen and worked with some pretty experienced bodymen and I'm just about certain not one of them would take on a project like this. It takes a certain kind of fella to want to do this work. :) Being a mechanic - not a body guy - and wanting to do this speaks volumes about the kind of fella you are.
Most mechanics I know are all thumbs and no patience when it comes to any ​kind of body work.
Consulting with the man who will ultimately do the body work is a great idea! Trust me, he'll be thanking you for that!
 
Not to diminish his considerable skills one bit, but a large part of what makes Stretch so good at this is his inclination to treat every car he works on, particularly classics, as if it were his: "This is how it should be done, so this is how I would want it, so that's how it's getting done." I don't even think he realizes how much that affects him. Combine that with someone who, after all these years, is still the most un-jaded, wide-eyed gearhead on the planet and you've got the ultimate guy to work on your car if you're unable or unwilling to do it yourself. And yes, he's the consummate craftsman.

Before his gear-shaped head gets too large, however, I would like to point out that I once beat him in a drag race because he missed a 1-2 shift. :D
 
then as a late xmas present i SCORED something ive wanted for ages....a baja/africa/dakar rally headlight...these things are VERY hard to come by..and they are "universal" and not for a specific brand/make....i got busy fitting it...cleaning it up and a quick rattlecan job on it till i can repaint the ENTIRE bike come summer

course this ment making mounts for it from scratch..moving the turn signals again and mounts from scratch..making a bunch of little stuff....then of course i found i had more room on the speedo so i could re-mount it on the oem mount..sorta..with some tweaking(better cushioning) which also ment new switch mounts, re-doing the forward wiring harness again.....in the end i ended up with AMAZING light aimed down the road instead of at the fender..and the LOOK that ive always wanted

then spent 4 days doing test n tunes..tweking every carb jet, needle, seat, etc possible and got it neer dialed in.....and yesterday i made a phone mount....which i detest the idea..but me and my wife have been maping my old trails trying to get to a place i havnt been since the early 80s..and with washed out roads, trails and gates..roads that dont exist trails long since gone...it means gps maping everything till you find a working path

IMAG2833_zpsqydmv9wx.jpg

IMAG2834_zpstioscaos.jpg

IMAG2835_zps9licttfh.jpg

IMAG2838_zpsqkxmsxud.jpg

IMAG2840_zps9f1c9vdm.jpg

IMAG2910_zpsbvixdpej.jpg

IMAG2911_zpsgtqraeso.jpg

IMAG2909_zpsl2t7epgn.jpg

IMAG2914_zpsml3gk9bt.jpg

IMAG2915_zpsbnfrd4zy.jpg

IMAG2918_zpstjxoesux.jpg

IMAG2919_zpsdf3iuzai.jpg

IMAG2922_zpsonvqry38.jpg

IMAG2924_zpsnrbnlzpt.jpg

IMAG2930_zpsvgilo3zk.jpg

IMAG2931_zpsyjln6v4i.jpg

IMAG2941_zpsqguwkuvf.jpg

IMAG2942_zpsjppbjo66.jpg

IMAG2945_zpsvjfwhb2v.jpg

IMAG2979_zpsqdpcgzbg.jpg

IMAG2980_zpsmzworq95.jpg

IMAG2981_zpsx83fsiah.jpg

IMAG2983_zpsnfnnp7f6.jpg

Man your garage sure is looking nice 69....lots of room to work on stuff now!
Those Baja lights look great, and the speedo and other mods turned out really nice. They appear to work together visually as well!
 
I'll be cleaning up parts to swap in the 11-3/4 front disc brakes on the Valiant this weekend. Need to get it on the ground and out of the garage so I can clean up the expanding ATF puddle.
 
Working on selling the Valiant and the A-body 8.75". Separately, of course. Sorting through some other stuff I'm sure I'll never use while I'm at it.
 
Well, the front end parts are still de-rusting, so I went another way


i also drained the oil and ATF, today I'll get the everything else unhooked and/or removed to get the motor and trans out once I get the front end reinstalled.

Oh, Doc, I received a Valentine's gift from my wonderful wife, it was in my eBay watch list...

 
I hope you painted the insides of the frame rails while you were in there! :naughty:

I'm kind of confused looking at those motor mounts. Not quite sure what I'm looking at in terms of how that bolts together, but I assume there's an engine-side bracket that mates up to what's pictured on the box.
 
if your gunna do a front end..drop the engine with the k member put the new one in the same way.....its how the factory did it and it makes things soooooo much simpler
 
I hope you painted the insides of the frame rails while you were in there! :naughty:

I'm kind of confused looking at those motor mounts. Not quite sure what I'm looking at in terms of how that bolts together, but I assume there's an engine-side bracket that mates up to what's pictured on the box.
Yeah, I'll get a pic of the brackets that bolt to the engine. Of course I painted the insides of the rails. I have some sanding to do on the other parts of the floor pan, there is some rust. Thinking I might just fiberglass them for now, not really that bad overall.
I thought you said you couldn't do bodywork? That floor looks nice!
Thanks, but as much body work as that is, it isn't straightening a quarter or anything that will be seen. Besides carpet and undercoating will cover all of my shortcomings.
 
you do NOT need a lift..i did it back in the 90s in the driveway with nothing more than a floor jack and an engine hoist..and some heavy duty jack stands(truck) all this on a certain 68 fish...

you get the cars nose up on stands...remove front wheels, remove UCA to car bolts,..loosen up and back out the t bars, remove brake lines, do all your nrmal disco for the engine/trans...hook up the picker with enuf tension to start lifting the car , put a jack under the tail shaft remove trans brace and k member bolts....lowwer picker and the whole unit will slip out the bottom...pull it up and back in in reverse order...i set the k member onto a wheel dolly(harbor freight unit) and lifted the car with the picker and rolled the engine/k/trans out

if i can do it in the drive way with next to nothing you aint got an excuse

bonus points..you can seriously clean the engine bay at this point..paint and prep everything real nice ...even bolt exhaust manifolds on trans attached///litteraly pull it up in 90% complete..and bolting the engine to the k member doesnt get any simpler
 
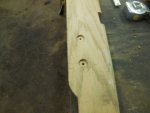
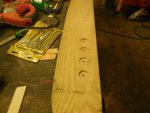
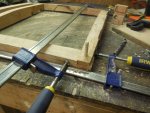
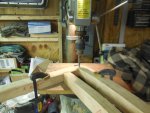
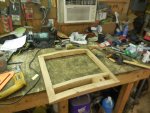
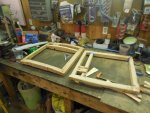
Back on the Oakland this weekend. I finished fitting the right side door frame and got it glued together. I also got the left side frame built. While I was waiting for glue and epoxy to dry I removed the sills and layed out and made clearance cuts for the rivet heads that are in the frame. After that I worked on the couture of the right side sill to get the cowl and hinge pillar to fit better. I still have more work on that couture before I can epoxy the hinge pillars into place.

The "heart" is bees wax. I rub the wood screws in the bees wax before installing them. The bees wax makes the screws super easy to thread into the hardwood. (There's a little wood working tip for ya). ;)

DSCN1772 resize.JPGDSCN1773 resize.JPGDSCN1775 resize.JPGDSCN1776 resize.JPGDSCN1777 resize.JPGDSCN1779 resize.JPGDSCN1780 resize.JPGDSCN1781 resize.JPG
 
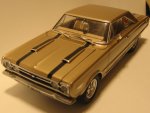
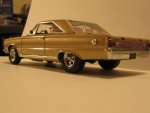
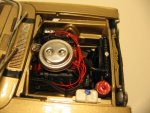
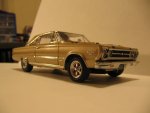
I've picked up the model building bug again... this is the latest.
 

Attachments

  • feb 20 1.jpg
    feb 20 1.jpg
    57 KB · Views: 30
  • feb 20 2.jpg
    feb 20 2.jpg
    43.9 KB · Views: 30
  • feb 20 4.jpg
    feb 20 4.jpg
    41.3 KB · Views: 30
  • feb 20 5.jpg
    feb 20 5.jpg
    83.5 KB · Views: 31

SiteLock

SiteLock
Back
Top