Rusty's not very quiet cuda progress

Thank's Bob, I watched some videos to try & see what I'm working with, they helped a lot, it looks like I just have 2 bad bushings, somehow the nut came off the first shaft before it fell apart,
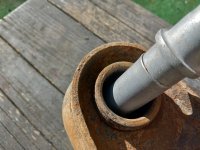
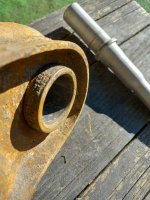
This is what's left over there20210907_172236.jpgYou can barely see the lip of the outer sleeve

The inner is still on the pin20210907_172305.jpg
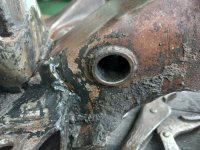
I think the rubber just fell out while I was moving it around the other day? 20210907_172312.jpgNow this is the back of the one that's stuck in there, something looks off center in there, hard to see but best pic I could get, the trick will be getting it out withiout ruining the pin, they sell in sets for over 100 bucks, no biggie when your gonna spend 20 or 30 K, but the less spent the better! 20210907_172425.jpg
 
The way I get them out when the rubber hangs together is to drill the rubber full of holes (end to end) then just wallow it out of the outer shell. You can melt it out with a torch too.

The rubber is the only thing holding that one in but you can't get to it to drill it out because the k-frame's in the way. I don't see being able to melt it out from that end either.

I'm still thinking prying the LCA away from the k-frame if it's stable enough where you've got it for that to work.
 
I'll take another wack at it tomorrow, drag out the crow bar & see if my forks are fat enough to bash in between there, that's the only 2 things I can think of at the moment, how did you get the sleves offthe shaft & out of the LCA?
 
Sleeve off the shaft is easy, whack it with a big chisel in about 4 different places around it and it will fall off. I use a cut off to put a groove in it so my whacks are in the same place. put it on something solid like a vise or anvil so it swells when you hit it.

The sleeve in the UCA is a trick. You can cut and peel it out, will require an air hammer and a lot of patience. I bought a tool especially for it but AFAIK they don't sell them any more. My 71 Duster work in progress
 
I saw the whacking thing on a video, the big one he threaded a tap in & then used a press, don't think I have a tap that big & definatly don't have a press, I do have a friend with one for the rebuild! I was thinking cut a slice in it with a sawsall & pry it out?
 
I saw the whacking thing on a video, the big one he threaded a tap in & then used a press, don't think I have a tap that big & definatly don't have a press, I do have a friend with one for the rebuild! I was thinking cut a slice in it with a sawsall & pry it out?
Yeah that's basically the way it works. Start a cut then try to peel it out. The hard part is not cutting so deep you damage the LCA. It will stand for some gouging though.

There's also a way to weld a big washer to it then press it out through that little hole in the TB end.

You're definitely going to need the press to put it all back together. Be sure you don't press the pin all the way through the bushing. I took one set to a place that had an old guy who knew what he was doing. But he didn't. I got to pay for the work and got to do it myself anyway. Win-win? I bought my own press right after that.

I just did the front end on my Duster and sure wish I had taken more photos but when I'm working, I'm working, and when I'm taking photos, I'm taking photos. So I'm pretty unreliable for documenting my work.
 
what i would recomend instead would be to put a nut splitter on there and break the nut, this should solve the issue with minimal issues and you should be able to re-use the pin

small caveat
im actualy wondering if you have the issue my 67 fish had where it actualy broke the k member sleeve free of the k member i eventualy free'ed the pin by cutting the nut, which is easily replaced

unless your just trying to get the arm off the pin, in which case i tend to almost burn them out..get that rubber to catch fire then carve a bit out and repeat

these CAN be pressed on with a good bench vise and some enginuity, another fun option is a bottle jack and something heavy.....
 
I'd be stunned if you were able to pry the LCA off. The rubber in those, as small as it is, is actually about 3" in diameter once it's pressed out of the shell (I'd love to see how they're made, seriously). Even when they're completely smoked, prying the arm off the pivot is essentially impossible.

So what's a fella to do? Cut the pivot nut diagonally with a hacksaw (or very carefully with a cutoff wheel or air saw) but stop a bit short of getting into the threads. Now put a large chisel in your cut and give it a firm whack with a "Thor hammer" (hand sledge). The nut will split. You don't need to get all the way into that washer for the nut to break. Just get as much as you can. Based on space, you might need to do it on a shallow angle. Keep it as close to a direct front-to-back cut as possible to make the splitting easier. If you've got the room, you could also try a nut splitter such as a Lisle 50180 (if someone still has one) or Performance Tool W88030... but in my experience, the hacksaw/chisel method is ultimately less frustrating. Once you've got the pivot out of the K-member, it can be pressed out of the control arm.

That shaft should not be spinning, even if the rubber were completely gone from the LCA bushing. If you stick your head under your other car and have someone else bounce the front suspension while you watch, you'll get a front valance to the head. Then, after you back up a bit you'll see those nuts don't move. The pivot is tight in the K-member--the bushings and torsion bars to all the work. Based on what you're describing, you definitely need LCA bushings, possibly a pivot, or just as possibly a replacement K-member. Pivot tubes cracking free of the K-member are not unheard of, and once they are the K is essentially junk--they oblong the holes into which they're welded. Guys much smarter than me advise against attempting to repair such damage due to potential bind/breakage.

The good news? There's nothing special about the K-member; it's not E-body specific. The '66-'72 B-body part fits, just make sure you get a non-Hemi V8 one. New pivots are available for about $75/pair from American Muscle (the link is to eBay; their website doesn't appear to work anymore), and the bushings are common parts-store fare (I highly suggest Moog).
 
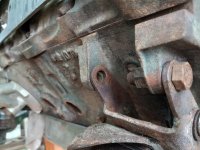
OK finally the luck wasn't BAD! I got a vise grip on the hub & the nut came off pretty easy .......20210908_120919.jpgthen I tried the other one in it's hole, it's pretty snug but did spin, now I didn't wack it all the way in either? The welds look good.20210908_121021.jpg20210908_121027.jpgthen I thought I had a bent motor mount20210908_123242.jpgBut when I loosened the bottom bolt up front it droppedinto place, turns out that bolt was too skinny & let it flop around? (bottom bolt)20210908_123839.jpg
You think I can save this bushing!!!!!!!!!!! Gonna try my friends press to get the shaft out & then it's rubes turn to try & get the sleeves out!
20210908_121056.jpg
 
Progress feels good, doesn't it?

The welding on that one sleeve looks like crap, at least in the photo, but it doesn't like like anything's really wrong with it.

If you can get on that pin it might press out of the LCA. Definitely worth a try, just be careful jigging that up and don't take any risks. Shit goes flying if it kicks out under pressure.
 
The welding on the K looks factory-issue to me... these weren't craftsmen, they were overpaid UAW guys that loathed their jobs. As long as it looks that good on both ends of both tubes, I'd run it.

Unless you're trying to save the outer bushing shell for some reason, cave that sumbitch in with a chisel starting at the outer lip, then work between shell and control arm once you've opened up some room. It weighs the same in the scrap hopper whether it's perfectly round or completely mangled. It's no fun, but there's little value in being pretty beyond not destroying the arm.

Unless I'm mistaken, the pivot can be pressed out of the arm from the torsion socket end. Use an appropriate-sized steel rod or bolt as a pusher. The machine shop at one of my former employers had an old throw pillow stuffed into a 5-gallon pail under the press as a catcher/drama reducer.

If your pivots were torqued but still spun in the K-member, I'd definitely consider using new ones. I've used quite a few of the American Muscle parts and always been impressed with the quality. The price ain't bad, either.
 
Last edited:
Progress is good, it's funny before I pulled the motor & was digging deep for things to do, now I look around at about a thousand jobs I can do & want to run & hide!
new tumbler is working overtime , I wasn't going to buy one after mine finally burnt then the kids asked what I wanted for christmas, so I said what the hey & I bought the bigger one, I can fit some bigger brackets in this, motor mounts are in there as we speak!One son through me 60 bucks, # 2 son just forgot & #3 son is working it off, so basically I bought myself a tumbler & they paid the shipping!!!
this is more than twice the size of my first one............20210908_182731.jpgExcuse the bench, it's a total disaster right now just too much stuff out, now I can clean that up to save me from the next thing I tackle on the car for a while.

these brackets probably would not have fit in the old one, nice to see clean metal without wire wheelin for hours! 20210908_182815.jpg
 
So with all that said today I finally climbed into the (well crawled would describe it better) engine bay & started stripping.
That shaft was easy, I went to my friends house to use his press, moved a ton of his stuff around & was ready to pull out the press when he says why can't we just bang that out, he grabbed a sledge & a bib punch & gave it a whack & out of the LCA it came, one more shot & it's on the floor, so then I put it on his vise & start wacking the sleeve, did it twice , quite a few wacks & it did NOT slide right off, he hit it with the air chisel & off it came.
After bout 4 hours of abrasive & wire wheels I'm a little more than half done tomorrow I'll pull the fender & hope to finish off the one side.
There's some damage on this one, get some pics to post I'm not sure what went on in there? 20210910_152959.jpg
 
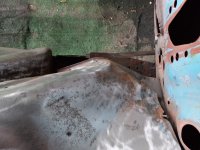
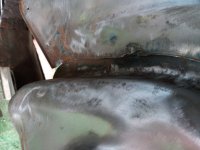
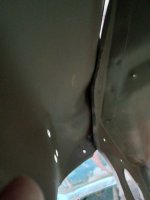
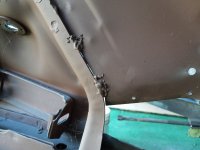
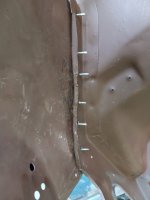
This has me stumped , section near the fire wall is bent way in, the few welds there are are in the wrong places, now I did manage to pull a full size starter out through that oversize hole without dropping the headers, could they have bashed that in that bad just to change a starter???20210910_183724.jpgYou can see there's not much holding the front on & the rear of it is not overlapped that inch or so it's right on the edge...........20210910_183753.jpgfirewall side from under the fender20210910_183816.jpg
So we cross measured to the rad support, measured straight from the firewall to the top shock hole & everything seems square & true there, I don't see that kind of damage from an accident, but who knows?
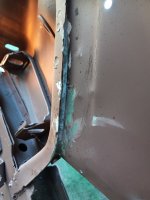
there's also a small area in front of the shock tower, this I think I can just pound right back?20210910_183642.jpg
 
Right off the bat, let me say these photos concerned me enough to clear all the shit off the hood of my Challenger so I could open it for comparison purposes. @Stretch can tell you that was no insignificant task.

There was some kind of hard impact here--hard enough to rip the inner fender away from the shock tower. You can see where the original rearmost shock-tower spotwelds were on the inner fender, and that they're nowhere near the shock tower itself anymore. That area broke free in whatever cataclysm befell the car. The inward crease through which you removed the starter is not intentional bending, that's definitely crash damage.

The intentional bending was forcing the rear edge of the inner fender back to (poorly) relocate it to the firewall. That outward bend at the forward lower corner of the shock tower happened when the back half was forced in and up, which also explains the inward bend large enough to remove the starter. I would bet the spotwelds on either side of that forward bend are fairly weak due to being twisted. The inner is still badly bent; the shape of its cutout for the shock tower isn't even close to right. I'd make odds that the shock tower is bent as well, and the rail may well be tweaked too.

My money says the LF wheel came off at speed and stuffed itself into the inner. It was either that or some sort of catastrophic front suspension failure. The condition of the inner around the battery tray belies a hit up front. Similarly, had another car hit it behind the wheel it's not likely the hood hinge/fender flange area would be that straight.

Unless you've got some insane hammer and dolly skills of which I'm not aware, the car absolutely needs that entire inner replaced, period. If it were my car, the first thing I'd do is have the entire structure of the car verified/straightened on a frame rack as-is (I think you'll want to reinstall the K-member for that). Only once you know all the attaching points are within spec should you remove the destroyed inner fender. While it's out, manipulate the shock tower if necessary--it's critical for your front-end alignment since that's where the upper control arm is anchored. Use the body service manual and measurements from the opposite side to get it right (assuming the opposite side isn't crashed). Do not attempt to correct the shock tower using the frame as its only support as you'll likely straighten one by tweaking the other. With the inner gone, getting the firewall and flange squared away will be much easier. Installing the replacement inner is last on the list.

If you do have mad metal skills, you're still going to have to cut it free to get it anywhere near the right shape. Ultimately I can't see where it's worth the effort over simply replacing it. This is important structure; I would highly recommend using an AMD panel here unless you can find a straight, solid OE cutoff ('71-'72 B-body is nearly identical, including sedans and wagons).

Any attempt to half-ass it will come back to bite you later, probably on the alignment rack when it can't be brought into spec. Recognizing the lack of any good workaround now and tackling this head-on will save you a lot of wasted effort. It'll pay dividends in both your confidence in the finished car and resale value. The car will be done sooner too.
 
It won't take much to cut the few crappy welds they put in to get it loose in the back area, I did note that tie rod adjustment were a few threads longer on one side compared to the other, I think this car was hit in a few places, I ran into some funky bends in the metal in the rear , tried my best to put em back to original positions when I was welding in the trunk floor patches & installing the new drop offs.
I'll pound on it a while & see how close to orig position I can get it & take it from there!
 
Hey Doc before I start making you crazy I want you to know that I do appreciate your knowledge & input, I have learned a lot over the years!
Now with that said, here's the mess I made, I have it to a point that I can live with, a friend was over & we did a lot of measuring & think frame rails & shock towers are in the correct positions, the inner fender definitely is NOT.
Starting up front she's back at least 3/4" when I looked at the 56 spot welds I'd have to drill I just pounded out the big lumps & called it a day.20210911_101307.jpgOut back I cut out a few spots on the top inside & wizzed off the outside welds, the firewall part I could not get the spot weld drill in there so I had to chisel those out, good thing they only put 3 .20210911_104212.jpgcut out20210911_105844.jpgFirewall section20210911_110931.jpgProceeded to hammer & dolly & bash & bang, got the fire wall side looking close but barley an overlap at the shock tower, even tried a little gentle persuasion & still came up way short? 20210911_131550.jpgGot the fire wall side screwed down & one in the tower side 20210911_123022.jpgStill have a little beating to do there20210911_123027.jpgAround this time charger man stopped over, we are looking it over & he notices how wide the lip is on the other side, he thinks someone cut metal off this one from the top all the way down the back side of the shock tower, we started measuring & sure enough it was way thinner, at the bottom it goes in (missing) an extra 1/4"
So at that point I started drilling for my plug welds

One round of welding & grinding done, will go back tomorrow & fill in all the holes I missed! 20210911_154433.jpgIt almost matches the frame rail now20210911_154450.jpgIt's got a lot of extra dents up top from my pounding now that it's welded I can smooth some of those out
got rid of the little gap here..........20210911_154503.jpg& the 4" gap that was at the top on the firewall side.............. again now that it' welded I can close the gap in the middle a bit.20210911_154514.jpg & that my friends is the rest of the story!
 

SiteLock

SiteLock
Back
Top