Rusty's not very quiet cuda progress

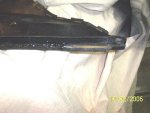
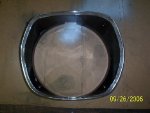
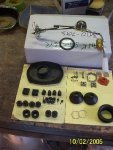
Somehow I ended up with 3 lefts & one right, the right is driver condition so I have to match that with whichever left comes out best?
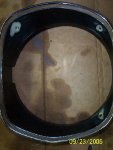
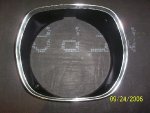
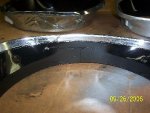
2nd one had driver qual. chrome but stripped out holes, so I tried an epoxy repair, don't know if it will hold up?
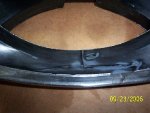
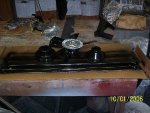
then rustolium semi gloss blk! you can see the repairs, not sure how much with screws in, one is pretty wide!
 

Attachments

  • 450 epoxy repairs_1947.jpg
    450 epoxy repairs_1947.jpg
    29.8 KB · Views: 8
  • 450 semi gloss black_1952.jpg
    450 semi gloss black_1952.jpg
    30 KB · Views: 11
3rd one has decent chrome, well cept where it cracked! glued that up & shot it with rustolium gloss black, hard to tell in the pics but maybe too glossy? I suppose I could fill the repair a bit if I wanna get picky? :huh: Rich.
 

Attachments

  • 450 glue repairs_1946.jpg
    450 glue repairs_1946.jpg
    30.6 KB · Views: 8
  • 450 rustoliun gloss blk_1955.jpg
    450 rustoliun gloss blk_1955.jpg
    25.8 KB · Views: 7
  • 450 crack repair_1954.jpg
    450 crack repair_1954.jpg
    35.2 KB · Views: 6
washed up (well kinda soaked em in a bucket of hot soapy water & rinsed) the wiring harness's (?) anyway this connector was all taped up, geeze I wonder why:doh: the black wire to the left is the reroute, looks like the main wire to the alternator! Guess I have some more improvising to do! :shifty: Rich.
 

Attachments

  • 450eng harness burn up!_1956.jpg
    450eng harness burn up!_1956.jpg
    58.6 KB · Views: 13
welp, she's in, spent a long day of cars stuff only, never did find the right bolts to mount the tranny to the engine, but got enough replacements till I locate the old ones or get new, I think we even worked as much as we BS'd , all in all a good day engine is comftably nestled in it's bay, tranny is snugly fitted to the eng, a rusty story for another day halted the driveshaft install, so we moved on to the front end .
 

Attachments

  • 450 eng going down_1962.jpg
    450 eng going down_1962.jpg
    40.3 KB · Views: 23
  • 450 trans inl_1960.jpg
    450 trans inl_1960.jpg
    29.9 KB · Views: 20
Last edited:
Me 340 let us know how much he appricviated the help of greg340 & me with his french salute!
 

Attachments

  • 450 mr 340's french salute_1963.jpg
    450 mr 340's french salute_1963.jpg
    30.6 KB · Views: 22
before installing the oil pan gasket we checked the torque specs on the bottom end, all good, and as describbed it looks like(well they think so ,I just know it's pretty clean in there?) a low milage eng!
 

Attachments

  • 450 bottom end_1964.jpg
    450 bottom end_1964.jpg
    47.6 KB · Views: 20
couldn't put in the tortion bars, but the rest of the front end is on, need torque specs for a few items(didn't show up in my 73 manual) the K frame to rail bolts & the lower control arm pivot nuts, but we just stuck the ratty old rotors & wheels on & soon she'll be a roller!
Still have some plumbing to do underneath, the boots & clips for the T bars are due any day as are the rest of the stuff I need to install the gas tank, so soon those will be in. anywho, Thanks to the 340 bros, a short visit & a tool from charger man, the day went fairly well , murph was only mildly annoying & I'm a tried old man! ZZZZZZZzzzzzzzzzzzzzzzz oh yea don't believe anything they say, most of it is true! [smilie=2: Rich.
some day I'll get to the wheels! :dgt:
 

Attachments

  • eng-trans install_1959.JPG
    eng-trans install_1959.JPG
    148.9 KB · Views: 17
Last edited:
It's starting to look like a car again! :dance:

Lots of progress for a day's work... kudos to you and the 340 brothers.
 
A couple more shots of the work done yesterday, I did forget that the header on the drivers side goes through the steering link, but don't have the starter yet anyway, so I guess no harm done!
 

Attachments

  • 450 underneath the frontl_1973.jpg
    450 underneath the frontl_1973.jpg
    41.6 KB · Views: 23
  • 450 eng in bay_1975.jpg
    450 eng in bay_1975.jpg
    37.6 KB · Views: 23
Spent a couple of hours today clearing one of my work benches of all the parts & hardware bags, rebagged & updated the lists for the boxes, try to avoid the "HUNTS" for missing stuff in the future:doh:
clutch fan ready to go & a few more parts painted up!
 

Attachments

  • 450 clutch fan ready_1972.jpg
    450 clutch fan ready_1972.jpg
    43.9 KB · Views: 11
  • 450 more parts ready_1970.jpg
    450 more parts ready_1970.jpg
    38.3 KB · Views: 16
68, workin on the new av, maybe a new banner shot too, tired of lookin at that primer!
Gonna finish off the cleanup of the other bench this week, then go through all the other boxes again, not finding those bolts is driving me(well if I'm not there already) NUTS! :toot:
Now if anyone needs a laugh, head over to roids & me & the murph will entertain! [smilie=f: Rich.
 
Got some more goodies, top pad came with my gasket kit, but nothing to isolate the bottom straps, so after I cut up one of the little guys inner tubes I can hang the gas tank, tortion bar boots, clips, steering coupler kit & body bumper kit also arrived.:) Rich.
 

Attachments

  • 450 goodies_1981.jpg
    450 goodies_1981.jpg
    38.1 KB · Views: 17
Another rustercation job here, seems my defrost vent was rubbing a tad , it was worn like that all the way across this side(other side is ok) so I'm trying to build it out of black silicone, stays plyable so if it sticks it might work! :eek: Rich.
 

Attachments

  • 450 vent goop lightened up_1980.jpg
    450 vent goop lightened up_1980.jpg
    42.7 KB · Views: 14
Last edited:

SiteLock

SiteLock
Back
Top