You are using an out of date browser. It may not display this or other websites correctly.
You should upgrade or use an alternative browser.
You should upgrade or use an alternative browser.
Rusty's not very quiet cuda progress
- Thread starter mopar_man
- Start date
gomopar440
Livin' my life...one gas station at a time.
Well there's always the all fiberglass one from VFN Fiberglass that replaces the dash entirely.
[FONT=Verdana, Arial, Helvetica, sans-serif][/FONT]
[FONT=Verdana, Arial, Helvetica, sans-serif]Dash. Price=[/FONT][FONT=Verdana, Arial, Helvetica, sans-serif]259.00 Weight=4 Ship: UPS Item. [/FONT]

[FONT=Verdana, Arial, Helvetica, sans-serif][/FONT]
[FONT=Verdana, Arial, Helvetica, sans-serif]Dash. Price=[/FONT][FONT=Verdana, Arial, Helvetica, sans-serif]259.00 Weight=4 Ship: UPS Item. [/FONT]
RUSTY Cuda
In over my head!
Been trying to keep the costs down a bit, I'm in so deep for a car thats not gonna be worth much, gonna see how bad this cover comes out as compared to how bad the rest of the car comes out, upgrades can always be added later, if the body comes out as shitty as I think, then its only getting whats absolutly necessary to get it running, if she's under a 10 footer, then I'll splurge a little(very little)! Rich.
RUSTY Cuda
In over my head!
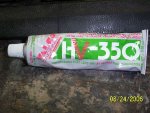
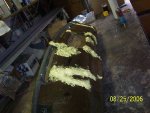
K, due mainly to a lack of effort on my part[smilie=f: (didn't go hunting for adhesive) I'm trying this stuff for gluing back the old foam that lifted on the dash pad, point & click & wala it's here in a couple a days! (eastwood):toot:
Attachments
RUSTY Cuda
In over my head!
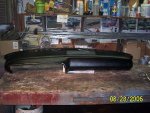
Tried it on the lower section the other day, seems to hold well???
been reducing the old foam in the rear of the pad in an attempt to make it fit better buy the vente, just hope I never hit my head on it in a crash! :doh:
glued the rest tonight, will play with it a bit more in a day or too, still have to find some foam, but I need a leaf spring bolt too so I should be in a hardware store soon! :shifty: Rich
Attachments
RUSTY Cuda
In over my head!
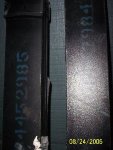
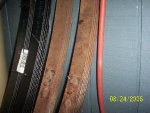
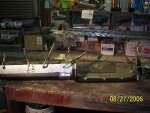
Got my leafsprings in, someone tell me which is drivers side & which is pass side?
also supprised(or should I be?) at second pic?
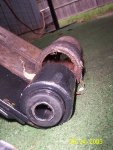
& finally theres one more leaf per spring(compared to the old, heavy duty as opposed to 318 car springs? ) but the front hole & bushing on the new ones is much smaller, whats with that? Rich.
also supprised(or should I be?) at second pic?
& finally theres one more leaf per spring(compared to the old, heavy duty as opposed to 318 car springs? ) but the front hole & bushing on the new ones is much smaller, whats with that? Rich.
Attachments

gomopar440
Livin' my life...one gas station at a time.
Even part numbered spring should be on the right IIRC. Vice versa for the other side obviously.
I wouldn't sweat the front bushing size unless you're after a luxury type ride. As long as the width and hole diameter is the same you'll be ok.
As far as the second pic... I got my XHD springs from Mancini and when they got here I found out that they were MP springs. I've heard some not so good things about the MP springs loosing their arch quickly so I'd be keeping an eye on them if that's what kind you got (they look exactly like mine BTW). I know I will have to be watching mine closely from now on.:doubt:
RUSTY Cuda
In over my head!
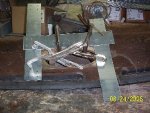
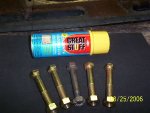
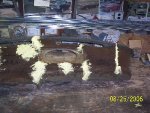
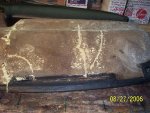
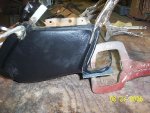
Todays quest was finding foam & some leaf spring front bolts, after wasting some gas between service calls I found both, bolts are slightly different but upgraded to grade 8, foam was the only one on the shelf that said soft set, after using a bit it might be too soft, but it does fill the gaps! Sliced & ground some off & it looks ok, got interupted at that point so I'll finish up sunday & take more pics!
Attachments
RUSTY Cuda
In over my head!
I LOVE bolting on nw stuff, problem is most of it isn't new, just cleaned up old crap, if I ordered all new I could easily double my already WAY over budget project! Trying to get the really important stuff new, rest will be Rusty-fied, (any way I can get the old shit to look decent)!
No nothing on the hands(wore gloves) & good thing I did, the application tube was broken off so I was working 1" from the top of the can, well the shit really shoots outta there, so everything was a mess,cept my hands! :toot: guess por 15 taught me somethin! Rich.
Rich.
No nothing on the hands(wore gloves) & good thing I did, the application tube was broken off so I was working 1" from the top of the can, well the shit really shoots outta there, so everything was a mess,cept my hands! :toot: guess por 15 taught me somethin!
Rich.RUSTY Cuda
In over my head!
RUSTY Cuda
In over my head!
RUSTY Cuda
In over my head!
RUSTY Cuda
In over my head!
lucky I had that eastwood silicone, ran out of what they give you about 3/4 of the way around the pad, will pull the clamps tomorrow & see what I got!:huh: Rich.
greg340 "GREGGLES"
sleeping in a vat of jello
Looks good Rich!!!!
68R/T
I got drunk and swallowed my teeth, now
snook said:Dude, you are a craftsman..............
Snook, you hit it square on the head. For someone with limited automotive experience he figures a way to get the job done, and always with quality results. :clap:
")