What lies beneath

Stretch

Hey! There’s no easy button for a body like this!
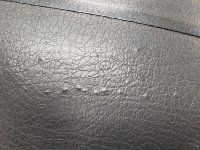
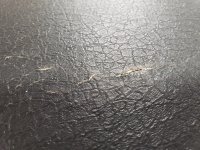
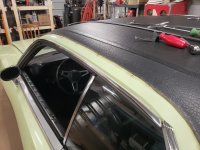
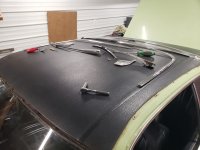
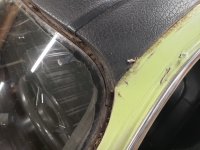
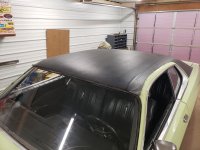
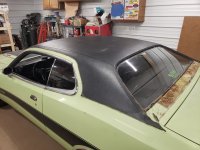
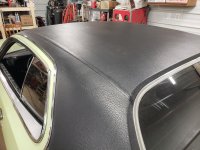
The vinyl top on my charger has had bubbles under it at the left rear quarter seam and under the back glass for as long as I have had it. It has been torn on the left rear under the back window for just as long. I purchased a new top about five years ago. I finally decided to jump in and replace it.

You might be wondering if I have ever changed one before. The answer is nope! I plan to do like I always do and just learn as I go. How hard can it be?

I'll do my best to keep the pictures of my...... progress? Coming.

I removed the trim tonight and vacuumed the shit out from under the trim. I started pulling it up in the corners then decided I had better grab the top and make sure its correct. I also decided I need to pick up some body tape to mark the seam location on the front and back glass. I also want to tape off the paint at the vinyl edge to help protect the paint where I'll be working.

Any advice on this project is more than welcome.20201112_064148.jpg20201112_064142.jpg20201112_064157.jpg20201112_064217.jpg20201112_192246.jpg20201112_194207.jpg20201112_194427.jpg20201112_200915.jpg20201112_200907.jpg
 
Last edited:
I've done 2 or 3 vinyls, but it's been a minute since...
Like most things body-related, find the center of the roof and record it, and do the same for the new vinyl. You'll have to do the roof first and then lay the vinyl on the roof and find it's center. Front and back. You'll need to also roughly lay-out the for and aft location.

But first, I would give serious consideration to pulling the front and rear glass. Now is the time to make sure it's all tickety-boo there. It also makes vinyl installation easier...

Once all the old glue is off, and any rust bubbles are dealt with and everything is sealed back up (or while you're dealing with it), lay out the vinyl for a few days in a warm environment and let all the folds from storage settle out.
 
Well. I'm committed now.😆 The ol' girl is as bald as I am.

I'm very pleased with what I found. Its not as bad as I had imagined. Now I need to build a couple of racks to store the charger and valiant glass in.

Here's what I did tonight.20201113_184126.jpg20201113_184131.jpg20201113_184133.jpg20201113_184139.jpg20201113_184202.jpg20201113_184159.jpg20201113_184208.jpg20201113_184213.jpg20201113_184221.jpg20201113_184146.jpg
 
Last edited:
Stretch, I would lay the vinyl out on the roof to get it molding to the roof lines once you are done getting the surface prepped to attach the vinyl keeping it warm as Mike said to get everything flat with no wrinkles.
 
Spent some time removing contact cement tonight. Its fun! Who wants to help??? Its more fun than..... well.... its so much..... lwts face it. It sucks! But at least I'm nowhere near done removing it so there's that.

20201120_191634.jpg20201120_191641.jpg
 

Attachments

  • 20201120_191648.jpg
    20201120_191648.jpg
    4.3 MB · Views: 0
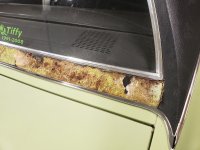
Oh, and i found this sadness below the rear window.

Restoman assures me it's a fairly simple fix.20201119_190006.jpg20201119_185958.jpg
 
Last edited:
A little digging after work tonight brightened my spirits a bit. I found really nice metal in the left rear seam.

What the hell did they use for filler? The shit is hard but still soft all at the same time!

Any advice as to what to use to get the old glue off is welcome. I am not planning on painting the car so great care in not damaging the paint around the vinyl is a must.20201123_193748.jpg20201123_193751.jpg20201123_193755.jpg20201123_193801.jpg20201123_193806.jpg
 
Last edited:
The factory filler is a fast-cure polyester. Nothing like it has ever been available for retail purchase. Awful stuff. I'm surprised there is lead underneath it... but then again, your car is mid-seventies with a partial vinyl.
The best way to get the glue off: get some un-suspecting soul to do it for you.


There is no easy way. Solvents make the glue soft and sticky. Water-based chemicals just plain don't work. Sanding it off is slow and messy.
The best way I've found is to either: (A) wash it off with solvents (I like enamel reducer) but it needs to be gone over several times, is slow, stinky, and uses a shit-load of rags or paper towels, or: (B) sand the majority of it off (sanding takes paint off, too), and wipe edges near the trim with reducer to save the paint that you don't want touched.

Make sure you get rid of all those rust spots. All. Of. It.

You've exposed one of the great shortfalls of factory leaded joints: rust underneath the lead. Because the joints were washed with acid prior to leading, there is zero rust protection on the bare steel.
Why would you need rust protection when you've leaded the joint, you might ask? Wouldn't the lead be stuck tight to the metal, might be your second question?
In a bodyshop, yes, it would be stuck to the underlying steel.
In a factory production setting, not necessarily. Keep in mind, anything that slowed production costs money. Only the fast guys ever did lead work. Fast means only really worrying about sticking the lead to where it was going to need featheredging. All the deeper areas just needed to be skimmed over. Who cares if it's not stuck in the deeper areas? It only needs to be good enough for the file man to smooth it out. In spots where the lead isn't stuck to the steel, rust forms quickly.
Fast. Quality is never a big concern in production.
 
Last edited:
But they look nice when done right. :)
They do, on certain cars (the '68-'70 Chargers spring to mind), but I can't think of a single model I prefer with a vinyl top. 'Course, on a Superbird you really haven't an option, but beyond that I'll take painted metal every time. It kinda sucks, because vinyl was mandatory on the '71 Charger SE, a car after which I will lust until I own one... with as little vinyl as possible. The canopy-style vinyl top is a must for me; I don't like full vinyl on those cars a'tall.
 
After trying many different things to get the glue off without damage to any paint that wont be under the vinyl I have decided the best method is to sand the glue with my DA using 240 grit and low speed to remove the "stick" then scrape it with a razor blade then back to the DA and more 240 grit.

After about two hours of this I'm basically 1/2 way through it.

As always, a few pictures.

20201127_200346.jpg20201127_200349.jpg20201127_200355.jpg20201127_200403.jpg
 
Saturday I started removing the windshield interior trim and I noticed mice had found their way into my car and destroyed my headliner. But at least I broke my windshield while removing it. I guess I will be learning how to replace a headliner this winter too.

Jass came over Sunday and helped me not break the rear glass so thats kinda nice.

The great part of all of this is the window ledges are in spectacular condition. I am very pleased with what I found.20201205_174302.jpg20201205_174311.jpg20201205_192158.jpg20201205_192339.jpg20201206_145209.jpg20201206_145204.jpg20201206_145242.jpg20201206_154229.jpg20201206_154214.jpg
 
Last edited:
The 70 gTx I had came with a vinyl top that had been removed and the roof painted. I had a neighbor at the time who owned a bodyshop and he was amazed they went through all that hell getting the roof to the point it could be painted.

IME the easiest way to get a windshield out without breaking it is to first make sure you can buy a new gasket, then cut the old one and lift the windshield right out.
 
No gasket... originally a butyl seal.
I've found the easiest way to get glass out is to call the glass guy... ;)
I HATE doing glass... luckily, I've got a good friend who owns his own shop. :)
 
Turns out I'm the glass guy. ;) Thus far, I'm 16-0 career removing vintage auto glass.

Ain't gonna lie, that was the most nervous I've ever been pulling one... I know that streak's gonna end and I didn't want that to happen on Stretch's OE back glass.
 
It bears mentioning that 12 of those 16 pulls were windshields, including the same one from two different cars. I spent many happy hours (and a few miserable ones) looking through that piece of glass. That particular windshield, for the record, will now serve time in a third car: Stretch's. 😄

That's right: At least one part of the Bitch Sisters--Black and Beige--rides again! 😁
 

SiteLock

SiteLock
Back
Top