What are you working on?

You know, I didn't check. It should roll right along at 60 MPH with little effort now though. The old set topped out at about 45 MPH.
 
It's always a trade-off. Acceleration will suffer accordingly, and probably quite noticeably. Comparatively speaking, he's essentially gone from a 3.23:1 to a 2.41:1. I certainly understand his desire for greater top end, but when he wonders why it's lacking oomph from a stop you'll need to remind him that the gear change is at fault. The difference would be very similar to pulling the 3.55s out of your Charger and installing 2.76:1 cogs.
 
1st gear is so low in the first place. With the fresh rebuild I'm sure the torque avalible will be much better than it was before the up grade. Also, this is a quite common change from what I understand. I'm thinking the mechanical drum brakes will be more of an issue than the starting off will be.
 
1st gear is so low in the first place. With the fresh rebuild I'm sure the torque avalible will be much better than it was before the up grade. Also, this is a quite common change from what I understand. I'm thinking the mechanical drum brakes will be more of an issue than the starting off will be.

True that....fine and dandy to get it up to 60mph, but having to slow it down again with those mechanical brakes....[smilie=2:
 
yeah those brakes would scare the crap out of me...im sure they will feel great for the first year or so and then begin to be spoooooky

so thats a TRUE "full floating" rearend LOL
 
Drill the drums and backing plates like I did.. I'm sure that guy'd love his restoration to have some 1940's style hot rodded drum brakes. It really does work great. I'll pretty much never pay the money for a disc swap again. If I gave you my Valiant and my Dart to drive normally in traffic, you'd be hard pressed to tell me which one had 9" drums all the way around, and which had the discs off of a Duster. I've got a Kelsey Hayes setup to go on the Valiant when I put the V8 in the Dart along with the Valiant's BBP suspension, but I don't plan on converting drum cars after that.
 
Last edited:
Drill the drums and backing plates like I did.. I'm sure that guy'd love his restoration to have some 1940's style hot rodded drum brakes. It really does work great. I'll pretty much never pay the money for a disc swap again. If I gave you my Valiant and my Dart to drive normally in traffic, you'd be hard pressed to tell me which one had 9" drums all the way around, and which had the discs off of a Duster. I've got a Kelsey Hayes setup to go on the Valiant when I put the V8 in the Dart along with the Valiant's BBP suspension, but I don't plan on converting drum cars after that.

Interesting! Do you have pictures of this modification?
 
So, this is where I get questionable stares and people either think I'm an idiot, or tell me I'm a hazard to myself and others.. I drill the shit out of my backing plates and drums to ventilate my brakes.

Here's how it works. Around the perimeter of the backing plate, drill a bunch (40 or so?) of #1 holes in the groove where the surface of the shoe lives. Then hog out the adjuster holes on the bottom of the backing plate to as large as you're comfortable with.. I did mine with a carbide reamer in a die grinder. Please ignore the shoddy spacing around the plate, and funny shaped holes in the bottom.. Not normally my style, but I had a cracked rib when I did this, and coughing felt like somebody stabbing me, let alone using a slide hammer. These were done on the car.
attachment.php
attachment.php

Then, (and this is where people freak out) drill your drums in a spiral pattern so that as much of the face of the shoe gets wiped by the holes as possible (drums are at least 3/8" thick.. They're fine). That is to say, imagine a straight line of holes from the front of the drum to the back. Leave the first where it is, move the second to the next hour on the clock, the third to the one after that and so on around the circumference so they're evenly spread out around the drum.
attachment.php
attachment.php

What this does, is basically turn the drum into a centrifugal air pump. Water, heat, and brake dust get ejected from the drum as the wheels turn. I've done this to a couple of cars now, and I've been able to drive through mountains, sit in stop and go DC traffic, drive through bad rainstorms and puddles all without brake fade or soaking problems.. As an added bonus, the inside of the brakes stay nice and clean, so there's no servicing, or unsticking of the star wheel necessary except shoe replacement and whatever adjusting needs to be done. It's worth mentioning that I drive my cars very hard. I typically brake harder and later into corners, and try to carry speed through, because everything I drive is such a slug, and because it's fun, dammit.

The only disadvantage I've found, is that you can't turn the drums after the modification. At least, I haven't tried..
 
in your defense i know some guys with old moto's who do very VERY similar mods to their brakes with spectacular results....you know the 60/70s stuff that doesnt have enuf drum to stop a bike half its size
 
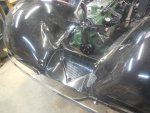
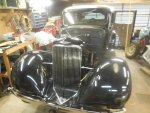
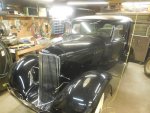
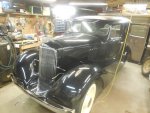
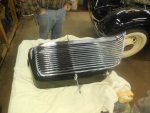
Back at it once the Christmas festivitys settled down. I assembled the radiator and installed it along with the lower pan. Then came hood assembly and adjustment. Next up is the headlamps, I made new gaskets for the headlamp stands then on to the fuel system.

OH boy is the ol' gal starting to look good again.

DSCN2406 resize.JPGDSCN2407 resize.JPGDSCN2408 resize.JPGDSCN2409 resize.JPGDSCN2410 rsize.JPGDSCN2411 resize.JPGDSCN2412 resize.JPGDSCN2413 resize.JPG
 
So, this is where I get questionable stares and people either think I'm an idiot, or tell me I'm a hazard to myself and others.. I drill the shit out of my backing plates and drums to ventilate my brakes.

Here's how it works. Around the perimeter of the backing plate, drill a bunch (40 or so?) of #1 holes in the groove where the surface of the shoe lives. Then hog out the adjuster holes on the bottom of the backing plate to as large as you're comfortable with.. I did mine with a carbide reamer in a die grinder. Please ignore the shoddy spacing around the plate, and funny shaped holes in the bottom.. Not normally my style, but I had a cracked rib when I did this, and coughing felt like somebody stabbing me, let alone using a slide hammer. These were done on the car.
attachment.php
attachment.php

Then, (and this is where people freak out) drill your drums in a spiral pattern so that as much of the face of the shoe gets wiped by the holes as possible (drums are at least 3/8" thick.. They're fine). That is to say, imagine a straight line of holes from the front of the drum to the back. Leave the first where it is, move the second to the next hour on the clock, the third to the one after that and so on around the circumference so they're evenly spread out around the drum.
attachment.php
attachment.php

What this does, is basically turn the drum into a centrifugal air pump. Water, heat, and brake dust get ejected from the drum as the wheels turn. I've done this to a couple of cars now, and I've been able to drive through mountains, sit in stop and go DC traffic, drive through bad rainstorms and puddles all without brake fade or soaking problems.. As an added bonus, the inside of the brakes stay nice and clean, so there's no servicing, or unsticking of the star wheel necessary except shoe replacement and whatever adjusting needs to be done. It's worth mentioning that I drive my cars very hard. I typically brake harder and later into corners, and try to carry speed through, because everything I drive is such a slug, and because it's fun, dammit.

The only disadvantage I've found, is that you can't turn the drums after the modification. At least, I haven't tried..

Very interesting mods to the drums there.....never thought of it, but it does seem to make sense.
 
Finally got the 2 stage snowblower installed and working on my 90's Craftsman yard tractor. Had to build a counter weight for it.....just a piece of 2x2, then a cheap cast off/clearance bin 2" hitch/receiver and a piece of angle iron. Then an old crate filled with scrap metal and spare commercial truck tire chains. Took it out to do some snow clearing yesterday....works great!


Wow! It looks like I haven't updated the Pontiac progress in some time. Its done and has gone home now making room for Jass's Valiant. Lets get some pictures posted.

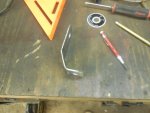
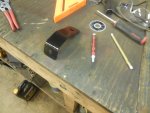
I added a battery kill switch so I needed to make a bracket. I also needed to modify a battery hold down that I bought so it would fit the 6v battery.
DSCN2462 resize.JPGDSCN2463 resize.JPGDSCN2464 resize.JPGDSCN2470 resize.JPGDSCN2471 resize.JPGDSCN2472 resize.JPG

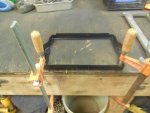
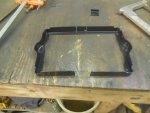
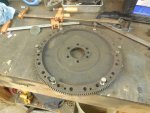
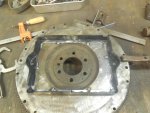
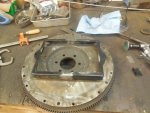
After cutting the battery hold down I walked out to my scrap pile and grabbed a chevy 350 flywheel. I used it as a heavy flat surface to tac weld the tray pieces to so the hold down wouldn't warp when I welded it back together.

DSCN2473 resize.JPGDSCN2475 resize.JPGDSCN2477 resize.JPGDSCN2478 resize.JPG
 
After that the interior went back in.

DSCN2479 resize.JPGDSCN2480 resize.JPG

Then there's the one year only 1933 Pontiac radiator cap we had reproduced. Damn its awesome!

DSCN2458 resize.JPG
 
June was a busy month.
I had planned to clean out the garage and get some parts put on the Charger. I even booked a week off to do just that.

This is what I did instead...

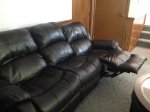
Advertised our family room furniture (recliner sofa and recliner loveseat) for sale. Ended up giving it away to out friend's daughter.
IMG_5267.JPG

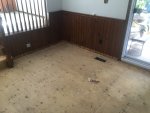
So, we sat on lawn chairs for about a week. (Note the carpet.)
IMG_5286.JPG

That carpet. Gone. I pulled all of the baseboard too.
IMG_5373.JPG

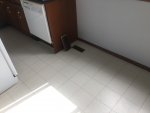
I also prepped the kitchen floor floor for a new sheet of vinyl. Moved all of the furniture out and pulled the quarter round trim off.
IMG_5365.JPG

Continued...
 
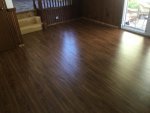
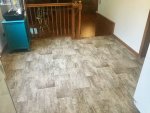
Then the floor installers did their thing.

IMG_5393.JPG

IMG_5409.JPG

But those stairs....
That job was left to me to tackle.

After much research, I decided to use "re-cap" treads. Basically, they are a bit thinner across the tread, but the bull nose is full size. Doing this meant I didn't have to rip out the existing treads and risers.
It does mean cutting off the existing bull nose.

IMG_5375.JPG

Then, I had to fit the new stair caps and risers. It sounds easy enough, but nothing is ever perfectly square in a house. They make a special tool for this job. I used paper and tape to make a template.
See that newel post and the bit of stringer sticking out onto the tread?
Yeah, that means notches. And the newel post was not coming out.
So, that meant that I had to cut both notches and try to make it all fit. I cut everything proud and then filed and sanded until it dropped into place.

IMG_6261.JPG

I measured and cut the balusters. I had a supervisor for that part.

IMG_5634.JPG

Then, I took it all out and stained it and put a couple coats of poly on it all.

Continued...
 
After the finish cured for a couple of days, I put it all back in with construction adhesive and finish nails.

IMG_5651.JPG

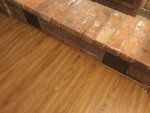
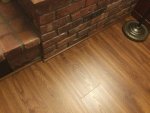
I had some quarter round in the garage that got removed when we replaced our door years ago. I used that to cover up the raggedy ends along the fireplace. I would have preferred to undercut the bricks and have the flooring slip under, but the installers weren't prepared for that. I wanted to do the undercut myself before they showed up but that idea was vetoed.

IMG_5668.JPG

IMG_5667.JPG

What you might not be able to see in the picture is that there are pieces in front of the vents that are removable. I cut the trim with lap joints and drilled a hole through both pieces. I can pin them with a finish nail that will stick up a bit and can be removed with a pair of pliers.
And all of that trim is stuck to the brick and not attached to the floor so that the floor is free to expand and contract.

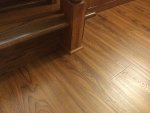
I also wrapped the newel post in quarter round because the floor installers were a little sloppy around there.

IMG_5672.JPG


I've still got some work to do.
The top of the stairs needs a vinyl nosing. The standard pieces are 36" long and that's not enough. I might box in the sides a bit with oak to create some nice straight lines and to reduce the length of nosing required.

The transition from the hallway to the laminate was not done. The installers hacked up a piece of T bar trim to figure it out, but never got around to actually putting a new piece in.
I'm just going to shave down a piece of reducer until it fits. I need things to be low profile because we've got a sliding door there.

New furniture should arrive on Friday or Saturday.
 
Oh, and I've been interviewing for a new job.

Our networking division got sold to another company. I, and many of the people that should have, did not receive an offer from the new company.

My current company hasn't come up with any kind of plan for me or the others.
One of my team mates talked them into a severance package and retired.

I'm hoping for a package too and timed well with a new job offer.
Fingers crossed.
 

SiteLock

SiteLock
Back
Top