What are you working on?

this i want vid of bad!...on a side note..3/4 ton springs make for some GREAT lift and soakability...however you should cut off the shock bump stops and bolt/weld a plate to the back of the shock towers..you WILL crack the frame right up the shock tower bolt holes


2WD.
 
Once in a life time opportunity here for sure.

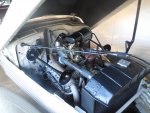
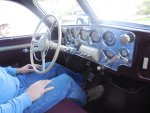
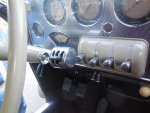
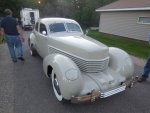
My antique car buddy brought this by last week for me to lube the cv axles. This car is PHOCKING AWESOME!!! It is 80% original paint, 100% original interior and 1000% AWESOME. After I was done lubing it we went for a ride. This thing rolls down the road like a modern car! It pulls like a champ in all 4 gears and runs 70mph with no effort. What a awesome day that was!

DSCN1602 corrected resized.JPGDSCN1606 resize.JPGDSCN1608 resize.JPGDSCN1609 resize.JPGDSCN1611 resize.JPG
 
that thing is a work of art...not a fan of the color..but..it was just one of those colors back then

that 4 on the tree is WICKED..and that thing is ALL dash
 
The shifting is cool. You can select a gear whenever you want. It wont shift until you push in the clutch. Its awesome! And pull! Wow the power. This one is a '36 so it isn't supercharged. I can only imagine how much harder it would pull if it was supercharged!

The pictures don't do the color any justice at all. It is breath taking!
 
That has always been my 100% most desired car ever. Since I was a preteen kid and read a book on Cord & Auburn.....

Words cannot describe how envious I am right now.
 
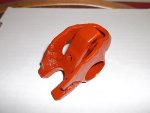
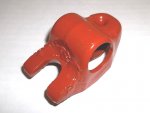
I guess I hadn't posted it here, but if you've got an old rocker arm and some scrap steel lying around (in my case, it was part of an Inland shifter from an Aspolare), this is a pretty-handy little valvespring remover you can make if you've got a welder, bench grinder and cutoff tool. It's small for easy storage and all you need is the large, flat-blade screwdriver you already own to use as a handle. I actually made this about six months ago, so if this is a re-run I apologize:

100_0226.JPG

100_0227.JPG


Yeah, the welds are rather booger-lookin' but at one point I'd forgotten to open the gas valve. :doh: Not a big deal, since the welds are under compression in usage anyhow. Anyhow, here's a video of it in action for the first time, on a crappy work surface--my Dakota tailgate. I used minimal tools and had no practice with it.

[video]https://www.facebook.com/pierre.payant/videos/962699463754562/[/video]
 
Once in a life time opportunity here for sure.

My antique car buddy brought this by last week for me to lube the cv axles. This car is PHOCKING AWESOME!!! It is 80% original paint, 100% original interior and 1000% AWESOME. After I was done lubing it we went for a ride. This thing rolls down the road like a modern car! It pulls like a champ in all 4 gears and runs 70mph with no effort. What a awesome day that was!

View attachment 18147View attachment 18148View attachment 18149View attachment 18150View attachment 18151
Absolutely gorgeous.
 
I spent a bit of time on the Oakland today. I pulled the transmission off of the engine, I also pulled the clutch and flywheel, then I put the engine on the engine stand. The engine and transmission assembly has been sitting on blocks on my floor sense I pulled it out of the car last October. I didn't take any pictures other than this one.

I need to take a few pics of the clutch and fly wheel assembly so you can get a idea of how this works. Its pretty cool.

engine stand resize.jpg
 

Attachments

  • .jpg
    .jpg
    77.7 KB · Views: 57
Last edited:
Did a service call at a high school today. Did some repairs on some customer's gear...

Met with the business partner for the balance of the day...
 
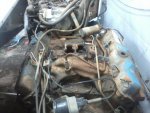
I monkeyed around with the 440 for the wagon a little bit tonight. Since yesterday was Halloween, the engine decided to dress up as a 351 Cleveland:
151101_110.jpg


:dance:

The funky valve covers, as far as I know, were van-only. There's no oil cap, just the two breather openings and a hole for the PCV valve. Also check out the wacky fuel line. It comes from the pump along the oil pan rail (there are clips down there for it), up the back of the block, and forward to the ThermoQuad. I haven't looked at the front of the engine to see where that steel vacuum line goes yet.

When I removed the carb, the driver's side rear bolt was only finger tight. Once I commenced to removing the plug wires, I came up with a theory as to why this otherwise-nice Class C motorhome got junked. My theory goes like this: the engine developed a valve-cover leak so common to big block Mopars. Dude changed the gaskets and gooped 'em up with silicone to make sure they wouldn't leak again, but in the process of bolting them back down, he pinched the #5 plug wire between the valve cover and the AC compressor base. He just cut the outer silicone jacket on the wire, so it probably ran OK for a while, but then the miss started. He put new plugs in it, which didn't help. He changed the cap and rotor, which are in such nice shape I'd have no problem using them on another engine, meaning they not only didn't fix the miss but it didn't run much after that. Next up, rather than take the obvious route and change the plug wires, he apparently had the carb off. I don't know if it's been opened, but it was definitely off the intake. It was bolted back onto the engine with a new gasket--which he set right atop the OE gasket, which was still under there tonight. At this point, I imagine it ran even worse, since the carb wasn't even solidly bolted to the engine. He probably got pissed and moved it to the backyard, it sat for a few years, and then he got sick of looking at it and junked it... never once attempting to change the plug wires. In his defense, if you've ever seen the plug wire routing on a big-block van, it's a God-forsaken nightmare. Anyone need 7 good date-coded plug wires? :D

151101_112.jpg


#5, which is why I believe this thing was junked at this point. Obviously, I have yet to crack open the engine and God knows it could be bad in there.
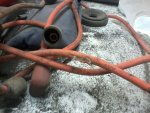
151101_111.jpg
 
having a 77 440 van nose rv..yes..yes i have..its UGLY in there...

i bet it has the goofy side edge dipstick track welded into the pan too

and yes those covers are van only..except the forward hole is typicaly NOT a breather but a tube that goes up to the hood line for easy filling

and that steel line i belive is for the booster..useualy had a chunk of rubber somewhere around the AC unit to goto the booster off that line
 
the "wood" engine stand is priceless

That is an insurance policy. That son-of-a-bitch is heavy! The last thing I need is to have the back of the block snap where its bolted to the engine stand and have it hit the floor. It's not like 86 year old Oakland engines are easy to come by these days.

I doubt it would break but why risk it?
 
Let the Oakland work begin again.

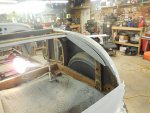
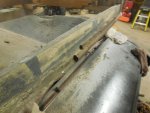
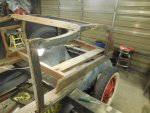
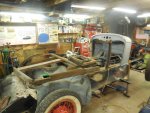
I started disassembling the body to gain access to the wood body structure. Someone at some point did some pretty shitty wood work and body work. Yhe body is full of rivets and 1/2 or better thick bondo. That bondo is right over the top of rust. The lower wood section of the car is nothing more than 2x6's and rough cut 2x4's. did I mention the gaps between the body and the make shift wood is inch thick fiberglass resin? What a mess!

DSCN1634 resize.JPGDSCN1657 resize.JPGDSCN1658 resize.JPGDSCN1660 resize.JPGDSCN1661 resize.JPGDSCN1662 resize.JPGDSCN1663 resize.JPGDSCN1664 resize.JPGDSCN1666 resize.JPG

The wood collapsed when I pulled the right side 1/4 off.
 
NOPE..a whole lot of NOPE...id be the bastard that would replace all of the wood with aluminum or steel just cause i HATE wood..i do NOT envy what your doing...tho ..i adimer the work


meanwith im preping bike n quad for me and the wife to go out for another day..a nicer day compared to my 40th a few days ago
 

SiteLock

SiteLock
Back
Top