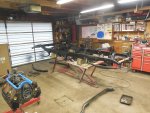
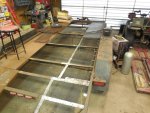
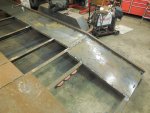
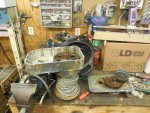
What are you working on?

i cant be alone in this..she looks like shes actualy ready for full assembly not the other way around

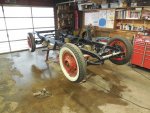
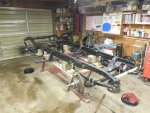
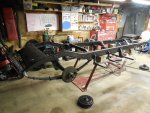
Mark bought this car from a guy who started the resto in the late '80s. His wife passed away in '91 and he lost intrist in the car and it hasn't been touched sense. The resto work is not good to say the least. The paint is pealing off of the frame because he painted over the rust with zero prep work. You can see huge runs in the paint and brush strokes as well.

I will be dropping the frame off at the blasters next week. The body is full of rivets and body filler which isn't really a big deal because I need to replace the wood body structure anyway. I think it might be a little easier to fit the body to the new wood I'm making if I remove the panels. I'll just drill out the rivets and make sure the panels fit the wood frame I build.
 
And in my free time I'm building a chevy 350 for a buddy. We got the heads and intake port/gasket matched a few nights ago and last night I got the rings file fit and the the reciprocating assembly done last night.
 
Damn, that's a clean piece to start with, maybe I'll make wood parts for the Cuda, then I'll worry bout termites instead of my dreaded rust!
 
Oh don't worry! There is plenty of rust! We are going to have to have body panels made for sure. The rockers, running boards boards, and lower rear quarters are very rusty!.
 
curious..does the wood hold moisture to the body and cause teh body to rot where the wood is more than say a normal metal seam to seam?

your going to have ALOT of fun with this one
 
curious..does the wood hold moisture to the body and cause teh body to rot where the wood is more than say a normal metal seam to seam?

You would think so but it doesnt look to be the case. The wood looks to be a soft wood like pine or something. Its just soft and falling apart. I'll get some pics of that and post them up when I get to that part of the project.

As for the rust, it just looks like normal body rot. I'll post those pics at the same time. I really didn't take any of the body rot yet.
 
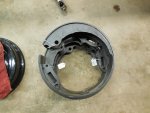
I spent the afternoon pulling the brakes apart on the Oakland. It took me a bit to figure out how they came apart but after the first one the others went easy.


DSCN1126.JPGDSCN1127.JPGDSCN1135.JPGDSCN1136.JPGDSCN1138.JPGDSCN1139.JPG
 
Last edited:
What a cool old car, and interesting brake set-up. Stretch makes me feel like I'm wasting my time instead of getting busy with projects. :)
 
What a cool old car, and interesting brake set-up. Stretch makes me feel like I'm wasting my time instead of getting busy with projects. :)

Me too.

I've got a shed for extra storage so that I can make room in the garage to work...haven't done anything with it yet.
I've got two radiant heaters to make the garage a workable temperature...still in their boxes.

I feel bad that I haven't touched the Charger since getting it home.
 
i just got done running gas lines and hanging a MONSTER modine in my lil shop...heats the shop in about 5 mins from 30s-65+
also "hung the horse" in the rafters to the winter

250,000 btu..for a 20x20 shop...
IMAG0923_zps33128598.jpg

IMAG0955_zpsec408747.jpg

IMAG0991_zps166255c8.jpg

IMAG0993_zpsbb859f36.jpg

IMAG0994_zpsa0990b87.jpg
 
Last edited:
Last Saturday I finished stripping down the frame. I striped the front axle beam and the rear axle housing. I made some plywood covers for the rear diff and loaded it all up to take to the sandblaster tomorrow.

DSCN1140.JPGDSCN1141.JPGDSCN1142.JPGDSCN1144.JPGDSCN1145.JPGDSCN1148.JPG
 
I dropped the frame, axles, & springs off at the blasters on Wednesday. Now that my garage is mostly empty and I have a 4 day weekend I got busy on finishing the repair work I started on my trailer about 3 years ago.

A little background on the trailer. It was built buy a friend of mine around 1989 or so and Mike built it with a wood deck. I bought it around 1993 or so and replaced the wood at least twice. A buddy of mine used it and I told him the wood was rotten so take the planks I have on the trailer to support the weight of his car. When Tom returned it he had replaced the wood with expanded metal. (Thats way Tom can use my shit. It comes back better than it left). The expanded metal worked good for a few years but it wasn't heavy enough and it started to stretch and sag.

About 3 years ago I decided to replace the expanded metal with 3/16 plate. I cut out the pieces and started to remove the expanded metal. I did the worst side first because I knew it I cut both sides apart I would end up needing the trailer before I was done. Sure enough I was welding in the last piece on the left side and I got a call. Someone needed it.

Fast forward to now and I'm finally getting around to doing the other side. As for the wench, It's been under my bench for around 12 years. Every time Jass and I load a car he says "You should get a winch!" I respond with "I have one under my bench!"

Looks like I just might get around to the winch part of the project. :D

1469965_921479294529720_576275544806908107_n.jpgDSCN1154.JPGDSCN1157.JPG
 
slip the winch on a reciever plate..add a slip in sleeve to the trailer...best mod i EVER did to a trailer....bonus is it never sits in the weather..or starts to get in the way mid way loading or loaded..i can yank it..and slips onto 3 different trailers AND the truck.....so lets say the grounds not great you can get the truck only so far and start winchin.....get shit close pop the winch off and onto the trailer and start loading

what i REALLY want to do and havnt tho is to make an ultra duty "pass thru" hitch plate for the winch..this way you can drop it on the back of the truck and have a dolley on the hitch and use the winch as well as all the other uses
 
That was the original plan but I acquired a much heaver duty winch for free. The way it mounts requires the mounting bolts to face the direction of pull. I'll take some pictures of it tomorrow.
 
ahh one of those....it can still be mounted onto a reciever you just have to make a angle box and brace it...imo...its better to be able to yank the winch than leave it in the weather...or be loading it have it get in teh way and have to get really weird with the load cause its in the way
 
I dont think weather will be an issue. I took the motor apart and the gear box apart before I went through the trouble of mounting it. the gearbox is sealed tight as is the motor. There are o-rings at every joint on the motor and the gearbox is oil filled so if the oil stays in water should stay out. Its heavy as phock too so I don't plan on moving it around. As for being in the way, I don't think that will be much of an issue. I'm mounting it low in the hitch tongue with a roller for the cable to ride on so it doesn't drag across the trailer frame as it pulls. I'm thinking the capacity on this thing is around 10,000# and it's old so you can imagine the weight. :D

I really do appreciate what you are saying about making it removable. That was the plan all along. I have a smaller winch that I was going to put on it for around 12 years now but I never got around to doing it. This one is much bigger and has a much higher capacity so I'm using it. If it turns out to be in the way I'll make it removable. If it was removable, I doubt I'd ever move it any way. It's Phocking heavy!!!

My other thought on bolting this one down is If it's easy for me to move, it's easy for someone to walk away with. (As long as they have help) :D
 
sounds like its one of the big ole monsters..always wanted one for my RC..till i lifted one..and was like oh hell no...nothing like some bonus tongue weight LOL...you might consider boxing it in some tho to keep the cable dry tho...course in this day n age you can get synthetic at a longer footage (no more steel splinter in the hands) and it weighs half as much WET and is just as strong..and isnt as expensive as i once thought
 
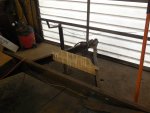
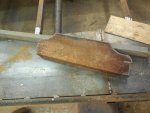
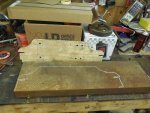
Some pictures of the winch and the mount I'm building for it. First I made a pattern out of 1/4" plywood. After that shape was transferred to the channel iron I cut the mount out free hand with my torch. I'm out of grinding wheels so the work stopped for the day.

DSCN1160.JPGDSCN1161.JPGDSCN1163.JPGDSCN1162.JPGDSCN1162.JPGDSCN1165.JPG
 

Attachments

  • DSCN1164.JPG
    DSCN1164.JPG
    3.9 MB · Views: 16

SiteLock

SiteLock
Back
Top