Texas Cuda!

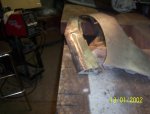
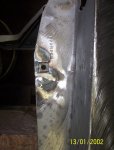
K, so a "little" more weldin:toot:
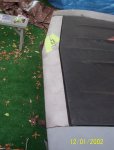
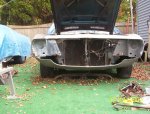
The rest went together pretty good, lower valence is close, the pass side bracket is still pulled to one side, other two are pretty straight(don't add up to me, unless the rails are bent) Now the whole front end seems to need to move towards the pass side, I got it over as far as I could by myself (without doing any more damage!) still seems to be off 1/4 to 1/2 an inch.
 

Attachments

  • position a-c & front end pcs 011.jpg
    position a-c & front end pcs 011.jpg
    183.2 KB · Views: 6
Last edited:
Was just gettin ready to pull it apart (3 bare metal pieces gotta go gack inside) & I realized I had not tried to close the hood, well I wish I had forgotten, then I woulld have to deal with this another time!
 

Attachments

  • position a-c & front end pcs 013.jpg
    position a-c & front end pcs 013.jpg
    156.9 KB · Views: 5
I toyed with it a little , but I'm gona need help on this, fender to doors are pretty good (as well as doors to quarters)
the hood can come down (to front) some, but it's already rubbin the fender on the pass side & has a much smaller gap to the header panel.
Gonna have to cross measure the front end & see weather I have a bent rail.
Car is quite beat up up front so I don't think I'll be surprised if it is, that will be a new repair to attempt for me! [smilie=2: Rich.
 
Next batch of repairs went a little better, took a slow down pill & went at a couple a pin holes on the header. baby welds & grinds, couple a little lines but I actually stopped right there !:naughty: before I f--ked it up!
 

Attachments

  • position a-c & front end pcs 015.jpg
    position a-c & front end pcs 015.jpg
    146.8 KB · Views: 4
Now the whole other side had pinholes all along the front, pretty thin, seeing as how I screwed up my other big patches I decided to lead this area, first I cleaned the back & laid down bout 1/4" a lead, then I did the outside ones where I had to fill, not steel but not burnt & warpped to shit either!:huh:
 

Attachments

  • position a-c & front end pcs 014.jpg
    position a-c & front end pcs 014.jpg
    183.1 KB · Views: 4
  • position a-c & front end pcs 016.jpg
    position a-c & front end pcs 016.jpg
    160.7 KB · Views: 4
Got the outsides cleaned up & welded in one of those top nuts that had broken off, got as far as one skim coat of rage before the session was over!
 

Attachments

  • position a-c & front end pcs 019.jpg
    position a-c & front end pcs 019.jpg
    167.7 KB · Views: 4
  • position a-c & front end pcs 017.jpg
    position a-c & front end pcs 017.jpg
    166.4 KB · Views: 4
  • position a-c & front end pcs 020.jpg
    position a-c & front end pcs 020.jpg
    167.9 KB · Views: 5
Another nice day here so I dragged the welder (thats me) & the machine out back & welded up that split fender, she's puttied up now & like the rest of the fender ready for the last coat of hi build (think i'm gonna try shootin resto's idea of polyester filler) when the whole car is back together & ready for the final blockin out.
I put the bolts in, grabbed em with vise grips & yanked on em till the car shook, I think it will hold this time.
 

Attachments

  • position a-c & front end pcs 016.jpg
    position a-c & front end pcs 016.jpg
    179.9 KB · Views: 2
Sanded out the header panel , ready for my coat of epoxy now, then i'll start the hi build. Also got the "skim" coat a mud on the lower valence, I'll be suckin dust all day tomorrow! [smilie=f:
 

SiteLock

SiteLock
Back
Top