Texas Cuda!

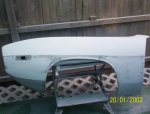
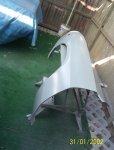
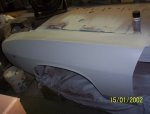
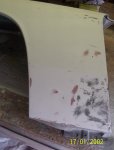
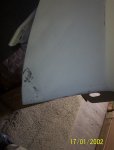
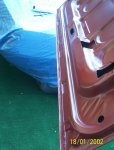
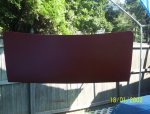
K, I may have screwed the trunk lid, was gonna blob a little silicone in all those spots where the skin meets the frame, was fitting it in, had a hard time getting it down on the edges & completly forgot to put in the silicone, started banging all the edges over & had three sides done when I realized I had a brain freeze.
So, will it rattle, or just not hold shape, what problems do I have to look foward too!:mad:
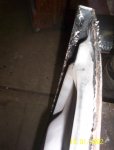
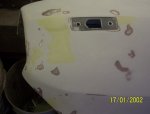
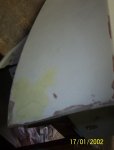
The other issue was it got thin on the edge where I put the patch & split right on the fold, so a little more welding& grinding & that one should be ok:huh: Rich.
 

Attachments

  • rust repairs 1.jpg
    rust repairs 1.jpg
    172.6 KB · Views: 5
  • rust repairs 2.jpg
    rust repairs 2.jpg
    164.4 KB · Views: 4
Got the fender etched & shot a good coat of epoxy primer on it, then shot 3 coats of high build, will guide coat it & start sanding next time out, got a lotta dings & dents around the headlight, minor dinds everywhere else, I know I need putty where I welded, just wanna see how bad the rest is!:rolleyes: Rich.
 

Attachments

  • rust repairs 3.jpg
    rust repairs 3.jpg
    154.1 KB · Views: 6
  • rust repairs 6.jpg
    rust repairs 6.jpg
    164.2 KB · Views: 6
  • rust repairs 9.jpg
    rust repairs 9.jpg
    160.5 KB · Views: 6
K sanded off the guide coat, did ok on my patches, lower one was the worst,could not help it with hammer & dolly because of the framing. the other two big ones just took a touch a putty.
Started cleaning up the trunk lid for a shot of epoxy primer, might get to that tomorrow. then I'll shoot some high build & see what I have there, I think I can make it work?
 

Attachments

  • rust repairs 001.jpg
    rust repairs 001.jpg
    151.2 KB · Views: 6
  • rust repairs 002.jpg
    rust repairs 002.jpg
    157.9 KB · Views: 6
  • rust repairs 003.jpg
    rust repairs 003.jpg
    142.5 KB · Views: 6
  • rust repairs 004.jpg
    rust repairs 004.jpg
    165.1 KB · Views: 6
  • rust repairs 005.jpg
    rust repairs 005.jpg
    158.4 KB · Views: 6
  • rust repairs 006.jpg
    rust repairs 006.jpg
    169.4 KB · Views: 5
Trunk lid prepped & coated with epoxy primer & shot the fender with some more hi build, gotta picck up another gallon & some incadentals tomorrow to continue blocking them out!
Back seam on the lid not too terrible, it's half metal & half epoxy putty! could use a tad more smoothin out, not bad for the first attempt![smilie=f:Rich.
 

Attachments

  • rust repairs 007.jpg
    rust repairs 007.jpg
    172.9 KB · Views: 6
  • rust repairs 008.jpg
    rust repairs 008.jpg
    151.6 KB · Views: 6
  • rust repairs 010.jpg
    rust repairs 010.jpg
    176.6 KB · Views: 6
It's Rage gold, is it decent stuff? Rich.

Nope. It's not decent.

It's about the best you can buy. And about the most expensive too. :)
I just thought being in the Jersey area, you'd be using Clausen products. Very good quality, and reasonably priced.
 
Pretty much follow the advice of the folks at the PPG store, no problems with anything they reccomended cept for user blunders!:eek: Rich.
 
Pic from the other day, now its a little better, gonna try one more prime & sand before I put any putty on, the upper section is fully sanded & pretty good, line drops way up front, might be ok with prime, that dent at the rear might take some putty, right on the line & they all seem to be in spots where there's framing behind so I can't help em a little with the hammer & dollies!:( Rich.
PS, trunk lid is actually lookin pretty good(well at least to me it is) anyway that might just have been worth all the fun I had so far!
 

Attachments

  • rust repairs 012.jpg
    rust repairs 012.jpg
    163.6 KB · Views: 6
Mounted up the fender with 2 more coats of hi build & a guide coat, the dent on the line by the doors gonna take some putty & a rough sanding will let me know if I still have a decent body line!
 

Attachments

  • rust repairs 013.jpg
    rust repairs 013.jpg
    172.1 KB · Views: 9
  • rust repairs 014.jpg
    rust repairs 014.jpg
    156.8 KB · Views: 9
Today I put on what I hope is the last coat a primer on these 2 parts, gonna go right to 600 (last round was 400) & see what I got, fender I think is in, trunk lid I can still see a few small spots, not sure if one coat will fix them, but I'm a hopin!:helpme: Rich.
 

Attachments

  • rust repairs 020.jpg
    rust repairs 020.jpg
    155.9 KB · Views: 8
  • rust repairs 025.jpg
    rust repairs 025.jpg
    170 KB · Views: 7
This is the first time I've ran across your work Rusty. Its sure nice to there are others who enjoy the creative part of this hobby as much as I do. And build with there hands instead of a check book.
 
Was mostly using PPG K36, but I got a gallon of this low voc primer from charger man, ppg stuff, darker gray & somewhat thicker than the k36, its a 2 to 1 mix, I've been thining it a little(1 part 870) .
Not positive but I think there both urathane? Rich.
 
Yep, they're urethane products.
The new primer youre using IS thicker, the mixing ratio required to comply with VOC regs makes it so. Thinning it shouldn't hurt at all, its just that the thinners make it non-compliant. Thinning it also reduces the film thickness, so an additional coat or two may be required for serious blocking.
High build primers are slowly becoming a thing of the past - really only heavily used by the resto crowd like us.
PPG is good stuff.
You could try some polyester primer at some point. The build characteristics and adhesion are second to none. Excellent for blocking and filling, and very reasonably priced.
 
K, so then the question is can you mix em up, I mean shoot one over the other or should you just go to another panel, & use polyester from the get go.
I usually seal my bare metal with epoxy primer first, then start the hi builds, I know it's not necessary most shoot right on bare metal, I'm just rust weary & don't want to deal with it again, since all my stuff is outdoors.
Which brings me to another question, I'm not gonna get around to painting this car for YEARS, should I shoot something over the primer after I get it somewhat straight(notice the somewhat, even when I think they are there NOT!) or do I just ruff it up when the time comes? Thanks,Rich.
 
You can use most polyester primers over urethane primer, as long as the urethane primer is cured - wait a day or three - and sanded before spraying poly on it. Read the product data sheets beforehand tho' - some primer manufacturers specify applying over bare steel only. The Evercoat Feather Fill I use can be applied over anything, but I usually stick to putting it over bare steel ('cause I'm cheap :)). Epoxy as a ground coat should not be an issue.
Poly primer should be top coated with urethane after blocking if the car or parts sit outside or in an especially damp area. Polyester WILL absorb moisture if left uncoated. It's basically spray filler. It'll will also work exceptionally well absorbing the oils from your fingers, so keep the bare skin contact to a minimum.
Urethane primer is pretty water resistant. Not as good as paint, but pretty good nonetheless. It should hold up well sitting outside, tho' it may start to chalk up some if it was applied in anything less than a full-wet coat.
A full-wet coat is the ONLY way any primer should be applied.
Exposed epoxy primer and polyester primer should NOT be left sitting outside. Epoxy does not like UV exposure, and will break down in short order.
I use polyester primer on anything that I plan on making arrow straight, which is just about everything I do. I find it to be a HUGE time and labour saver. Most times, you can eliminate the glaze coats of putty if you're using poly primer, and the way it blocks out is fantastic.

Mike
 
K since I'm not getting into this car that fast I'll stick with the urathanes for now, shes outside, but not left in the sun always tarped over, but yes it's very damp most of the year out there!
When the time comes to get serious(when i can affort the quarter panels & other major pieces) I can shoot the polyester over the whole thing for the last blocking out!
Sound like a plan? Rich.
 
Dumb ass continued! Fought with the trunk lid tortion bar for over an hour, poped it out with just my fingers, could not for the life of me get it back into that upper slot with the slider in place, got it all in once but the slider was behind the arm, pulled down on the arm & it just didn't feel right, took it all apart & fought it a while longer.
Totally ready to break out the sledge & decide to open up the other car & take a look see, the F..Kin thing does go behind the arm, now I'm scratchin my head, all right how did I do that 20 mins ago????????
Finally got it & then proceded to chip the lid twice before I got it lined up:mad: Lucky I'm in primer stage at this point!:shifty:
 
So now it's on, back drop off is nice & straight, trouble is the quarter corners bend in, so 2x4 & a moderatly sized hammer come out & I procede to correct the problem, no major mishaps there, how straight it now is is another question!:wtf:
 

SiteLock

SiteLock
Back
Top