Rusty's not very quiet cuda progress

My cone heads slipping off the back!:eek:
RIM00027.jpg
 
I was going for the old "Lone Ranger" radio and TV reference quote. Kinda hoping one of the other 'oldsters' would have given me a "Hi Ho, Silver! Away!"
 
Been sanding out the dirt & bugs little by little this week & set the tent back up today & shot the touch ups & the second coat a clear, used a faster hardener, helped a bit, less dirt but I ran quite a few more drips, hope to shoot 2 more small color touch ups, yep upon close inspection still mised some paint spots & the last 2 coats of clear tomorrow & the it's sand till I drop.
 

Attachments

  • 2nd coat clear_2496.JPG
    2nd coat clear_2496.JPG
    168.6 KB · Views: 11
  • 2nd coat clear_2492.JPG
    2nd coat clear_2492.JPG
    159.7 KB · Views: 14
Spent the mourning sanding out more dirt & buggers, now I'm wondering if I had too:huh: shot the last few color touch up & around 2:30 started the 3rd coat a clear, finished cleaning up around 4,grabbed a bite to eat & went back out at 4:30, lookin at all the dirt(not as bad but still quite a bit) & the runs I opted to put on the 4th coat right over it all rather than wait till tomorrow & sand the whole friggen car again & see what I was left with, only worry was that sanding out the previous coats dirt I might hit paint & have more color touch ups.:doh:
Low & behold the gods of cleardom must have felt sorry for me & were finally ready to give me a break for all my hard work.
She laid out really nice(maybe I'm actually learning after the 44th time) & got very little dirt in it, covered the last coats dirt & only added 2 or 3 runs to the collection.
There's hope that this will sand & buff out & I'll have my 10 footer!:giggedy:
That last coat saved me from a week of depression about this friggen paint job, after 2 more 12 hour days I think it's finnally over & I can move back to the rebuilding!:bravo: break time! Rich.
 
Well I did a test today took one bad drip area on the quarter & sanded the area,then buffed, then sanded again, then buffed, on & on, I'll be sanding & buffing this car for years, spent 4 hours on a 3' section on the top of the quarter, the peel comes out pretty easy, the runs & puddles are gonna take forever. just above the quarter you can see some of the worst peel area & the puddles laying on the top edge!
I wanna go back to welding in metal!!!!!!!!!!!
faint.gif
Rich.
modify_inline.gif
 

Attachments

  • testing sand-buff_2502.JPG
    testing sand-buff_2502.JPG
    162.2 KB · Views: 22
Man, I wish I was closer, I'd be glad to help. After all the runs I've gotten over the years, I've become pretty good at getting rid of them.
Need any pointers?
 
Yea for the next car, how the hell do you shoot clear without runs, such a fine line between a good layout(without a lot of peel )& running wild.seems where angles converge are my worst areas, but even on that flat part of the quarter very thin run areas showed up after buffing a bit, I'm pretty sure it was just me being uneven with the amount of overlap , I did try like hell to be steady with the gun.The top of the car is my best area, side bad,down low the worst. I think what I have will end up decent, but it will take 30 or 40 hours of sanding & buffing. 4 in so far! :dgt: Rich.
 
Well, its kind of like closing the barn door after the horse has escaped, but here goes.
#1 - you need air flow for the urethane to set up. Temperature is important, but air flow is critical. Even air flow over all areas of the body. No air means runs.
#2 - the right temp reducer and hardener is critical. you can get away with a slower reducer if you're careful, but hardener speed is vitally important. Beleive it or not, hardener slows down the set up and dry time. Too slow on the hardener means runs.
#3 - gun set up. Some guys spray with the gun cranked wide open, some guys cut it back to where there is very little paint coming out. I use the 6 inch @ 6 inch standard as my initial setting, and tailor it as required. Basically, hold the gun 6 inches away from a panel, set the pattern to deliver a 6 inch wide fan, and adjust the fluid needle to deliver the finest atomization (paint droplets) you can get.
#4 - spray gun technique, basically, don't lose track of where you've just sprayed. overlap should be 40-50% for clear, 60% or better for base. Get your arm moving, not just your wrist, and cover as big an area as you can without moving your feet. Walking while spraying is for custom finishes only.
#5 - light is critical. if you can't see where you've just sprayed, you'll likely be putting too much paint on that area. A spray booth - even a homemade one - can never have too much light.
#6 - orange peel is not your enemy. As you've found out, its easier to knock down some peel than it is to flatten out runs. Don't be tempted to get that coat as smooth as glass when spraying. Doing that takes years of practice and perfect spray gun technique. If the paint is too smooth when its fully wet, gravity takes over. This is where air flow becomes critical. Peel will have to smooth out before it starts to run - smooth paint is ready to run as soon as it hits the car. A little orange peel is hardly noticeable when the car is put back together and sitting outside.

What grit paper are you sanding the runs with? Are you using block to sand with?
 
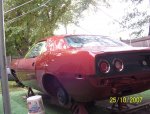
K so we start with no hardener(or is it catalist), using shopline 660 clear,started with medium reducer, went to a faster reducer for the middle coats & back to medium on the last coat.
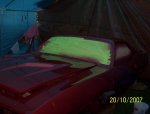
Light is an issue, but that never stopped me before! First two days it was actually getting dark when I shot the clear, last coat the light was decent.
I was trying to lay it on too thick then, lookin for glass rather then lite(with the rough look)
Air flow, questionable,exhaust fan at rear corner of "tent" & opening at front corner, both about 10' from the car.
eastwood divilbiss cheapie hvlp gun,Gun air & fluid wide open, tried to set the fan with the 6x6 rule compressor at 50lbs with a 50' hose.
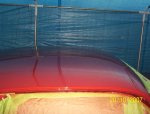
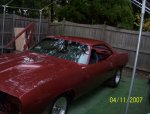
Base went on great,no dirt & don't think I ran any of that even down low, clear is killing me or is that killed me, well I'm still typing so only one foot in the grave, the sanding may push the other in!
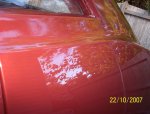
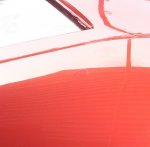
Started with 2000, then tried some coarse cut buffing, ended up going to 500 on the runs till I got close, then 1000 then 2k, then took it thru 3 buffing stages to see what I had, showed some very fine run lines but some areas are good. on the peel light 1000, then 2000 & the buff seems to be fine. put on 4 coats of clear, but in a few small areas there are paint touchups under only 2 coats, gotta be careful there.
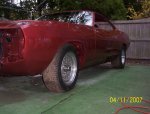
Using mostly 3 4 &6" paint sticks wrapped in the paper, on larger areas a 6" rubber sanding block
for the rounded areas a piece of rubber hose rolled in the paper:huh: seems to work?
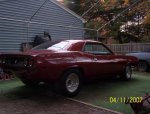
I'll pay for my mistakes with many many hours of sanding, I'm learning the hard way! :doh: Rich.
 
Last edited:
Got in about 4 hours today, a little more work on the quarter, hit paint & still have a few run issues'roof 1/2 done from the drivers side, not too terrible up there, 2 bugs & one white dot showed, but I only have a few runs to rework, started sanding the top of the door, various stages of work on this side!
 

Attachments

  • hit paint crop_2511.jpg
    hit paint crop_2511.jpg
    51.4 KB · Views: 17
  • sand buff polish_2509.JPG
    sand buff polish_2509.JPG
    161.5 KB · Views: 14
K, got about 40 hours of sanding & buffing in,some defects removed & showed up some more defects, the shinier I get it the more crap shows, some sanding scratches, hit paint under another drip, couple of spots the metalic dots show thru(again under drip areas) & a lot of shallow runs all around the car. Gonna try & get the 3rd buff done over the weekend(glaze) & put the wheels from the 74 on it, blead the breaks yesterday, picked up the power steering hoses today, so hopefully mon or tuesday it will be a running & moveable 10footer!
Kinda excited & dissapointed at the same time, comming to the realization that I just have to settle for now because I may go to fix the defects & create more problems
dunno.gif
Rich.
Will post up the result pics when I get her out in the sun shine!
 
Well she's back on wheels again, kinda partially cleaned the wheels of the 74 for the sake of the pics (you'll see) :wtf:
Got the power steering hoses in, think I have power steering but didn't test it on the ground???
I got my 10footer, still some spots not shinning up might hafta go back a stage or two on the buffing, all the scratches & defects I'll live with for now! :toot:
I opened the side windows cause I was too wiped out to clean enm for the pics!:shifty:
Well here's 2 RUSTY!
 

Attachments

  • dr side front hi_2529.jpg
    dr side front hi_2529.jpg
    58.9 KB · Views: 21
  • 650 dr from front low_2530.jpg
    650 dr from front low_2530.jpg
    59.1 KB · Views: 22
  • 650 pass from rear_2525.jpg
    650 pass from rear_2525.jpg
    63.7 KB · Views: 24
  • 650 low from rear_2519.jpg
    650 low from rear_2519.jpg
    65.1 KB · Views: 22
Last edited:
Lookin' damn good Rusty. You must be feelin' awful proud. Just 5 yrs ago when you joined Scatpack you barely knew how to spin a wrench and here you are with an "almost completed" restoration done entirely by yourself.;) :clap:
 

SiteLock

SiteLock
Back
Top