You are using an out of date browser. It may not display this or other websites correctly.
You should upgrade or use an alternative browser.
You should upgrade or use an alternative browser.
Rusty's not very quiet cuda progress
- Thread starter mopar_man
- Start date
Robertson_Tech
Dopameans and SodaPals proud dad.
That is a lot of work on the valve covers you know about ( dinging ) the bolt holes for a leak free seal. With all the good work you have done so far you must, but I fought a lot of leaks before I got it down..
It all is looking great.
It all is looking great.
RUSTY Cuda
In over my head!
'Splain please. I was just gonna make sure they were straight!
He means look at the underside of the bolts holes and make sure they aren't dimpled from over tightening the bolts. If they are, take a hammer and tap them back to flat. You'll see what he means once you look at the gasket side of the holes. You prolly did it on the oil and trans pans. ")
RUSTY Cuda
In over my head!
Can't say I did, Mr 340 had that honor, so I've been taught that trick, i was wondering if a reverse ding was your trick. :huh: Rich.
RUSTY Cuda
In over my head!
Finally scratched out a little car time, ran em both a while ,sanded on a few panels & messed with the neutral safty switch wiring.
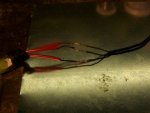
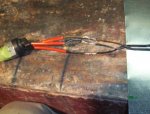
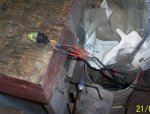
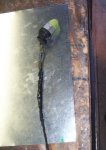
SO My new switch came with the repair harness on it, I won't dare take it off, it's on tight & thats the way it will stay. so I wanna make the splice & then install the switch, problem being the 340 bros graciously donated harness has A/C connections (i don't need on this car) & they interconnect both fire wall plugs......... lookin it over, remove two solderless terminals & it's outta there so that done i star gettin ready for the splice, for some reason I pull down my old harness:huh: on it I notice theres a plug half way up, so thats the one I decide to splice in
SO My new switch came with the repair harness on it, I won't dare take it off, it's on tight & thats the way it will stay. so I wanna make the splice & then install the switch, problem being the 340 bros graciously donated harness has A/C connections (i don't need on this car) & they interconnect both fire wall plugs......... lookin it over, remove two solderless terminals & it's outta there
so that done i star gettin ready for the splice, for some reason I pull down my old harness:huh: on it I notice theres a plug half way up, so thats the one I decide to splice inAttachments
RUSTY Cuda
In over my head!
RUSTY Cuda
In over my head!
 some day!
RUSTY Cuda
In over my head!
RUSTY Cuda
In over my head!
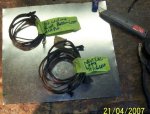
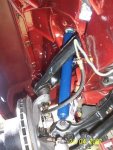
 GREG!!!!!!!!! bad info, next time I see ya be ready for a dousing in tranny fluid! Bout 2 quarts came outta that friggen hole, glad I went at it slow, only lost a pint at first! Anyway switch & wiring are finally done & i got the new front shocks in too!
Attachments
RUSTY Cuda
In over my head!

RUSTY Cuda
In over my head!
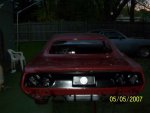
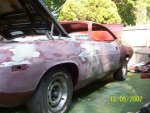
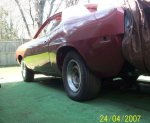
From the front, I'm likin what a little sunlight does for my color! :giggedy: Rich.

RUSTY Cuda
In over my head!
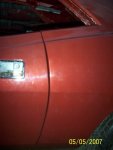
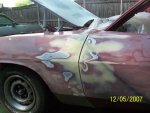
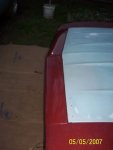
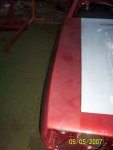
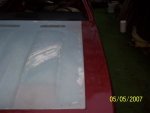
Charger man came over a couple a times & helped me get the panels lined, well somewhat lined up. got some issues, some I'll live with, some will require back to grinders & putty!
Attachments
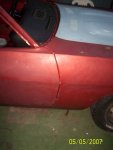
RUSTY Cuda
In over my head!
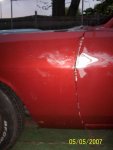
heres the biggie, goes back to patch panel done off the car & buying a another door, so I have two unknowns to deal with. we screwed with the egde of both & forced them to match, gonna take a few feet of putty to blend em in now, hopefully closer when redone! :huh: Rich.