Rusty's not very quiet cuda progress

K, I think 1st thing next time out is a continuity test on that circuit to ground, then see if there's any way to disconnect one area at a time, I hope that dash doesn't have to come out, major upheaval in my life, really don't want to go there!
 
Ok, backing out a bit, for some reason I put the tester on the other 2 connections on that plug, the "hot" one & the one that feeds the fuse, both also had continuity to ground, now I'm totally cornfused.

So I'm looking for any wire that might be touching ground, can't really get to much behind there, did notice some funky old tape up at the light bar, while bare I put power to it & grounded the base & they worked & didn't put the meter in circuit breaker mode, went back to the feed at the dimmer & put power there again, popped the meters circuit breaker, still a short, but at least I eliminated the light bar, also found that the indicator on the tranny is working off the dimmer, brightens as I roll the dial, so half the switch is working!
hoping that was the tan wire side of the dimmer to the light bar, they are tan also.
Started tracing the yellow off there & looks like it goes to the door switch on the drivers side, gotta take a bunch more stuff apart to get the that wiring, the adventure continues!20240419_132300.jpg
 
Last edited:
this is driving me nuts.

But at least I'm starting to get an idea of how it works, So first up I think that 3rd prong on the dimmer is a grounding circuit, hench the probe hitting circuit breaker, thank god it has that it's not my meter!

traced the wires & they go to both door switches, the dome light, dome light has a pink power supply!

So my switch may actually be working now that I cleaned it up, on the back side there's a copper spring thing, that starts grounded to the case of the control, when switch is full on to the click it makes contact with the lug for that last terminal, but breaks from the base20240419_153649.jpg
So the power goes to the radio light first then to the supply line to a triple connector (which is way up in the dash & I can't reach it) & I think there's 2 wires coming off it the diagram shows 3? but it may be an accessory I don't have? so if my bulbs on the light bar & near the heater switch all tested good I have to have something back there not connected, now I'm praying I can find it, or add my own feed & not have to pull the dash?
Still not understanding why the radio light is not on it's in the same connector as the shifter light?
The hunt goes on!
 
So my switch may actually be working now that I cleaned it up, on the back side there's a copper spring thing, that starts grounded to the case of the control, when switch is full on to the click it makes contact with the lug for that last terminal, but breaks from the base
I'm glad you looked into that, like I mentioned earlier, it's pretty straight forward. On b-bodies the white part with the spring in it deteriorates badly so don't mess with it any more than you have to.
 
I guess I'm a bit confused trying to follow everything you've posted, but as I said way back in this post, the tail lamps, side markers and dash lights are all fed by the same circuit, which is black with a yellow tracer. Then here I told you, "If you have taillights and side markers, then the problem has to be dimmer-related. It's either a faulty switch, the switch is not connected, it's not being fed by the headlamp switch, or you have a broken wire somewhere along its run."

I cannot, for the life of me, understand what you've been doing since. Why would the fuse box come into play, if you have tail and marker lights? The working lights are literally on the same fuse as the non-working lights.

I asked you to test the dash lights by running a jumper wire from the red triple tap to the orange one with the key in the RUN position, which would've told you immediately if the problem is at the dimmer switch. If the dash lights worked, then either the dimmer is faulty, it's not being fed by the headlamp switch (very unlikely since the exterior lights work), or there's a broken wire. You found a broken wire and fixed it, but for some reason you continue to probe wires. Worse, you're doing so without using the wiring diagram to see where the wires you're testing actually go in the circuit... without ever checking to see if fixing that wire solved the problem. Why?

Here's what I do when I find a broken wire: I fix the wire, plug everything back together, then see if the problem persists. Why make it harder?

If that didn't fix the problem, the factory wiring diagram tells us the function of all five wires on the back of the dimmer switch:
  • One black/yellow tracer (BK/Y*) comes from the headlamp switch. It feeds directly to the dimmer switch. Inside the switch, that voltage travels through the rheostat to the tan (T) output wire.
  • The other BK/Y* at the dimmer switch is 12V+ out to feed the park, tail, and side-marker lamps.
  • Each yellow (Y) wire feeds one of the door switches, which is how it overrides the dome light without opening a door. Those two wires are fed by the rheostat when it's clicked at the end.
  • The tan (T) wire feeds the orange (O) wire for the instrument cluster/console/radio lights through the fuse box.
Since all the fuses are good, and the park, tail, and side-marker lamps all work, that means either you've got a bad dimmer switch or a broken wire. The broken wire you found and repaired is BK/Y*. Until you've proven otherwise by immediately testing after fixing that wire, there is no reason to believe any other wire on the car is a problem, or that the problem even exists anymore. Why you've continued to test after finding an obvious problem and correcting it, rather than immediately seeing if the issue is corrected, is beyond me. You're literally searching for a problem that may not exist anymore.

Quit jumping around. Solve one problem at a time. Once the dash lights work, worry about the radio or the vacuum leak. Every time you leave a task, you lose track of where you were, or what was next, because you lose your focus (which is true of most people, myself included).

On the good news side I have radio, on the bad, it won't tune to my station, I'll fight that later.
It actually takes a few minuets to warm up.

The ariel is defiantly NOT stock, at least not for what I had, a one piece mast even shorter by a little than this one down!
The antenna you have is 100% correct for a 1974 'Cuda--with an AM radio. Cars with an AM/FM radio, like your original 'Cuda had, used a fixed-length (31" overall) mast, part number 3513745. You simply ordered the wrong antenna. The good news? If you want to use the solid mast, you can change just that easily enough, and virtually any non-black Mopar solid mast from '72-'89--including trucks, vans, and FWD cars--will work. There's no need to disrupt the base; it's the same for either mast. The bad news is, new ones are nearly impossible to find. The original part, 3513745, later superseded to 4469014 but there don't seem to be any of those out there either.

If you simply want to stick with the telescopic AM mast, simply set its height at 31" from the base. I don't know if you ever listen to AM radio, but out in the middle of nowhere you can pick up stations from hundreds of miles away with that mast at full extension. The downside is that the telescoping masts are ridiculously easy to break.

Do not buy anything listed on eBay. I found nothing I trust. If you want a solid mast like your old car had, let me know. I haven't got any spares at the moment, but I have a friend that might be able to help.
 
That's why I pulled the dimmer, & I think with a good cleanup I got it working, as I said, the dimmer does work on the shifter light, the switch part I'm not sure about yet!

I did about 90% of what you have gone through, it took all that tracing around & poking to finally realize that terminal was in the ground circuit, so at least I learned something!
& followed all the wires on the diagram to see where they go
Switches were put back in & still no dash lights & yes I know now they are all fed on the same circuit, that orange 3 way connector, but as of now it's way up in the dash & I can't get to it, but it feeds the shifter light & that works, still no light bar ,radio (the wire goes to the radio first & then feeds the 3 way, so that is odd too) & the bulb by the heater switch. all bulbs except radio were tested & worked.
Could not do the jumper test for that reason I can't reach the orange plug. gonna look tomorrow & see if removing the clove box insert will be close enough to get me there.
I did notice a red or orange wire also way up there that was taped off , will try & see what that baby is, could be the missing link!

The antenna will stay, I'll just keep it down!
 
After a long battle I have all lights but radio!
So this is what I had to get to.....................orange plug wrapped right in the wire bracket..........................

The taped off wire was from the radio, 12V out for accessories, so not involved.
20240420_131557.jpg
After removing the radio I could get my hand in there, fought with all the wire ties I put on to neaten it up & unbent the bracket, at that point I could clearly see the light bar wire directly to that connector, which had power with the dimmer on.
So all I did was pull the plug look at it, looked clean & just popped it in & out a few time & wa la, I have light bar lights. Bad connection I guess!

So before rebuilding the corner of the dash I put a blob of goo, sorry 68 I ran out of goop, close to the same stuff, behind the black/Y input wire,.

While that was drying I figured I had a little time so I started it up again, could not get it started, after pouring gas in the carb & she tried a few times I thought maybe I ran it out of gas, if so that was quick, so I put the last 4ish gallons I had here in & did get it started & idling a bit high maybe 1100 but I checked the timing & I can not get the marks in visible range, I turned the distributor quite a bit in both directions???

Had enough for the day & did one last little thing, in my search of spare dash parts I found one knob that still had the metal insert, so I used engine paint this time & actually did a little better job with the paint, now I have to see if my 26guage sheet metal is thin enough to cut a sliver for the yellow one? 20240420_170435.jpg
Last major issue is that tuning deal.
After that all that's left is bleed the brakes & try & align the hood & front fenders, that should be interesting.
Maybe some work on the drivers door, since I was in there & shut it for the dome light test (oh yea that did work from the dimmer switch) it was rough to open from inside, that job I dread.

Oh yea, I could get the dome light bulb in but could not turn it to lock it, looking closely the headiner guy didn't get the base snapped into the bezel correctly, another little job I I don' screw up that perty headliner.
 
another little job I I don' screw up that perty headliner
It's like you turned into a Cajun there at the end.

Do you have a helper to bleed the brakes? They're not hard to bleed alone.

Everything is empty, right? First, put some fluid in it and open the bleeders. Keep an eye on the MC and keep it topped up until the level stops falling or it comes out the bleeders. Or you run out of time and need to get started on the bleeding. It can be a slow process. If you have a cheap vac pump I think you could draw fluid though.

Once done, be sure you close all the bleeders.

Get a mason jar or similar, put about an inch of brake fluid in the bottom.

On each wheel from farthest to nearest to the MC, stick a piece of vac hose on the bleeder and run it int the jar, curling it on the bottom, covered by brake fluid. Open the bleeder and pump the brake 3-4 times then retighten it.

Check the MC and refill. Note how much fluid was used by 3-4 pumps, and maybe increase the number of pumps, but don't go too far or you can pump air in from the top.

Do that for 2-3 cycles, then go to the next wheel.

If you don't have brakes when you get to the last wheel, go around again.

It's hard with all the getting up and gettin' down yo, but otherwise it's a breeze.
 
Are Cajuns famous for typos, if so I fit right in lately!

I was an A/C guy I do have a good vacuum pimp.

I just put some fluid in & hoped it would at least gravity flow a bit, then got sidetracked by the electric & tuning problems. Hoping it went down a bit when I finally get back to it?

Mark, C-man offered to assist but getting him with some time lately is near impossible, I could get my son to pump (well if he can fit in there, I'm 6'1" & my knees are in my chest, he's 6'4" ? )
more worried about the other stuff, if that becomes a problem I will truly go nuts!
 
OK, pretty good day, some actual forward progress on a few fronts & nothing broke, went haywire or burned down!

Dome light fixed, drivers seat back in, a good start on the brake bleeding, opened all 4, the fluid had gone down a bit, got gravity flow to both rears, so I closed those of, pumped a few time & got squirts out of both fronts, now I need the helper to close the ports after a good squirt on ech one.

Even made some progress on the tuning, somehow got to 5BTDC, figured that's where the other car was & ran good, a base to start from. So I played with the idle speeds, raised the fast to 1500 after it warmed up I was able to lower the idle to around 850, vacuum is still low 6 or 7 on that idle.
starting at 1/2 turn out on the mixture screws after a lot of turns best I could get was about 11, turned em back in about half the amount & not much changed, but the idle went up some & it seemed to smooth out a bit, lowered the idle back to 850, then stuck it back on fast idle & oh my it was like2500, so After next cold start if it's that high I'll have to back that off a bit.
20240421_141211.jpg

I snugged down the distributor to be sure it doesn't wander on me. I may need someone who knows something to take a gander at this point.

After it cooled a bit I put a wrench on all the manifold bolts & snugged em all down a tad, nothing seemed lose.
see if that helped next startup?


yea I'm still avoiding the tuning.

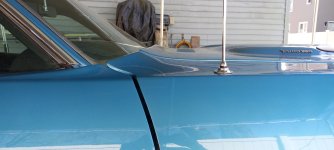
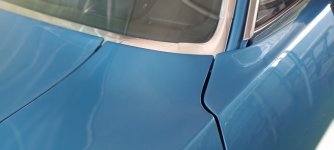
Today was see how close I could align the hood & fenders. Close but no cigar,
first up I moved the bottom of the new drivers fender away from the door a bit, the primary "chip" area is still awful darn close.
The bends in the top rear are no where near matching the hood or the door! 20240422_170533.jpg20240422_170547.jpgthis keeps happening when I push down on the hood to see if I'm set at the right height! 20240422_163434.jpgThe straight lines are close, I was able to move the fenders over about 1/8" could have used another 1/8 but slots were maxed out. 20240422_170141.jpg20240422_170151.jpg20240422_170200.jpgNow in shimming the fenders to try and match the hood, up in opposite corners I came close, but that raised the fender way too high, if I can get that bolt in from the bottom by the door it may pull it down a bit?
will try that first & then go back & see if I can drop the hood back there?
20240422_170031.jpg
Still up some midway down that new fender. rear & front are good? 20240422_170014.jpg
 
So I'm getting closer, lowered the hood & took out the fender shims in that corner, I did manage to get those rear, from under bolts in the fenders, I think there's still a skosh of down left on the hood there, will try that tomorrow. 20240423_154658.jpgOther side I got the gaps better, curves are still off, but that ain't changing.
20240423_154808.jpg
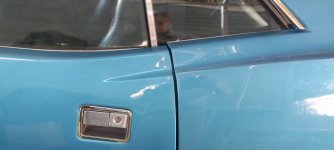
So I check into why the door worked nice from outside but needed a shoulder to get open from inside,
the door was being lifted by the rear latch, lowered the post still hard from inside & now quite low outside, still opens nice out there?
I dread this but I think I have to mess with the hinges again to raise the back of the door up, I think that is gonna mess with the top front!!! 20240423_153835.jpg
 
I dread this but I think I have to mess with the hinges again to raise the back of the door up, I think that is gonna mess with the top front!!!
I went back and forth like that with the Duster a few times and just decided it was never going to be better and quit. I was just dealing with the fender and grille though.
 
Yea, I'm close to that but getting the driver's door to open nice from inside is important.

Funny the rust bucket lined up really nice all around, this car is fighting me at every turn!
 
Ok dropped that corner of the hood, it's real close, think I'm gonna call it DONE!

The door I have to wait for a helper!

Talked to a couple of mechanics I know to see if they could take a look, looks like I will have to wait a while but trying to see where I have to go from here?
 
K removed one questionable fitting, had a small extra vacuum port which I had taped off?
20240427_151917.jpg
She started up nice, one pump to set choke, no gas & she fired right up, hi idle was only about 1200, warmed it up played with the mixture screws a bit, not much changing.

So I shut it down, reset the screws at 1/2 turn out & tried messing with the timing again, thought I had it at10BTDC by the time I tightened it down & rechecked it was only about 6BTDC, so I played with em there.
got the vac up around 11 , tops I could get, idle around 850, now I'm not sure how accurate the tach is, does this sound fast to you guys.
Also went around to try & pick up the clunkity noises I'm hearing, not sure how much the video picked up?


SiteLock

SiteLock
Back
Top